So you’re craving something absolutely delicious, impressive, but secretly super chill to make, huh? Yeah, me too. We’ve all been there – staring into the fridge, dreaming of that smoky, juicy, fall-off-the-bone BBQ chicken but dreading the whole “effort” part. Well, buckle up, buttercup, because we’re about to make your whole chicken BBQ dreams a reality without breaking a sweat (or a mental state).
Why This Recipe is Awesome
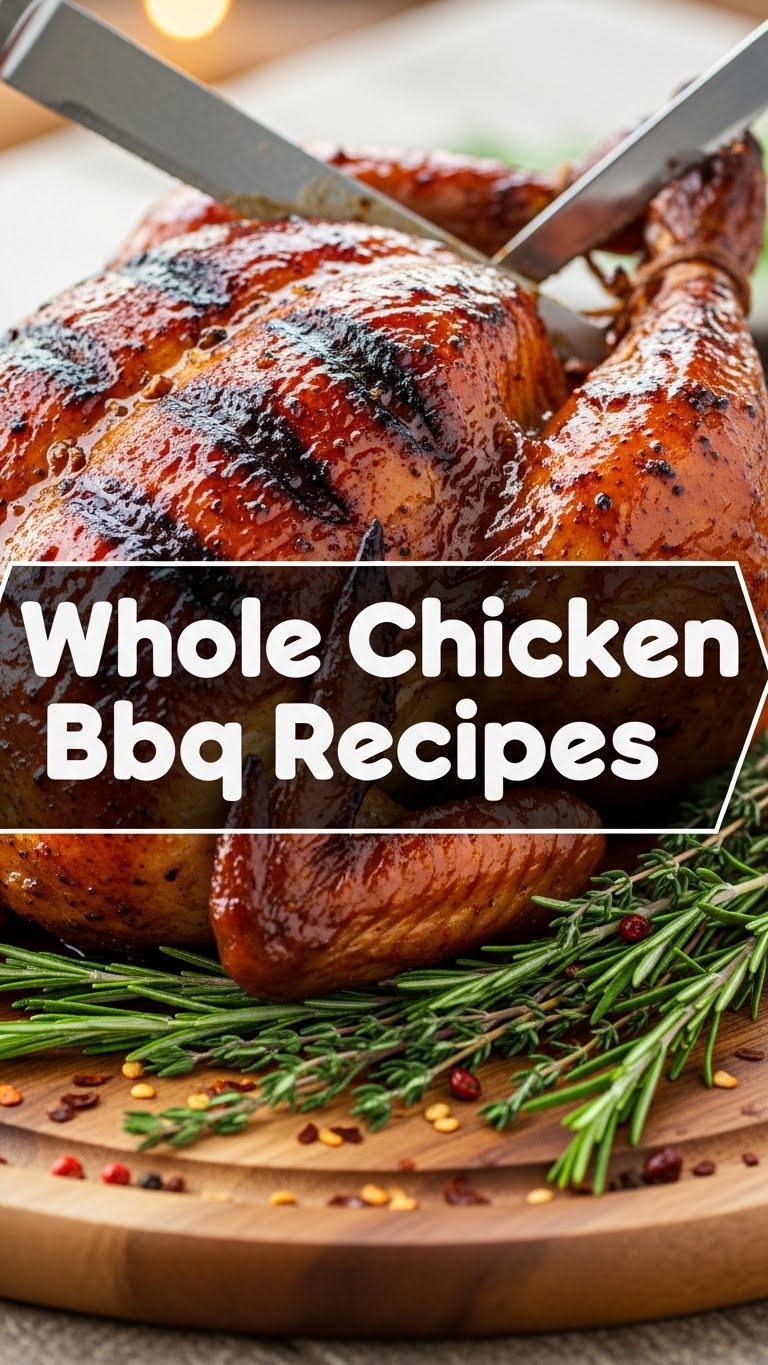
Let’s be real, cooking a whole chicken can seem a bit intimidating. Like, it’s a *whole chicken*. That’s a lot of bird! But this recipe? It’s literally idiot-proof. Seriously, if I can do it without setting off the smoke detectors, you’re golden. What’s so great about it? First, the flavor payoff is HUGE for minimal input. Second, it looks like you spent hours slaving away, when in reality, you were probably just binging your favorite show while it did its thing. Third, it feeds a crowd (or gives you epic leftovers), and who doesn’t love that? Your neighbors will smell this goodness and think you’re a culinary genius. Don’t worry, your secret’s safe with me.
Ingredients You’ll Need
Alright, gather your troops! Most of these you probably already have lurking in your pantry.
- One Whole Chicken: Around 3-4 lbs is perfect. Make sure it’s thawed, obvs.
- Olive Oil: A couple of glugs. It’s like the chicken’s personal moisturizer.
- Salt & Freshly Ground Black Pepper: To taste, but don’t be shy! This is your flavor foundation.
- Garlic Powder: Because everything is better with garlic. Duh.
- Onion Powder: Garlic’s best buddy, rounding out the flavor profile.
- Smoked Paprika: This is where the magic happens for that “BBQ” vibe without even touching a grill. Regular paprika works in a pinch, but the smoked stuff? *Chef’s kiss*.
- Optional (but highly recommended) BBQ Rub: If you have a favorite store-bought one, go for it! Or mix your own with a bit of brown sugar, chili powder, and cumin.
- Optional BBQ Sauce: For slathering at the end, if you’re feeling saucy (pun absolutely intended).
Step-by-Step Instructions
Get ready to feel like a kitchen wizard. It’s shockingly simple.
- Prep Your Bird: First things first, unwrap your chicken and pat it super dry with paper towels. I mean, **super dry**. This is key for crispy skin, folks. Remove any giblets from the cavity (unless you have plans for them, you go-getter!).
- Rub-a-Dub-Dub: Drizzle the chicken all over with olive oil, then get in there with your hands and rub it like you’re giving it a spa treatment. This helps the seasoning stick.
- Season Like a Pro: In a small bowl, mix your salt, pepper, garlic powder, onion powder, and smoked paprika (and any extra BBQ rub). Sprinkle this glorious mixture generously all over the chicken. Don’t forget the cavity and underneath the wings! Get it everywhere.
- Preheat & Position: Preheat your oven to 400°F (200°C). Place your seasoned chicken in a roasting pan or on a baking sheet with a rack (the rack helps with even cooking and crispy skin, FYI). You can truss the chicken if you’re fancy, but I usually don’t bother.
- Roast Away!: Pop that beautiful bird into the preheated oven. Roast for about 60-90 minutes, depending on the size of your chicken. The skin should be golden brown and crackling.
- The Sauce Slather (Optional): If you’re using BBQ sauce, brush it generously over the chicken during the last 15-20 minutes of cooking. This prevents it from burning but still gives it that sticky, caramelized goodness.
- Check for Doneness: The internal temperature needs to reach 165°F (74°C) in the thickest part of the thigh (without touching the bone). A meat thermometer is your best friend here. Don’t guess!
- Rest, My Friend, Rest: Once cooked, take the chicken out of the oven, tent it loosely with foil, and let it rest for at least 10-15 minutes. This is crucial! It allows the juices to redistribute, making for a super moist chicken. Patience is a virtue, especially when deliciousness is involved.
- Carve & Devour: Carve up your masterpiece and serve! Prepare for oohs and aahs.
Common Mistakes to Avoid
We all make mistakes, but let’s try to avoid these rookie blunders, shall we?
- Not Patting It Dry: This is probably the biggest offender. A wet chicken equals soggy skin. Nobody wants soggy skin. **Seriously, pat it dry!**
- Skipping the Rest: You just cooked a whole chicken, you’re hungry, I get it. But slicing into it immediately is a crime against juiciness. Those 10-15 minutes of rest are non-negotiable.
- Under-seasoning: A whole chicken can handle a lot of flavor. Don’t be shy with the salt, pepper, and spices. Taste as you go with your rub mixture!
- Not Using a Thermometer: Guessing if your chicken is done is like playing Russian roulette with salmonella. Invest in a meat thermometer, they’re cheap and a lifesaver.
- Preheating? What’s That?: Thinking you don’t need to preheat the oven. Rookie mistake! A cold oven will mess with your cooking time and the crispiness factor.
Alternatives & Substitutions
Feeling adventurous? Or just missing an ingredient? No stress, we got options!
- Spatchcocking: If you want a faster, more evenly cooked chicken with maximum crispy skin, **spatchcocking** (aka butterflying) is your jam. Basically, you cut out the backbone and flatten the bird. It looks fancy, but it’s super easy. Your cooking time will reduce significantly, so keep that thermometer handy!
- Different Rubs: Don’t like smoked paprika? Swap it for chili powder, cumin, or even a pre-made lemon-herb blend. Customize to your heart’s content!
- Marinades vs. Rubs: Instead of a dry rub, you could marinate the chicken for a few hours (or overnight) in something like buttermilk, yogurt, or a zesty citrus marinade. Just pat it dry *again* before roasting.
- No Oven? No Problem! (Almost): While this recipe is oven-focused, you can absolutely do a whole chicken on a BBQ grill (indirect heat is key!) or even a rotisserie if you’re fancy like that. Adjust times and temps accordingly.
- Melted Butter: Instead of olive oil, you can use melted butter for an even richer flavor and crispier skin. Because butter makes everything better, IMO.
FAQ (Frequently Asked Questions)
Got questions? I’ve got (casual) answers!
- “Can I use frozen chicken?”: Well, technically yes, but you’ll need to thaw it completely first. Trying to cook it from frozen is a recipe for disaster (and uneven cooking). Don’t do it!
- “How do I get super crispy skin?”: **Pat it dry, really dry!** Use a rack in your roasting pan for air circulation, and don’t overcrowd the oven. Higher heat helps too, within reason.
- “My chicken is browning too fast, what gives?”: If the skin is getting too dark before the inside is cooked, just tent it loosely with aluminum foil for the remainder of the cooking time. Crisis averted!
- “Can I brine my chicken first?”: Oh, absolutely! Brining will make your chicken even more juicy and flavorful. Just remember to pat it dry post-brine.
- “What kind of sides go with this?”: Anything! Seriously. Roasted potatoes, a simple green salad, grilled corn, mac ‘n’ cheese… the world is your oyster!
- “How do I store leftovers?”: Once cooled, shred or cut up the chicken and store it in an airtight container in the fridge for up to 3-4 days. It’s fantastic for sandwiches, tacos, or salads!
Final Thoughts
See? That wasn’t so bad, was it? You just conquered a whole chicken, made it taste like a dream, and probably didn’t even break a sweat. This recipe is your secret weapon for weeknight dinners, impressing guests, or just treating yourself because you deserve it. Now go impress someone—or yourself—with your new culinary skills. You’ve earned it!


