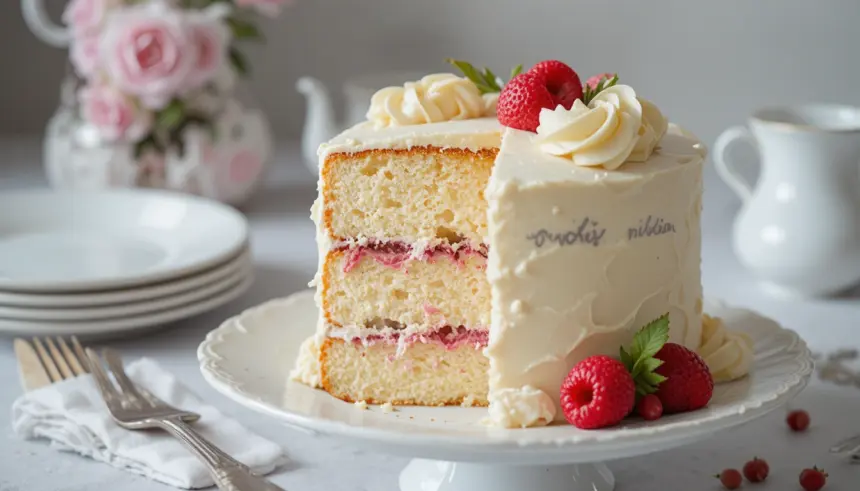
So, You Want to Conquer the Victoria Sponge? You’ve Come to the Right Place!
Alright, spill the tea (or coffee, or wine, no judgment here). You’re staring into the abyss of your pantry, vaguely craving something sweet, and the thought of baking something complex feels about as appealing as a root canal. But a classic, fluffy, utterly divine Victoria Sponge? That’s a different story. And guess what? We’re about to make it happen. No fancy French techniques, no 37-ingredient lists that make you want to weep. Just pure, unadulterated cakey goodness. Let’s do this!
Why This Recipe is Your New Best Friend (Besides Me, Obviously)
Honestly, this Victoria Sponge is like that effortlessly cool friend who can rock anything. It’s **incredibly forgiving**, meaning even if you have a minor kitchen mishap (we’ve all been there), it’ll likely still turn out spectacular. It’s a blank canvas for your inner baker, a crowd-pleaser, and frankly, it just tastes like pure happiness. Plus, it requires minimal fuss and maximum deliciousness. What’s not to love?
Ingredients You’ll Need (The Usual Suspects, Plus a Little Magic)
Here’s what you’ll be gathering for this adventure:
- For the Cakes:
- 200g (that’s about 7 oz, for my friends across the pond) unsalted butter, softened (crucial! Don’t be that person who microwaves it for 5 seconds and wonders why it’s oily)
- 200g caster sugar (or granulated if that’s all you’ve got, but caster gives you that finer texture, IMO)
- 4 large eggs, at room temperature (let them chill out on the counter for an hour, or do the warm water bath trick if you’re impatient)
- 200g self-raising flour, sifted (sifting is your friend here; it prevents those dreaded lumps)
- 1 teaspoon baking powder (because we like a good lift!)
- 2 tablespoons milk (any kind will do, but whole milk is your velvety friend)
- For the Buttercream:
- 100g unsalted butter, softened
- 200g icing sugar (also known as powdered sugar), sifted
- 1-2 tablespoons milk or water
- A splash of vanilla extract (optional, but highly recommended for extra yumminess)
- For the Filling:
- Your favorite jam (strawberry is the OG, but raspberry or even apricot is divine!)
Step-by-Step Instructions (Let’s Get Our Bake On!)
- Preheat & Prep: First things first, crank your oven up to 180°C (160°C fan/350°F). Grease and line two 8-inch (20cm) cake tins with parchment paper. Think of it as tucking your cakes into cozy little beds.
- Cream Dream: In a large bowl, beat the softened butter and caster sugar together until it’s light, fluffy, and pale. This is where the magic starts! A stand mixer makes this easy, but a good old-fashioned whisk and some elbow grease work too.
- Egg-cellent Addition: Crack in the eggs one by one, beating well after each addition. If it looks like it’s starting to curdle, don’t panic! Just add a tablespoon of the flour and beat it in, and it should come back together. Phew!
- Flour Power: Gently fold in the sifted self-raising flour and baking powder. Add the milk and fold until just combined. **Don’t overmix** – we want tender cakes, not tough ones!
- Into the Tins: Divide the batter evenly between your prepared tins. Smooth the tops with a spatula. They should look happy and ready to bake.
- Bake it ‘Til You Make It: Pop those beauties into the preheated oven for about 20-25 minutes. They’re done when a skewer inserted into the center comes out clean, and they’re golden brown.
- Cool Down: Let the cakes cool in their tins for 5-10 minutes before carefully turning them out onto a wire rack to cool completely. Patience, grasshopper! Hot cakes and frosting are a messy, melty disaster.
- Buttercream Bliss: While they cool, whip up your buttercream. Beat the softened butter until smooth, then gradually beat in the sifted icing sugar. Add the milk (or water) and vanilla extract a little at a time until you reach a lovely, creamy consistency.
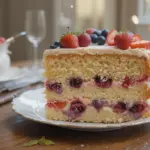
- Assemble Your Masterpiece: Once the cakes are *completely* cool, spread a generous layer of jam on one cake’s flat side. Then, top with a good dollop of your delicious buttercream. Place the other cake on top, gently press down, and voilà! You’ve made a Victoria Sponge!
Common Mistakes to Avoid (Because We’re All About Success Here)
- Skipping the Soft Butter: Hard butter = sad, dense cakes. Make sure it’s properly softened.
- Overmixing the Batter: Seriously, just fold gently. Overworking the gluten is the enemy of a light sponge.
- Opening the Oven Door Too Early: Those first 15-20 minutes are crucial for the rise. Resist the urge to peek!
- Trying to Frost Warm Cakes: This is a one-way ticket to a buttercream puddle. Let them cool completely, I repeat, COMPLETELY.
- Forgetting to Sift: Lumps are not a desirable texture in a Victoria Sponge. Sift your dry ingredients, people!
Alternatives & Substitutions (Because Life Happens)
- Gluten-Free? Absolutely! Use a good quality gluten-free self-raising flour blend. Results can vary slightly, but it’s totally doable.
- Dairy-Free? Swap the butter for a good quality dairy-free butter alternative. For the milk, use your favorite plant-based milk.
- Fancy Flavors? Add a teaspoon of lemon zest to the cake batter for a citrusy twist. Or a few drops of almond extract instead of vanilla in the buttercream. Get creative!
- No Self-Raising Flour? No sweat. For every 200g of plain flour, add 2 teaspoons of baking powder. Easy peasy.
FAQ (Your Burning Questions, Answered Casually)
- Can I make this a single layer cake? You sure can! Just bake for a bit longer, keeping an eye on it. It won’t be a “sandwich” cake, but still delicious.
- How long does it keep? In an airtight container at room temperature, it’s usually good for about 2-3 days. But let’s be real, it rarely lasts that long.
- Can I use margarine instead of butter? Well, technically yes, but why hurt your soul (and your taste buds) like that? Butter gives it the best flavor and texture. Stick with butter if you can.
- My cakes are a bit uneven on top. What gives? This is super common! Don’t stress. Just use a serrated knife to gently level them before frosting. It’s all part of the charm.
- Can I freeze it? Yes, you can! Wrap it well in cling film and then foil. Thaw at room temperature. Just a heads-up, the buttercream might be a little softer when it thaws.
- What if I don’t have caster sugar? Granulated sugar will work in a pinch. Just make sure it’s dissolved properly when you cream it with the butter.
Final Thoughts (Go Forth and Bake!)
There you have it! Your very own, homemade, ridiculously good Victoria Sponge. It’s a rite of passage for any home baker, and I promise, it’s way more fun (and rewarding) than scrolling endlessly. So, go forth and bake! Impress your friends, your family, your cat, or just yourself. You’ve totally got this. And hey, if it’s not perfect the first time, who cares? It’s cake! Happy baking!
