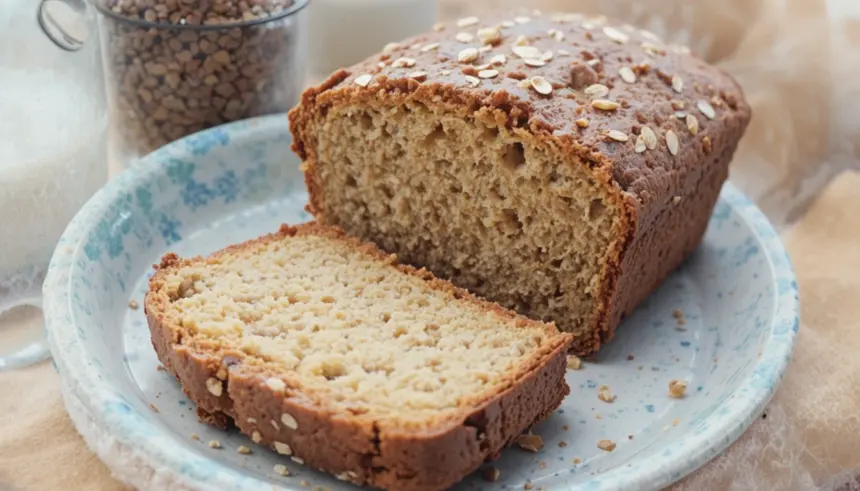
Alright, listen up, my carb-loving comrade. Got some ridiculously ripe bananas judging you from the fruit bowl? Don’t you dare toss ’em! We’re about to turn those sad, spotty guys into pure, unadulterated joy. And guess what? You barely have to lift a finger. This isn’t some fancy chef-level stuff; this is “I need something delicious RIGHT NOW and also want to feel good about eating it” banana bread. With oats! Because oats make everything feel a little bit healthier, right? 😉
Why This Recipe is Awesome
Seriously, this isn’t one of those recipes where you need a science degree or an expensive stand mixer. If you can mash a banana and stir, you’re golden. **It’s practically impossible to mess up**, even if you’re multi-tasking and watching cat videos. Plus, it’s vegan, so you can feel smug about being kind to animals AND your tastebuds. And oats? Hello, fiber! Basically, it’s a hug in bread form that’s also secretly good for you (shhh, don’t tell anyone). It’s moist, flavorful, and will make your whole house smell like a bakery. You’re welcome.
Ingredients You’ll Need
- Ridiculously Ripe Bananas: 3-4 medium ones. The spottier, the almost-blacker, the better. These are the unsung heroes of banana bread. Embrace the brown!
- Oat Milk (or any plant milk): ½ cup. Your favorite non-dairy buddy. Almond, soy, cashew – whatever floats your boat. Oat milk is my personal fave for creaminess.
- Vegan Butter (melted) or Neutral Oil: ¼ cup. Melted vegan butter for that extra “OMG” factor, or any neutral oil like canola or vegetable if you’re feeling simple. We’re not judging.
- Maple Syrup (or Agave): ½ cup. Liquid gold! This is our main sweetener. You can use brown sugar too if you’re less fancy or out of syrup.
- Vanilla Extract: 1 teaspoon. Because everything’s better with a splash of vanilla. Duh.
- All-Purpose Flour: 1 ½ cups. The base of our bread-y dreams.
- Rolled Oats: ½ cup. Not instant! We want some proper texture in this party.
- Baking Soda: 1 teaspoon. The magic powder that makes it rise and get all fluffy.
- Salt: ½ teaspoon. Just a pinch to balance the sweetness and make everything pop.
- Cinnamon (optional): ½ teaspoon. If you like a little spice in your life (and your banana bread).
- Chocolate Chips / Chopped Walnuts (optional): ½ cup. Because who doesn’t love extras? Or leave it plain, it’s still amazing.
Step-by-Step Instructions
- Preheat & Prep: First things first, get your oven hot! Preheat it to 350°F (175°C). While it’s warming up, lightly grease and flour a standard loaf pan. Or line it with parchment paper for easy removal. Future you will thank past you.
- Mash ‘Em Up: In a large bowl, mash those ridiculously ripe bananas with a fork until they’re mostly smooth but still have a few small lumps. We’re going for rustic, not baby food.
- Wet Ingredients Party: Add the oat milk, melted vegan butter (or oil), maple syrup, and vanilla extract to the mashed bananas. Stir everything together until it’s just combined. Don’t overmix, we’re not making a soufflé here.
- Dry Ingredients Join In: Now, sprinkle in the flour, rolled oats, baking soda, and salt (and cinnamon, if you’re using it). Gently fold them into the wet ingredients until **just combined**. A few lumps are totally fine; overmixing is the enemy of moist banana bread.
- Fold in Goodies (Optional): If you’re adding chocolate chips or walnuts, now’s the time! Fold them in gently. Don’t go crazy, we don’t want to overwork the batter.
- Into the Pan: Pour your glorious batter into the prepared loaf pan. Smooth out the top a little if you want to be fancy. Or don’t, it’s banana bread.
- Bake It, Baby! Pop that pan into your preheated oven. Bake for about 50-60 minutes, or until a toothpick inserted into the center comes out clean. **Keep an eye on it** after 45 minutes, ovens vary!
- Cool Down: Let it cool in the pan for 10-15 minutes before transferring it to a wire rack to cool completely. Patience is a virtue here, my friend. It helps it set and makes it easier to slice.
- Devour! Slice it up and enjoy your masterpiece. Seriously, you did that! High five.
Common Mistakes to Avoid
- Using under-ripe bananas: Those yellow ones with green tips? Hard pass. They’re not sweet enough and won’t mash well. You want the ones your grandma would probably throw out. Embrace the brown!
- Overmixing the batter: Seriously, I can’t stress this enough. Mix until *just* combined. Overmixing develops the gluten, making your bread tough and rubbery. We want tender, not tire-like.
- Not preheating the oven: Rookie mistake! An un-preheated oven means your baking soda won’t activate properly, and you’ll end up with a dense, sad loaf. Give your oven time to get cozy.
- Cutting it too soon: I know, I know, the smell is intoxicating. But slicing it hot means it might crumble or be gummy. **Let it cool**; it’s worth the wait, promise.
Alternatives & Substitutions
Got a specific dietary need or just missing an ingredient? No stress, we can totally hack this!
- Flour Power: Don’t have all-purpose? You can try a 1:1 gluten-free flour blend, but results might vary slightly. Or whole wheat flour for a nuttier, denser loaf (it might need a tiny splash more liquid).
- Sweetener Swaps: No maple syrup? Agave nectar works perfectly. Brown sugar is also a solid choice; it adds a lovely caramel note.
- Milk My Way: Any plant-based milk will work! Soy, almond, cashew – use what’s in your fridge. Oat milk is my go-to for creaminess, though.
- Oil vs. Butter: Vegan butter definitely adds a richer flavor, IMO, but any neutral oil like canola, vegetable, or even melted coconut oil works great. Just make sure the coconut oil isn’t solid.
- Mix-ins: Feeling adventurous? Shredded coconut, dried cranberries, chopped nuts (pecans are amazing!), or even a swirl of nut butter can be awesome additions. Get creative!
FAQ (Frequently Asked Questions)
- Can I make this gluten-free? Absolutely! Just swap the all-purpose flour for a good 1:1 gluten-free baking blend that contains xanthan gum. Make sure your oats are certified GF too, if that’s important to you!
- How long does it last? Wrapped tightly at room temp, about 3-4 days. In the fridge, it’ll happily hang out for up to a week. If it lasts that long, you’re doing something wrong. Or you have superhuman self-control.
- Can I freeze it? **Yes, please do!** Slice it first, then wrap individual slices in plastic wrap and then foil. Pop them in a freezer bag. Thaw on the counter or microwave a slice for a quick treat. It’s like having a delicious emergency button.
- My banana bread turned out dry, what went wrong? Ah, my friend, likely suspects are overbaking or overmixing. Remember, a toothpick coming out *mostly* clean is perfect, not bone-dry. And gentleness with the mixing is key!
- Do I *have* to use ripe bananas? Seriously? Did you even read the mistakes section?! 😉 Yes, you absolutely do. They provide natural sweetness and moisture. Green bananas make sad bread.
- Can I add protein powder? You *can*, but I’d proceed with caution. Protein powder can sometimes mess with the texture and absorb a lot of liquid. If you try it, maybe reduce the flour slightly or add a splash more milk, and be prepared for potential texture changes.
Final Thoughts
So there you have it, folks! Your new favorite vegan banana bread recipe, ready to rock your world. It’s easy, it’s delicious, and it’s basically a love letter to ripe bananas. Now go impress someone—or yourself—with your new culinary skills. You’ve earned it! Don’t forget to share your creations (and maybe a slice or two) with your favorite people. Happy baking!
