So you’re craving something tasty but too lazy to spend forever in the kitchen, huh? Same. What if I told you there’s a dessert that sounds bougie but is actually ridiculously easy to make, and will make everyone think you’re some kind of culinary genius? Yeah, I’m talking about Vanilla Ice Cream with a swanky olive oil drizzle. Trust me, your taste buds are about to throw a party.
Why This Recipe is Awesome
Okay, let’s be real. Most ice cream recipes are either a pain, or they taste like sad, icy disappointment. This one? It’s a game-changer. First off, it’s pretty much **idiot-proof** – even I didn’t mess it up, and my kitchen skills are usually limited to ordering takeout. Second, the olive oil isn’t just a gimmick; it adds this ridiculously smooth texture and a peppery, fruity note that makes the vanilla sing. It’s like vanilla ice cream went to finishing school and came back with a sophisticated accent.
Plus, you get to say things like, “Oh, just some homemade vanilla bean ice cream with a finishing of high-quality extra virgin olive oil,” and sound effortlessly cool. Impress your friends, impress your dog, or just impress yourself with how easy it is to elevate a classic. You’re welcome.
Ingredients You’ll Need
Get ready to gather your delicious arsenal. Don’t skimp on quality here, especially with the olive oil – it’s the Beyoncé of this recipe, it needs to shine!
- 2 cups Heavy Cream: The good stuff. No “light” cream here unless you want light disappointment.
- 1 cup Whole Milk: Again, whole milk for max creaminess. We’re not counting calories today, friends.
- ¾ cup Granulated Sugar: Sweetness is essential, obviously.
- 1 pinch Salt: Don’t skip this! It amplifies all the other flavors. Science, baby!
- 1 tablespoon Pure Vanilla Extract (or 1 Vanilla Bean, scraped): Go for good quality vanilla. It’s half the name of the recipe, after all. Or be fancy and use a bean.
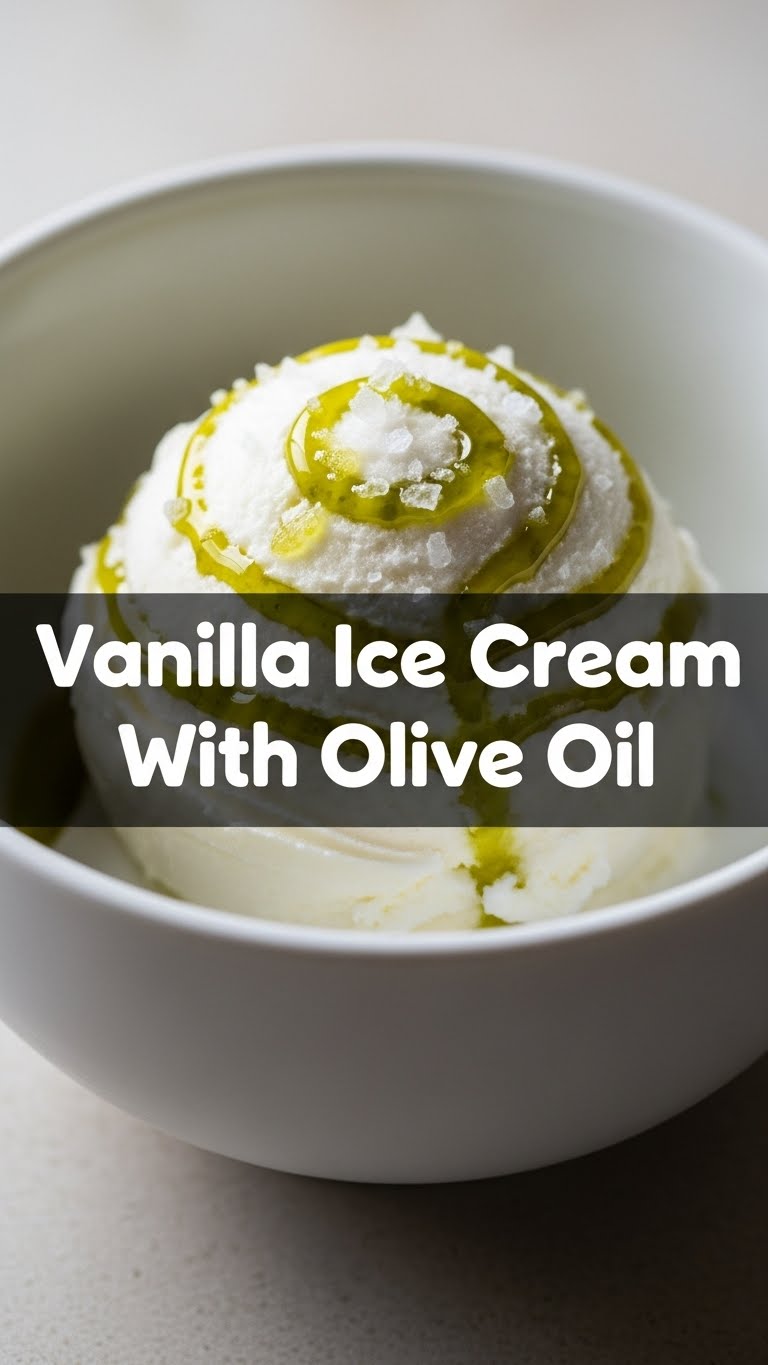
- ¼ cup High-Quality Extra Virgin Olive Oil (EVOO): This is the star. Seriously, get a good one. Fruity, slightly peppery notes are ideal. This isn’t for cooking; it’s for *flavor*.
Step-by-Step Instructions
Alright, apron on (or don’t, I won’t tell). Let’s make some magic happen!
- Combine Your Base: In a medium saucepan, whisk together the heavy cream, whole milk, granulated sugar, and salt. We’re going for smooth sailing here.
- Warm it Up (Gently!): Heat the mixture over medium-low heat, stirring occasionally, until the sugar is completely dissolved. **Do not boil!** We’re not making soup. Just warm enough so those sugar crystals disappear. This usually takes about 5-7 minutes.
- Chill Out: Remove the pan from the heat. If you’re using a vanilla bean, add it now (or wait for the extract later). Let it cool to room temperature, then transfer it to an airtight container and chill it in the fridge for at least 4 hours, or even better, overnight. **The colder the base, the better your ice cream texture!**
- Churn, Baby, Churn!: Once thoroughly chilled, remove the vanilla bean (if using) and stir in your vanilla extract. Pour the mixture into your ice cream maker and churn according to the manufacturer’s instructions. This usually takes about 20-30 minutes, until it’s the consistency of soft-serve.
- The Olive Oil Reveal: When the ice cream is still slightly soft (not fully firm, but mostly churned), drizzle in about half of your **good quality EVOO**. Let the machine churn for another 1-2 minutes to incorporate it. You want ribbons of oil, not fully blended.
- Finish with Flair (and Chill): Transfer the soft ice cream to a freezer-safe container. Drizzle the remaining EVOO over the top. Use a spoon to gently swirl it in a few times – don’t overmix! Cover tightly and freeze for another 2-4 hours, or until firm enough to scoop.
Common Mistakes to Avoid
Look, we all make mistakes. But these are the ones that can turn your dreamy ice cream into a sad puddle. Learn from my errors, okay?
- Using Low-Fat Dairy: Just no. Seriously. This is not the time for “lite” anything. You’ll end up with an icy, flavorless disappointment. Go for the full-fat stuff; your taste buds will thank you.
- **Not Chilling the Base Enough:** This is probably the most common rookie mistake. An unchilled base leads to longer churning times and larger ice crystals, meaning gritty, icy ice cream. **Patience is a virtue here, my friend.**
- Overfilling Your Ice Cream Maker: Most machines have a max fill line for a reason. Dairy expands as it freezes! Overfill it, and you’ll have a mess and probably subpar ice cream.
- **Using Cheap Olive Oil:** The whole point of this recipe is the *flavor* of the EVOO. If you use the stuff you cook with every day, it might taste bitter or just… meh. Invest in a small bottle of the good stuff.
- Adding Olive Oil Too Early: If you add it right at the beginning of churning, it will fully emulsify, and you’ll lose those gorgeous ribbons and distinct pockets of flavor. The key is adding it when the ice cream is already partially churned and starting to thicken.
Alternatives & Substitutions
Feeling adventurous? Or just ran out of something? Here are a few ways to tweak this glorious recipe:
- **Vanilla Power-Up:** Instead of extract, use the seeds from one vanilla bean for a more intense, speckled vanilla flavor. Or try vanilla bean paste for a happy medium.
- **Dairy-Free Dreamin’:** Swap the heavy cream and milk for full-fat coconut cream (the thick stuff from a can, chilled overnight). It won’t be exactly the same, but it’s a delicious dairy-free alternative that pairs surprisingly well with olive oil.
- **Flavor Boosts:** A tiny pinch of black pepper or a zest of orange or lemon could be subtly delightful when swirled in with the olive oil. Just a little, don’t overdo it!
- **Different Oil?** Honestly, I wouldn’t mess with it. The specific flavor profile of good EVOO is what makes this recipe sing. Other oils won’t give you the same complexity or “aha!” moment.
FAQ (Frequently Asked Questions)
Got questions? I’ve got answers. Mostly.
- Do I *really* need an ice cream maker? For this recipe, yes, IMO. You’ll get the best texture and proper aeration. There are no-churn methods out there, but they won’t give you the same luxurious mouthfeel that makes this olive oil twist so special.
- Why olive oil? Isn’t that… weird? Ha! It sounds weird, but trust the process! Good EVOO adds a rich, almost buttery texture and a subtle peppery, fruity note that surprisingly complements and enhances the vanilla. It’s a chef’s secret, basically.
- Can I use light olive oil? Absolutely not. Please, for the love of all that is delicious, use a good quality extra virgin olive oil. The flavor difference is monumental. Light olive oil is processed and lacks the depth of flavor needed here.
- How long does homemade ice cream last? It’s best eaten within 1-2 weeks. After that, ice crystals might start to form, and the quality will diminish. But let’s be real, it won’t last that long anyway.
- My ice cream isn’t firm enough after freezing. What gives? A few things could be wrong: your freezer isn’t cold enough, your base wasn’t fully chilled before churning, or your ice cream maker itself wasn’t properly frozen (if it’s a bowl-in-freezer type). Ensure your freezer is set to 0°F (-18°C) or colder.
- Can I make a bigger batch? Sure, just scale up all the ingredients proportionally! But be mindful of your ice cream maker’s capacity. Don’t overfill!
Final Thoughts
So there you have it – your new secret weapon for impressing everyone (including yourself) with minimal effort and maximum deliciousness. This Vanilla Ice Cream with Olive Oil isn’t just a dessert; it’s an experience. It’s sophisticated, surprisingly simple, and utterly addictive.
Now go forth, churn some magic, and bask in the glory of your culinary prowess. Don’t be afraid to experiment a little, and definitely don’t be afraid to eat it straight from the container. You’ve earned it!


