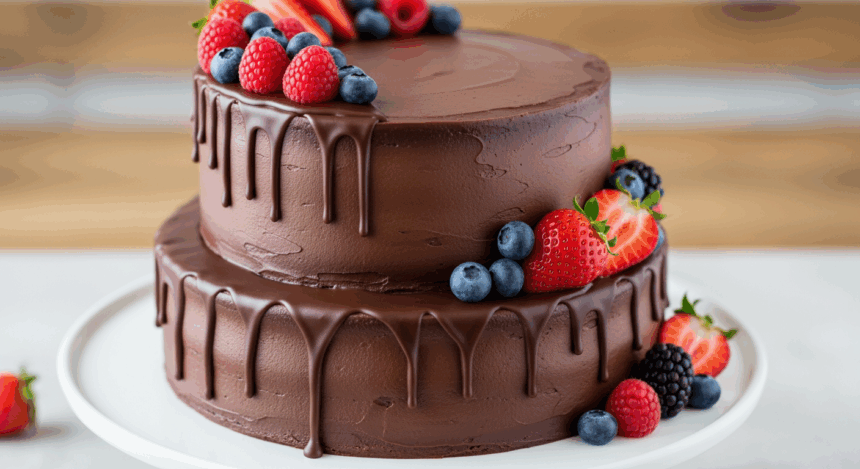
Has anyone else noticed that bringing a two-tier cake to a gathering instantly makes everyone think you’re some kind of pastry wizard? I’m here to let you in on a little secret – this chocolate drip berry cake looks like you spent hours perfecting it, but between us, it’s actually pretty simple. Grab your apron (or don’t, live dangerously) and let’s create some cake magic that’ll have your friends begging for the recipe.
Why This Recipe is Awesome
Let’s be real for a second – this cake is basically the Meryl Streep of desserts. It’s versatile, consistently impressive, and ages beautifully (at least for the few hours before everyone devours it). The contrast between the smooth chocolate drip and bright berries creates that Instagram-worthy look that screams “I’m adulting so hard right now” even if you ate cereal for dinner three times this week.
The best part? It’s surprisingly forgiving. Lopsided layer? Cover it with frosting. Messy drip? Call it “artistic.” Dropped some berries? That’s now your chef’s snack. You literally cannot mess this up unless you set your kitchen on fire… and even then, you could call it a “flambéed” version.
Ingredients You’ll Need
For the Cake:
- 2 boxes of vanilla cake mix (yes, boxed – I’m not judging and neither should you)
- 6 large eggs (the ones buried behind your condiments)
- 1 cup vegetable oil (or canola oil, they’re basically twins)
- 2 cups water (from the tap, nothing fancy)
- 1 teaspoon vanilla extract (the real stuff if you’re feeling fancy)
For the Frosting:
- 4 sticks unsalted butter, softened (that’s a pound of butter – diet starts tomorrow)
- 8 cups powdered sugar (don’t breathe while measuring unless you want to look like a ghost)
- 2 teaspoons vanilla extract
- 4-6 tablespoons heavy cream (the stuff that makes everything better)
- Pinch of salt (to balance sweetness, not your life choices)
For the Chocolate Drip:
- 1 cup chocolate chips (semi-sweet, dark, milk – follow your heart)
- 1/2 cup heavy cream (yes, more cream. It’s a celebration, not a salad)
For Decorating:
- 2 cups mixed berries (strawberries, raspberries, blueberries – whatever looks prettiest at the store)
- Mint leaves (optional, but they make you look like you really know what you’re doing)
Step-by-Step Instructions
1. Prep Your Battle Station
Preheat your oven to 350°F (175°C). Grease and line four cake pans – two 8-inch and two 6-inch. If you don’t have four pans, just bake in batches like the rest of us mortals.
2. Mix the Cake Batter
Dump cake mix, eggs, oil, water, and vanilla into a large bowl. Beat with an electric mixer until smooth (about 2 minutes). Don’t overmix unless your goal is a cake with the texture of a rubber tire.
3. Bake Like You Mean It
Divide batter between your pans. The 8-inch pans get more batter than the 6-inch ones (duh). Bake for 25-30 minutes or until a toothpick comes out clean. Pro tip: The toothpick test never lies, unlike your ex.
4. Cool Your Jets (and Your Cakes)
Let cakes cool in pans for 10 minutes, then flip onto cooling racks. If they stick, panic briefly, then run a knife around the edges. Allow them to cool completely – rushing this step is like texting after three glasses of wine… regrettable.
5. Whip Up That Frosting
Beat butter until fluffy (about 3 minutes). Gradually add powdered sugar, vanilla, salt, and enough cream to reach spreadable consistency. Keep beating until it’s so fluffy you want to face-plant into it.
6. Level and Stack the Cakes
Slice the domes off your cakes to make them flat. Stack the 8-inch cakes with frosting between them, then do the same with the 6-inch cakes. Don’t toss those scraps – they’re chef’s treats (aka midnight snacks).
7. Crumb Coat and Chill
Apply a thin layer of frosting to each tier, covering the entire cake. This is your crumb coat – it doesn’t need to look pretty yet. Refrigerate for 30 minutes until firm. This is a great time to contemplate your life choices or scroll mindlessly through social media.
8. Final Frosting
Apply a thicker, smoother layer of frosting to each tier. Use a bench scraper or spatula to smooth the sides. For that professional look, rotate the cake on a turntable while holding your tool steady. If you don’t have a turntable, a lazy Susan works, or just twist yourself around the cake like a weirdo.
9. Stack Those Tiers
Insert 3-4 dowels or sturdy straws into the bottom tier for support (unless structural collapse is part of your presentation). Place the 6-inch tier on top of the 8-inch tier. Center it or don’t – I’m not the boss of your cake.
10. Make the Chocolate Drip
Heat heavy cream until it just starts to simmer. Pour over chocolate chips and let sit for 1 minute. Stir until smooth and glossy. Let cool until slightly warm but still flowing – about the consistency of your favorite reality TV star’s tearful confession.
11. Create the Drip Effect
Pour chocolate into a squeeze bottle or use a spoon to create drips around the top edges of each tier. Start with small amounts – you can add more, but you can’t un-drip chocolate avalanches.
12. Add the Final Touches
Once the chocolate has set slightly, arrange fresh berries on top of the cake. Add mint leaves if you’re feeling extra fancy. Step back and admire your masterpiece before someone asks, “When can we eat it?”
Common Mistakes to Avoid
Rushing the cooling process. Warm cake + frosting = sliding disaster cake. Patience, grasshopper.
Forgetting to support your tiers. Unless you want your cake doing an impression of the Leaning Tower of Pisa, use those dowels.
Making chocolate drip too hot. Unless “rapidly melting frosting” is the look you’re going for, let that ganache cool a bit.
Washing berries right before decorating. Wet berries + cake = sad, bleeding mess. Pat those babies dry!
Over-mixing your cake batter. This isn’t a workout session. Mix just until combined unless you’re trying to build muscle instead of a cake.
Alternatives & Substitutions
Cake flavor options: Not into vanilla? Swap for chocolate, lemon, or funfetti. IMO, chocolate cake with raspberry filling is basically what they serve in heaven.
Dairy-free needs? Use plant-based butter and coconut cream instead of heavy cream. The cake will never know the difference.
No fresh berries? Use freeze-dried berries for a pop of color without the moisture. Or go wild with other decorations – chocolate curls, sprinkles, edible glitter, or tiny plastic dinosaurs (remove before eating, obviously).
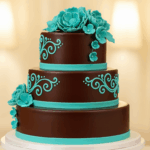
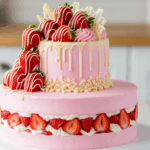
Chocolate options: White chocolate drip with food coloring creates a whole different vibe. Pink drip with strawberries? Ruby chocolate for the fancy folks? You do you.
Frosting alternatives: Swiss meringue buttercream is silkier if you’re feeling ambitious. Cream cheese frosting works beautifully too, especially with berry-filled layers.
FAQ (Frequently Asked Questions)
Can I make this cake ahead of time?
You bet! The assembled cake (minus berries) can hang out in the fridge for up to 2 days. Add fresh berries just before serving unless you’re into that soggy aesthetic.
Do I really need special equipment for this?
Nah. While a turntable and bench scraper make things easier, a dinner plate that spins and a spatula will work in a pinch. MacGyver would be proud.
What if my chocolate drip hardens before I finish?
Microwave it for 5-10 seconds and stir. But like any relationship, if you have to reheat it too many times, it’s probably not working out.
Can I use frozen berries instead of fresh?
For decorating? Please don’t unless soggy, bleeding cake is your aesthetic. For filling between layers? Go for it, just drain them well.
How do I transport this masterpiece?
Very carefully! Refrigerate until firm, then place in a cake carrier. No carrier? Use a cardboard box and toothpicks with plastic wrap stretched over them as a makeshift dome. Then drive like you’ve got nitroglycerin in the passenger seat.
What if my cake layers come out uneven?
That’s what frosting is for! It’s basically edible spackle. Fill in the gaps, smooth it out, and no one will ever know. Your secret’s safe with me.
Final Thoughts
Look at you, standing there with flour on your shirt and a two-tier cake that could make a professional baker do a double-take! Whether your drips are perfectly spaced or running wild like toddlers at a birthday party, you’ve created something both beautiful and delicious.
Remember, the best thing about homemade cakes is that they come with built-in bragging rights. When someone asks where you bought it, you get to casually say, “Oh, I made it,” while examining your fingernails like it was no big deal.
Now go slice into that beauty, take the obligatory cross-section photo for social media, and enjoy every bite. You’ve earned it! And if anyone asks for the recipe, just send them this link… or tell them it’s a family secret. Your call.
