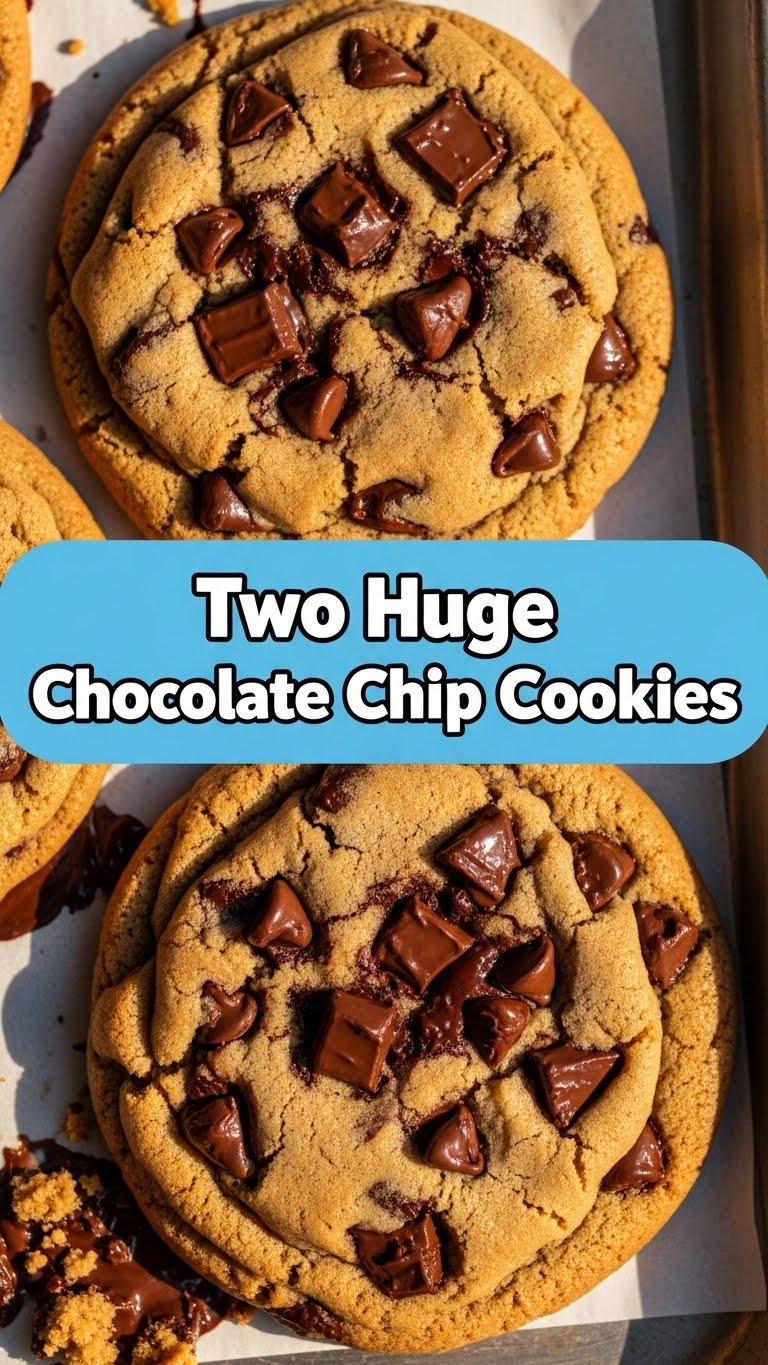
So you’re craving something warm, gooey, and chocolatey but the thought of baking a whole batch of cookies sounds like a marathon you’re not ready to run? Been there, done that, bought the emergency store-bought ice cream. What if I told you we could whip up two *gigantic*, perfect chocolate chip cookies with minimal effort and even less cleanup? Buckle up, buttercup, because your instant gratification just got a delicious upgrade. This isn’t just baking; it’s a strategic operation for maximum deliciousness with minimal fuss.
Why This Recipe is Awesome
This isn’t just any cookie recipe; it’s practically a life hack for your sweet tooth. First off, it’s
designed for peak laziness. No need to wash a dozen cookie sheets or spend an hour scooping. We’re talking two cookies. Two! That means two times the satisfaction, divided by twelve times the effort of a regular batch. Plus, it’s pretty much idiot-proof. Even if you usually burn water, I promise you can nail this. It uses super common ingredients you probably already have, and the whole thing comes together faster than you can decide what to watch next on Netflix. Less time baking, more time *eating*. Priorities, right?
Ingredients You’ll Need
Gather ’round, my friend, for these humble heroes of deliciousness. Measurements are key here, even if it feels like you’re baking for ants.
- 4 tablespoons (that’s 1/4 cup) Unsalted Butter, softened: Not melted, not cold from the fridge. Think “I left it on the counter for an hour and now it’s squishy.”
- 1/4 cup Packed Light Brown Sugar: The secret to that chewy, caramelly goodness. Don’t skimp, and really pack it in there.
- 2 tablespoons Granulated Sugar: Just a touch for structure and that perfect crisp edge.
- 1 Large Egg Yolk: We’re going for richness and chew, not extra fluff. Toss the white, or save it for an omelet if you’re feeling fancy.
- 1/2 teaspoon Vanilla Extract: Use the good stuff, or at least one that doesn’t taste like chemicals. It makes a difference!
- 1/2 cup + 2 tablespoons All-Purpose Flour: Don’t just scoop; lightly spoon and level it for accuracy. Too much flour means hockey pucks, not cookies.
- 1/4 teaspoon Baking Soda: Our leavening agent. It’s tiny but mighty.
- Pinch of Salt (around 1/8 teaspoon): Balances all that sweetness. Trust me, it’s crucial.
- 1/2 cup Chocolate Chips (or more!): I’m talking semi-sweet, milk, dark, whatever makes your heart sing. Go big or go home here. No such thing as too many chocolate chips.
Step-by-Step Instructions
Alright, apron on (or not, we’re not judging!), let’s get baking.
- Preheat Your Oven & Prep Your Sheet: Crank that oven to 375°F (190°C). While it’s heating up, line a baking sheet with parchment paper or a silicone mat. This step is non-negotiable for easy cleanup.
- Cream the Butter & Sugars: In a medium bowl, combine your softened butter, brown sugar, and granulated sugar. Use an electric mixer (or a sturdy whisk and some elbow grease) to beat them together until they’re light and fluffy, about 2-3 minutes. Scrape down the sides of the bowl as needed.
- Add the Wet Goodies: Beat in the egg yolk and vanilla extract until just combined. Don’t overmix here; we’re just aiming for everything to be friends.
- Whisk the Dry Stuff: In a separate, smaller bowl, whisk together your flour, baking soda, and salt. This ensures even distribution and prevents lumps.
- Combine & Conquer: Gradually add the dry ingredients to the wet ingredients, mixing on low speed (or by hand) until *just* combined. Stop as soon as you see no more dry streaks. Overmixing develops gluten, which makes tough cookies. And nobody wants tough cookies, unless they’re for an enemy.
- Fold in the Chocolate: Now for the best part! Gently fold in those glorious chocolate chips. Make sure they’re evenly distributed so every bite is a chocolatey dream.
- Shape & Bake: Divide the dough into two large, glorious mounds on your prepared baking sheet. Leave plenty of space between them—these babies spread! Bake for 12-15 minutes, or until the edges are golden brown and the centers are still slightly soft and gooey.
- Cool (if you can wait): Let them cool on the baking sheet for about 5-10 minutes before carefully transferring them to a wire rack to cool completely. Or, you know, just eat them warm with a scoop of ice cream. Your call, I won’t tell.
Common Mistakes to Avoid
Listen up, buttercup, because a few simple blunders can turn your giant cookie dreams into crunchy disappointments. Learn from my past mistakes (and trust me, there were many).
- Using Cold Butter: This is a cardinal sin. Cold butter doesn’t cream properly with sugar, leading to a dense, sad cookie. Always use softened butter!
- Overmixing the Dough: Once you add the flour, mix *just* until combined. Mixing too much develops gluten, resulting in a tough, chewy (and not in a good way) cookie. We want tender, soft cookies here!
- Not Preheating the Oven: Rookie mistake! A properly preheated oven ensures even baking and that perfect spread. Pop them into a cold oven, and they’ll slowly melt before they bake, potentially becoming flat puddles.
- Skimping on Chocolate Chips: This isn’t a mistake, it’s a tragedy. Seriously, load ’em up.
- Impatience: Pulling them out too early or not letting them cool for a few minutes on the sheet. Give them time to set up!
Alternatives & Substitutions
Feeling adventurous, or just missing an ingredient? No stress, we can totally tweak this.
- Different Chocolates: Mix and match! White chocolate chips, dark chocolate chunks, peanut butter chips, or even chopped up candy bars (Snickers cookies, anyone?). Go wild.
- Add-ins: A sprinkle of sea salt on top before baking? Chef’s kiss! A tablespoon of chopped nuts (walnuts, pecans) for some crunch? Absolutely. Just don’t add too much liquid or your cookies might get weird.
- Butter vs. Margarine: Can you use margarine? Well, technically yes, but IMO, nothing beats real butter for flavor and texture. Margarine can make cookies spread more and taste… different. If you *must*, use a stick margarine with at least 80% fat for the best (least bad?) results.
- Egg White Dilemma: If you don’t want to toss the egg white, you *could* use a whole small egg instead of just the yolk. The cookies might be slightly puffier, but still delicious.
FAQ (Frequently Asked Questions)
- Can I make more than two cookies? Duh! Just double, triple, or quadruple the recipe. Just remember you’ll need more baking sheets.
- How long do these gigantic cookies last? If you manage not to eat them all immediately (a feat of superhuman willpower, I might add), they’re best enjoyed fresh. Store them in an airtight container at room temperature for up to 2-3 days. They might get a little firmer, but still tasty.
- Can I freeze the dough? Absolutely! Form the two big dough balls, wrap them tightly in plastic wrap, and then place them in a freezer-safe bag. They’ll keep for up to 1 month. When ready to bake, you can bake from frozen, just add a few extra minutes to the baking time.
- What if I don’t have brown sugar? Oh, a minor crisis! You can make your own by mixing 1 cup of granulated sugar with 1 tablespoon of molasses. For this recipe, you’d just scale that down. Or, use all granulated sugar, but know your cookies will be a bit crispier and less chewy. Still good, but different.
- My cookies spread too much! What happened? A few culprits: your butter might have been too warm (melted, not just soft), your oven might not have been hot enough, or your flour wasn’t measured correctly (too little flour). Sometimes, the altitude can affect spreading too, FYI.
- Can I use gluten-free flour? Yes, you can! Use a 1:1 gluten-free baking blend that contains xanthan gum. The texture might be slightly different, but they should still turn out delicious.
Final Thoughts
So there you have it, folks! Two enormous, ridiculously good chocolate chip cookies, made with minimal fuss and maximum deliciousness. You’ve just unlocked a new level of baking efficiency and immediate gratification. Now go forth, impress your significant other, bribe your kids, or just treat your fabulous self. You totally earned this, and let’s be real, you deserve it. Happy baking (and even happier eating)!


