So, you’ve hit that sweet spot between “I need something delicious right now” and “I absolutely refuse to put in too much effort,” huh? Welcome to my world! Today, we’re diving into the legendary (and by legendary, I mean *my* new favorite) Till House Chocolate Chip Cookies. Forget those fussy, multi-day recipes. We’re going for instant gratification, my friend.
Why This Recipe is Awesome
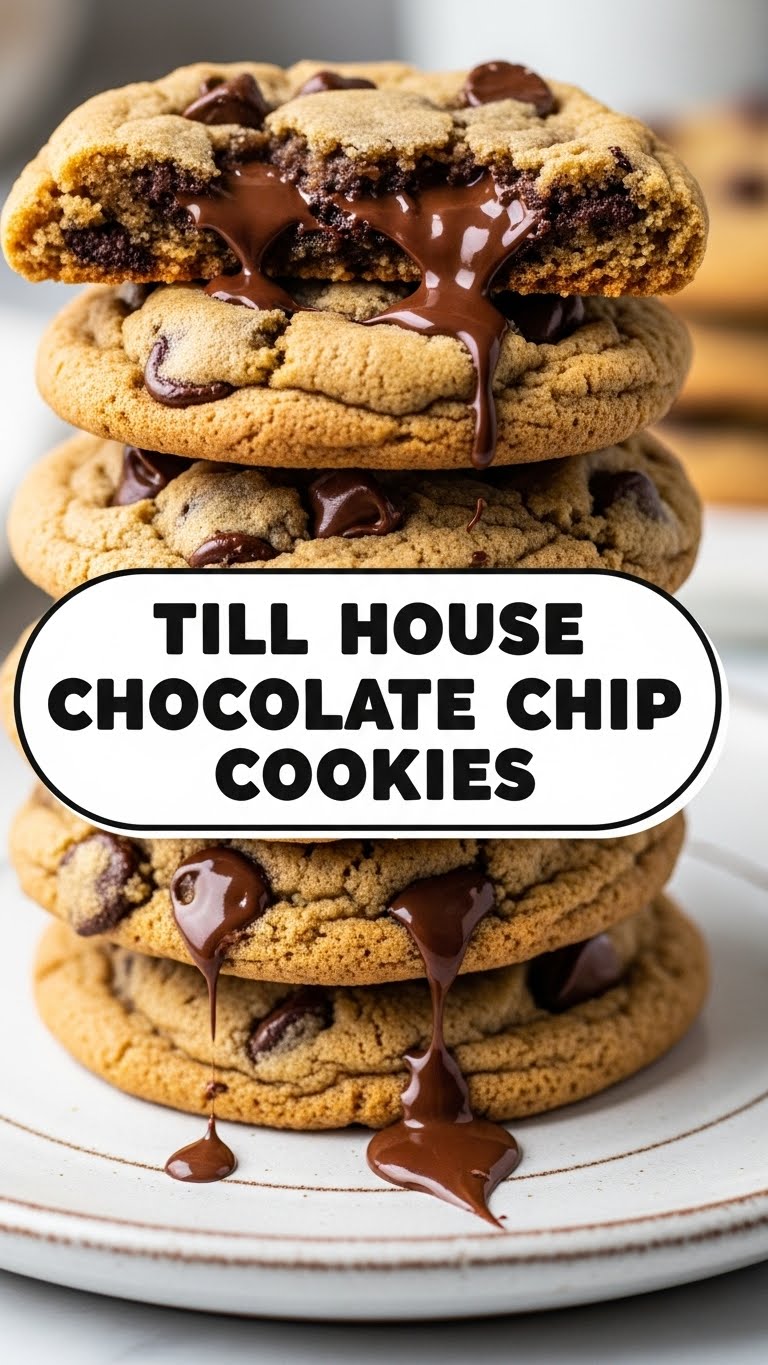
Okay, let’s be real. In a world full of complicated baking trends, sometimes you just need a straightforward, no-fuss cookie that delivers big on flavor without requiring a science degree. This Till House recipe? It’s basically that. It’s **idiot-proof**, I swear. Even *I* didn’t mess it up, and my kitchen has seen some things. These cookies come out perfectly chewy in the middle, crispy on the edges, and packed with melty chocolate goodness. Plus, no weird ingredients you have to hunt down in an obscure artisan store. Just simple, honest-to-goodness deliciousness.
Ingredients You’ll Need
Get ready for the lineup! Nothing wild here, just the good stuff.
- 1 cup (2 sticks) unsalted butter, softened. And by softened, I mean not rock-hard from the fridge, but not a melted puddle either. Think room temp, ready to mingle.
- ¾ cup granulated sugar. For that classic sweetness.
- ¾ cup packed light brown sugar. This is where the magic happens for that chewiness. Don’t skimp!
- 2 large eggs. Room temperature, if you’re feeling fancy (it helps with emulsification, FYI).
- 1 teaspoon vanilla extract. The good stuff. Not imitation. Your taste buds will thank you.
- 2 ¼ cups all-purpose flour. Your basic, trusty flour.
- 1 teaspoon baking soda. Gives our cookies that perfect lift.
- ½ teaspoon salt. Essential for balancing all that sweetness. Seriously, don’t skip the salt.
- 1 ½ cups chocolate chips (semi-sweet or a mix of dark and milk – your call!). Go wild! Chunks work too if you’re feeling extra.
Step-by-Step Instructions
- Preheat & Prep: First things first, get that oven humming at 375°F (190°C). Line a couple of baking sheets with parchment paper. Trust me, it makes life so much easier.
- Cream the Goods: In a large bowl, or your stand mixer if you’re fancy, cream together the softened butter, granulated sugar, and brown sugar until it’s light and fluffy. This usually takes about 2-3 minutes.
- Egg-cellent Addition: Beat in the eggs, one at a time, until they’re just combined. Then stir in that glorious vanilla extract. Don’t overmix here, we’re not making a soufflé.
- Dry Mix Time: In a separate, medium-sized bowl, whisk together the flour, baking soda, and salt. Make sure it’s all well combined.
- Combine & Conquer: Gradually add the dry ingredients to the wet ingredients, mixing on low speed until *just* combined. Stop as soon as you don’t see any dry streaks. Overmixing is a cookie killer!
- Chocolate Shower: Stir in those beautiful chocolate chips by hand. A spatula works wonders here. Distribute them evenly, because nobody wants a naked cookie.
- Scoop & Bake: Drop rounded tablespoons (or use an ice cream scoop for uniform greatness) of dough onto your prepared baking sheets, leaving a couple of inches between each.
- Golden Deliciousness: Bake for 9-11 minutes, or until the edges are golden brown and the centers are still looking a little soft. That soft center means gooey perfection!
- Cool Down: Let the cookies cool on the baking sheets for 5 minutes before transferring them to a wire rack to cool completely. Or, you know, eat them warm. No judgment.
Common Mistakes to Avoid
- Cold Butter Blues: Using cold butter straight from the fridge. It won’t cream properly, and your cookies will suffer. Give it time to soften!
- Overmixing Mania: Seriously, overmixing develops the gluten too much, leading to tough, cake-like cookies. We want tender, chewy goodness, not a hockey puck.
- Ignoring the Salt: Thinking salt is optional in baking? Rookie mistake! It balances the sweetness and brings out all the flavors.
- Impatience is a Virtue (Not Here): Not letting them cool slightly on the baking sheet. They’re fragile when hot, and you don’t want them breaking apart before they even reach your mouth.
- The “Eyeball” Method: While I love an improv chef, baking is a science. **Measure your ingredients accurately!**
Alternatives & Substitutions
Feeling adventurous or just out of something? No worries, I got you.
- Chocolate Choices: Not a fan of semi-sweet? Swap them for milk chocolate, dark chocolate, white chocolate, or a mix! You can even add some chopped nuts (walnuts or pecans are great) for extra crunch.
- Flour Power: If you’re going gluten-free, a 1-to-1 GF baking blend usually works pretty well in this recipe, though the texture might be slightly different.
- Butter Swaps: While butter is king, if you absolutely *must*, you could try a high-quality plant-based butter substitute. Just make sure it’s one designed for baking.
- Extra Flavor Boost: Add a pinch of cinnamon or a tiny bit of almond extract along with the vanilla for a different flavor profile. Just a tiny bit, though!
FAQ (Frequently Asked Questions)
Got questions? I probably have snarky, yet helpful, answers!
- “Do I really need to use both granulated and brown sugar?” Yes, my friend, you really do! Granulated sugar gives crispiness, and brown sugar provides that amazing chewiness and moisture. It’s a team effort!
- “Can I chill the dough?” Absolutely! If you have the time (and the willpower to wait), chilling the dough for 30 minutes to an hour (or even overnight!) can deepen the flavors and give a slightly chewier cookie. But it’s not strictly necessary for this recipe, IMO.
- “My cookies spread too much! What happened?” Could be a few things: your butter was too soft/melted, your oven wasn’t hot enough, or your baking soda isn’t fresh. Make sure your oven temp is accurate!
- “Can I make these ahead of time?” You bet! You can scoop the dough balls and freeze them on a baking sheet. Once solid, transfer to a freezer bag. Bake from frozen, adding a couple of minutes to the baking time. Fresh cookies anytime!
- “What if I don’t have parchment paper?” Foil works in a pinch, but you might want to grease it lightly. Silicone baking mats are also a fantastic reusable option. But seriously, **parchment paper is your friend.**
Final Thoughts
So there you have it! Your new go-to chocolate chip cookie recipe that’s as unfussy as it is delicious. These Till House cookies are perfect for impressing friends (or just yourself, let’s be honest). Grab a glass of milk, put on your comfiest PJs, and enjoy the fruits (or rather, cookies) of your minimal labor. Now go forth and conquer that cookie craving! You’ve earned it!


