So you’re craving something tasty but too lazy to spend forever in the kitchen, huh? Same. We’ve all been there: that sudden, intense, almost spiritual need for something warm, gooey, and utterly comforting that just screams, “You deserve this!” And let’s be real, nothing quite hits the spot like a thick, chewy chocolate chip cookie straight from the oven. Forget those flat, crispy imposters. We’re going for the good stuff here, the kind that makes you close your eyes and do a happy dance. Ready to become a cookie legend? Let’s do this!
Why This Recipe is Awesome
Okay, let’s talk about why this isn’t just *another* cookie recipe. First off, it’s practically idiot-proof. Seriously, even I, a person who once set off the smoke detector making toast, can nail these. You don’t need fancy equipment, a culinary degree, or even particularly good hand-eye coordination. Just a bowl, a spoon, and a dream (and the ingredients, obvs).
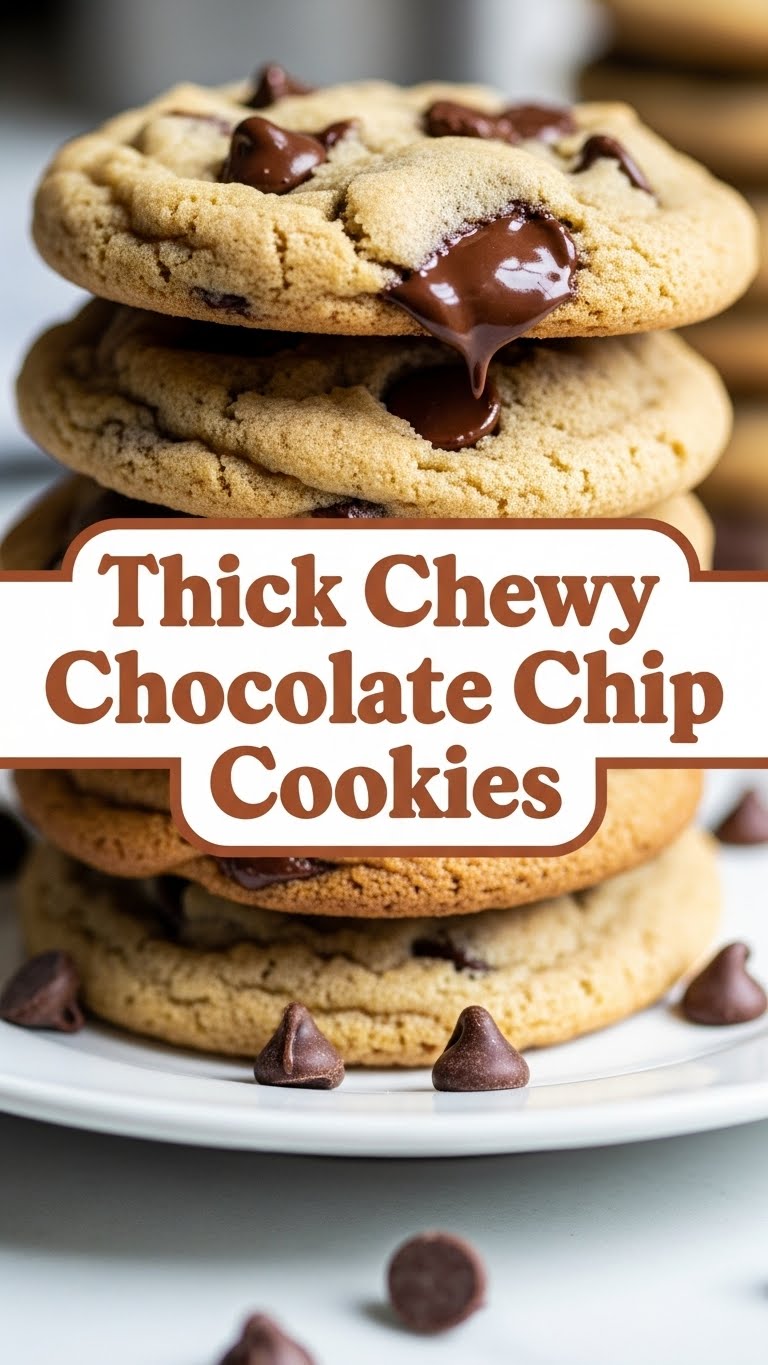
Secondly, these cookies are the epitome of “thick and chewy.” We’re talking golden-brown edges with a gooey, soft center that’s packed with melty chocolate. They hold their shape beautifully, so no sad, flat pancakes here. And the best part? The recipe is relatively quick, meaning you’re mere minutes away from pure, unadulterated cookie bliss. Prepare for compliments, because you’re about to become a cookie wizard!
Ingredients You’ll Need
Gather ’round, my fellow snack enthusiasts! Here’s your shopping list. Don’t skimp on the good stuff; your taste buds will thank you.
- 1 cup (2 sticks) unsalted butter, softened. Not melted! Softened means leaving it out for an hour, or a quick zap in the microwave if you’re impatient like me.
- ¾ cup packed light brown sugar. This is your chewiness MVP. Don’t even think about swapping it all for white sugar unless you want dry, sad cookies.
- ½ cup granulated sugar. For that perfect crisp-edge, soft-center combo.
- 1 large egg, at room temperature. Trust me, it mixes better.
- 2 teaspoons vanilla extract. The good stuff. If it smells like a candle, skip it.
- 2 ¼ cups all-purpose flour. No need for fancy flour, just the regular kind.
- 1 teaspoon baking soda. The magic behind the rise!
- ½ teaspoon salt. Balances all that sweetness and brings out the chocolate flavor. Crucial, don’t skip it!
- 1 ½ cups (about 9-12 oz) chocolate chips or chunks. Mix it up! Semi-sweet, dark, milk chocolate – whatever makes your heart sing. I usually go for a combo.
Step-by-Step Instructions
Alright, apron on (or not, we’re friends here), let’s get baking!
- Get Creamy: In a large bowl, or the bowl of your stand mixer, cream together the softened butter, brown sugar, and granulated sugar until it’s light and fluffy. This usually takes about 2-3 minutes. Scrape down the sides of the bowl to make sure everything is incorporated.
- Egg-cellent Addition: Beat in the egg and vanilla extract until just combined. Don’t overmix here, we just want it to come together nicely.
- Dry Goods Unite: In a separate medium bowl, whisk together the flour, baking soda, and salt. Give it a good whisk to ensure everything is evenly distributed.
- Combine Forces: Gradually add the dry ingredients to the wet ingredients, mixing on low speed (or with a spoon) until *just* combined. Stop mixing as soon as you see no more streaks of flour. Overmixing develops gluten and leads to tough cookies, and nobody wants that.
- Chocolate Shower: Fold in those glorious chocolate chips or chunks. Make sure they’re evenly distributed throughout the dough.
- Chill Out (Optional, but Recommended): For the absolute best thick and chewy results, cover the dough and chill it in the refrigerator for at least 30 minutes. An hour is even better! This helps prevent spreading.
- Prep for Baking: Preheat your oven to 375°F (190°C). Line a baking sheet with parchment paper or a silicone baking mat. This is non-negotiable for easy cleanup and no sticking!
- Scoop ‘Em Up: Drop rounded tablespoons (or use a cookie scoop for uniform size) of dough onto the prepared baking sheet, leaving about 2 inches between each cookie.
- Bake It ‘Til You Make It: Bake for 9-11 minutes, or until the edges are golden brown but the centers still look slightly soft and underbaked. This is key for chewiness!
- Cool Down: Let the cookies cool on the baking sheet for 5-10 minutes before transferring them to a wire rack to cool completely (if you can wait that long, you’re stronger than me).
Common Mistakes to Avoid
Nobody’s perfect, but we can avoid these rookie blunders together!
- Overmixing the Dough: I said it before, I’ll say it again: overmixing = tough cookies. Mix until just combined, then back away from the mixer!
- Using Cold Butter or Melted Butter: Cold butter won’t cream properly, and melted butter will make your cookies spread into thin, sad puddles. Stick to softened.
- Skipping the Chill Time: While optional, skipping the dough chill is a one-way ticket to flat cookie town. The chill helps the butter firm up and prevents excessive spreading.
- Overbaking: This is probably the most common mistake. Pull your cookies when the edges are set and golden, but the centers still look a little soft and underdone. They’ll continue to bake on the hot sheet.
- Not Using Parchment Paper: Thinking you can just grease the pan? You’re playing with fire, friend. Parchment paper or silicone mats ensure your cookies don’t stick and bake evenly.
Alternatives & Substitutions
Feeling adventurous? Or just missing an ingredient? No stress, we can tweak this!
- Chocolate Choices: Go wild! Use all milk chocolate, all dark chocolate, white chocolate, or a mix of everything. Chocolate chunks from a chopped bar often give a superior melty pull. You can even mix in mini chocolate chips for extra chocolatey goodness.
- Add-ins Galore: Want more fun? Stir in ½ cup of chopped nuts (walnuts, pecans), pretzels, M&Ms, toffee bits, or even a dash of flaky sea salt on top before baking. IMO, a little sea salt elevates these to gourmet status!
- Gluten-Free: If you’re going GF, swap the all-purpose flour for a 1:1 gluten-free baking blend that contains xanthan gum. The texture might be slightly different but still delicious.
- Butter Swap: While butter is king for flavor, if you absolutely must, you can try using a plant-based butter alternative or even coconut oil (solid, not melted). Just be aware the flavor and texture might be slightly altered.
FAQ (Frequently Asked Questions)
Got questions? I’ve got (casual and humorous) answers!
- Do I *have* to chill the dough? I’m impatient!
Technically, no. But for the absolute best thick, chewy, non-spreading cookies, yes, you should! Think of it as giving your dough a little spa day. It makes a noticeable difference. - My cookies are flat! What went wrong?
Oh no! This usually means your butter was too warm/melted, your baking soda is old (check the expiration date!), or your oven wasn’t hot enough. Also, warm dough spreads more, so refer back to the chilling advice! - Can I use margarine instead of butter?
Well, technically yes, but why hurt your soul like that? Butter is flavor, friend. Margarine just doesn’t deliver the same richness or texture. Live a little, use real butter! - How long do these magical cookies last?
If you manage not to eat them all immediately (a true feat of self-control), they’ll stay fresh in an airtight container at room temperature for about 3-5 days. But seriously, who has that kind of self-control? - Can I freeze the cookie dough for later?
Absolutely! Scoop the dough into balls, place them on a baking sheet, and freeze until solid. Once frozen, transfer them to a freezer-safe bag. When you’re ready to bake, just pop them onto a baking sheet, maybe add an extra minute or two to the baking time, and boom! Fresh cookies whenever you want ’em. - What if I don’t have brown sugar? Can I just use all white sugar?
You *can*, but your cookies won’t be as chewy or moist. Brown sugar adds moisture and that signature caramel-y chewiness. If you’re truly desperate, you can make your own by mixing 1 cup of white sugar with 1 tablespoon of molasses.
Final Thoughts
And there you have it, folks! Your new go-to recipe for thick, chewy chocolate chip cookies that will make you feel like a master baker (even if you’re just wearing sweatpants and dancing in your kitchen). These aren’t just cookies; they’re a hug in edible form, a little piece of joy that’s ridiculously easy to make. So go forth and bake, my friend! Now go impress someone—or yourself—with your new culinary skills. You’ve earned it!


