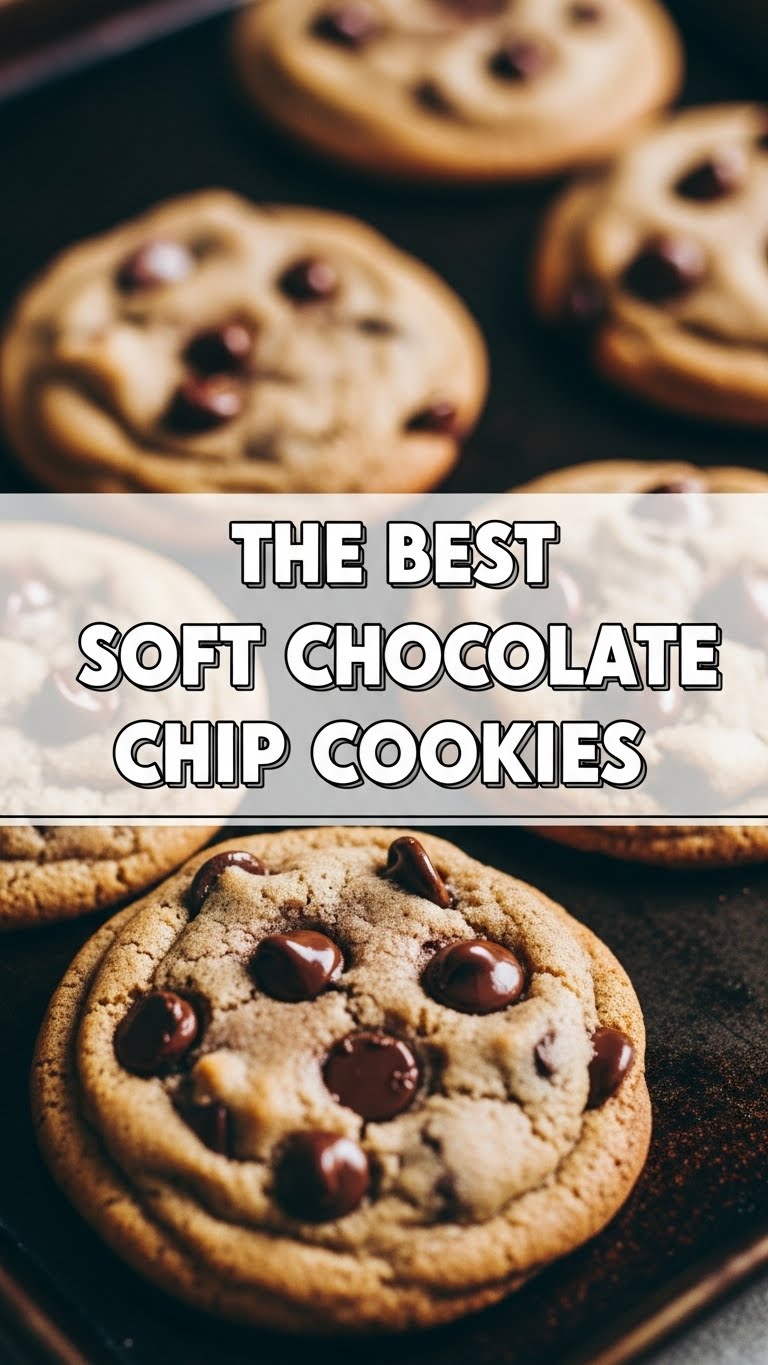
So you’re craving something tasty but your cooking motivation is currently on a sabbatical, huh? Been there, done that! But fear not, my friend, because today we’re tackling the *holy grail* of comfort food with minimal effort and maximum deliciousness: the best soft chocolate chip cookies. Seriously, get ready to feel like a baking wizard without actually having to cast any complicated spells. Just good old-fashioned sugar, butter, and chocolate magic!
Why This Recipe is Awesome
Look, I get it. Baking can be intimidating, and sometimes a recipe just looks like a list of chores. But this one? It’s genuinely **fool-proof**. I’ve made it after a long day, half-asleep, and still ended up with perfectly gooey, soft-centered cookies with those slightly crispy edges we all adore. Plus, it doesn’t require any fancy equipment or a degree in pastry arts. It’s quick enough for a weeknight craving, and impressive enough to fool guests into thinking you’re a domestic god/goddess. No judgment here!
The secret? A perfect ratio of brown to white sugar for that ideal chew, and not over-baking (we’ll get to that!). The result is a cookie that holds its shape, melts in your mouth, and makes you wonder if you should just eat the whole batch. (Spoiler: you probably will.)
Ingredients You’ll Need
Gather ’round, my fellow kitchen adventurers! Here’s your treasure map of ingredients:
- 1/2 cup (113g) Unsalted Butter: Softened, but not melted. This is where the magic starts. **Don’t skimp here**, it’s the heart of the cookie!
- 1/2 cup (100g) Granulated Sugar: For that essential sweetness and a little crisp.
- 1/4 cup (50g) Packed Light Brown Sugar: Our secret weapon for chewiness and depth of flavor.
- 1 Large Egg: To bind all that deliciousness together.
- 1 Teaspoon Vanilla Extract: A splash of pure joy. Trust me, it makes a difference.
- 1 1/4 cups (150g) All-Purpose Flour: Just regular flour, no need for anything fancy.
- 1/2 Teaspoon Baking Soda: Our lift-off secret for that perfect rise.
- 1/4 Teaspoon Salt: Balances the sweetness and makes everything pop. Crucial!
- 1 cup (170g) Chocolate Chips: Semi-sweet, milk, dark – your call! Go wild. Chunks also work wonderfully.
Step-by-Step Instructions
Alright, apron on (or not, I won’t tell), let’s get baking!
- Preheat & Prep: Crank that oven to 350°F (175°C). Line a couple of baking sheets with parchment paper. This prevents sticking and makes cleanup a breeze.
- Cream the Good Stuff: In a large bowl, beat the softened butter with both the granulated and brown sugars until it’s light and fluffy. This usually takes about 2-3 minutes with an electric mixer, or a good arm workout if doing it by hand.
- Egg & Vanilla Time: Crack in the egg and add the vanilla extract. Beat until fully combined and smooth.
- Dry Ingredients Unite: In a separate, smaller bowl, whisk together the flour, baking soda, and salt. This ensures everything is evenly distributed.
- Combine & Conquer: Gradually add the dry ingredients to the wet ingredients, mixing on low speed (or by hand) until just combined. **Stop mixing as soon as you see no dry streaks of flour.** Over-mixing makes tough cookies, and nobody wants that!
- Chocolate In! Fold in your chocolate chips. Don’t be shy.
- Scoop & Bake: Drop rounded tablespoons of dough onto your prepared baking sheets, leaving about 2 inches between each cookie. They will spread!
- Bake to Perfection: Bake for 9-11 minutes. Here’s the key: **pull them out when the edges are set and lightly golden, but the centers still look slightly soft and underdone.** They will continue to bake on the hot cookie sheet.
- Cool Down: Let the cookies cool on the baking sheet for 5 minutes before transferring them to a wire rack to cool completely. Or, you know, eat one warm. I won’t judge.
Common Mistakes to Avoid
We’ve all been there, staring at a sad-looking cookie and wondering “what went wrong?” Here are a few rookie mistakes to dodge:
- Skipping the Preheat: Thinking you don’t need to preheat the oven? Rookie mistake. A hot oven is crucial for even baking and proper spread.
- Over-Measuring Flour: Too much flour makes dry, crumbly cookies. **Use the spoon-and-level method:** spoon flour into your measuring cup, then level it off with a straight edge. Don’t pack it in!
- Over-Mixing the Dough: As mentioned, once you add the flour, mix only until just combined. Over-mixing develops gluten, leading to tough cookies. We want tender, chewy ones!
- Over-Baking: This is the number one culprit for hard, crunchy cookies. Trust your gut (and my instructions!). **When they look a little underdone in the middle, take them out.** They’ll firm up as they cool.
- Using Cold Butter: If your butter isn’t softened, it won’t cream properly with the sugar, affecting the texture. Plan ahead, or microwave it in short 5-second bursts until soft.
Alternatives & Substitutions
Want to get creative? I love your spirit! Here are some simple tweaks:
- Chocolate Variety: Not a fan of semi-sweet? Use all milk chocolate for a sweeter cookie, or go dark for a richer flavor. You can also mix in white chocolate chips, butterscotch chips, or even chopped candy bars. **IMO**, a mix of semi-sweet and milk chocolate is divine.
- Add-ins Galore: Feel free to toss in 1/2 cup of chopped nuts (walnuts, pecans), shredded coconut, M&Ms, or sprinkles for extra flair. Just reduce the chocolate chips slightly to accommodate.
- Flour Power: For gluten-free friends, you can usually substitute a 1:1 gluten-free all-purpose flour blend. Just make sure it contains xanthan gum, or add 1/2 teaspoon if it doesn’t.
- Brown Butter Magic: Feeling fancy? Brown your butter before letting it cool and soften. It adds an incredible nutty depth to the cookies. It’s an extra step, but **FYI**, it’s totally worth it if you have the time!
FAQ (Frequently Asked Questions)
Got questions? I’ve got answers (mostly humorous, of course).
- Can I use margarine instead of butter? Well, technically yes, but why hurt your soul like that? Butter is king for flavor and texture in these cookies. Stick with the good stuff.
- Do I really need to chill the dough? For this recipe, chilling isn’t mandatory if you’re impatient (like me!). However, chilling for 30 minutes to an hour can enhance the flavor and prevent too much spreading. It’s a bonus, not a requirement.
- Can I freeze the cookie dough? Absolutely! Scoop the dough into balls, place them on a parchment-lined tray, and freeze until solid. Then transfer to an airtight freezer bag for up to 3 months. When craving a cookie, bake from frozen, adding 2-4 minutes to the baking time. Fresh cookies on demand? Yes, please!
- How do I store leftover cookies? If there *are* any leftovers, store them in an airtight container at room temperature for up to 3-5 days. They stay wonderfully soft.
- Why are my cookies flat? Oh no! This could be due to several reasons: butter too soft or melted, not enough flour, old baking soda (check the date!), or your oven temperature being off. Double-check your measurements and make sure your butter is just softened, not greasy.
- Can I halve or double this recipe? Yep, this recipe is super flexible! Feel free to halve it for a smaller batch (for, you know, “portion control”), or double it if you’re feeding a crowd or just really, *really* love cookies. Just stick to the ratios.
Final Thoughts
See? Told ya it was easy! Now you’ve got a batch of warm, soft, chocolatey goodness waiting to make your day infinitely better. Go forth and conquer those cookie cravings! Share them with loved ones, or don’t – your secret’s safe with me. 😉 You’ve earned this deliciousness, so enjoy every single crumb!


