So, you’re scrolling through your phone, minding your own business, and suddenly that craving hits. Not just any craving, but the kind that screams, “I need something warm, gooey, sweet, and probably drenched in cinnamon!” Sound familiar? Because, let’s be real, who *doesn’t* need a dose of warm, squishy happiness in their life? Exactly. Welcome to the wonderful world of **Lizzy’s Epic Cinnamon Rolls**. Forget those sad, cardboard-y ones from the store. We’re about to make magic, friend, and trust me, it’s easier than trying to assemble IKEA furniture with a hangover.
Why This Recipe is Awesome
First off, this isn’t just a recipe; it’s a mood booster. It’s the kind of recipe that makes your kitchen smell like a cozy autumn day, even if it’s 90 degrees outside. And the best part? It’s practically **idiot-proof**. Seriously, if I, a person who once set off the smoke alarm making toast, can nail these, you’re basically a Michelin-star chef in training. This recipe delivers big on flavor with minimal fuss, meaning you get maximum deliciousness for your effort. Plus, it’s a great excuse to make your whole house smell amazing. Your neighbors might even peek over the fence.
Ingredients You’ll Need
Gather ’round, future baking superstar! Here’s your shopping list. Don’t sweat it, most of these are probably already lurking in your pantry.
- For the Dough:
- 1 cup warm milk (around 105-115°F / 40-46°C – basically, warm bath water, not a hot tub!)
- 2 ¼ teaspoons active dry yeast (one packet, for the non-bakers out there)
- ¼ cup granulated sugar (just enough sweetness to get the party started)
- 1 large egg, at room temperature (helps with the fluff factor)
- ¼ cup unsalted butter, melted (because everything’s better with butter)
- ½ teaspoon salt (don’t skip this, it balances the sweet!)
- 3 cups all-purpose flour (and maybe a little extra for dusting, you know the drill)
- For the Filling:
- ½ cup unsalted butter, softened (room temp is key here, don’t microwave it into a puddle)
- ¾ cup light brown sugar, packed (the more, the merrier, IMO)
- 1 tablespoon ground cinnamon (the star of the show, obviously!)
- For the Glaze:
- 1 ½ cups powdered sugar (also known as confectioners’ sugar)
- 2-3 tablespoons milk (or heavy cream for extra decadence, no judgment here)
- ½ teaspoon vanilla extract (a little goes a long way)
- 1 tablespoon unsalted butter, melted (because, again, butter)
Step-by-Step Instructions
Alright, let’s get our hands (and probably our counter) a little messy. This is where the magic happens!
- Activate Your Yeast: In a large bowl, whisk together the warm milk, yeast, and a pinch of that granulated sugar. Let it hang out for about 5-10 minutes. It should get frothy and bubbly – that means your yeast is alive and ready to party! If it doesn’t, your milk was either too hot or too cold, or your yeast is past its prime. Try again, champ.
- Mix the Dough: Add the remaining ¼ cup sugar, egg, melted butter, and salt to the yeast mixture. Stir it all up. Gradually add the flour, one cup at a time, mixing until a shaggy dough forms.
- Knead It Out: Turn the dough out onto a lightly floured surface. Knead it for 5-7 minutes until it’s smooth and elastic. It should spring back when you gently poke it. No need for a gym membership today, this is your workout!
- First Rise: Lightly grease a clean bowl with a little oil. Place your dough in the bowl, turn it once to coat, then cover with plastic wrap or a clean kitchen towel. Let it rise in a warm spot for 1-1.5 hours, or until it’s doubled in size. This is a great time to scroll TikTok.
- Make the Filling: While your dough is rising, combine the softened butter, brown sugar, and cinnamon in a small bowl. Mix until it forms a lovely, spreadable paste.
- Roll ‘Em Out: Once your dough has doubled, gently punch it down (satisfying, right?). Roll it out on a lightly floured surface into a large rectangle, about 12×18 inches. Don’t overthink it, a rough rectangle is fine!
- Spread the Goodness: Evenly spread your cinnamon-sugar filling over the entire dough rectangle, leaving a small ½-inch border along one of the long edges.
- Roll and Slice: Starting from the opposite long edge (the one *without* the border), tightly roll the dough into a log. Once rolled, use a sharp knife or unscented dental floss (seriously, try it!) to slice the log into 12 equal rolls, about 1 ½ inches thick.
- Second Rise & Preheat: Arrange the rolls in a lightly greased 9×13 inch baking dish. Cover again and let them rise for another 30-45 minutes while you preheat your oven to 375°F (190°C). They should look puffy and cozy.
- Bake Time: Pop those beauties into the preheated oven for 20-25 minutes, or until they’re golden brown and smell absolutely heavenly.
- Whip Up the Glaze: While the rolls are slightly cooling (but still warm!), whisk together all the glaze ingredients: powdered sugar, milk/cream, vanilla extract, and melted butter. Adjust the milk until you get a smooth, pourable consistency.
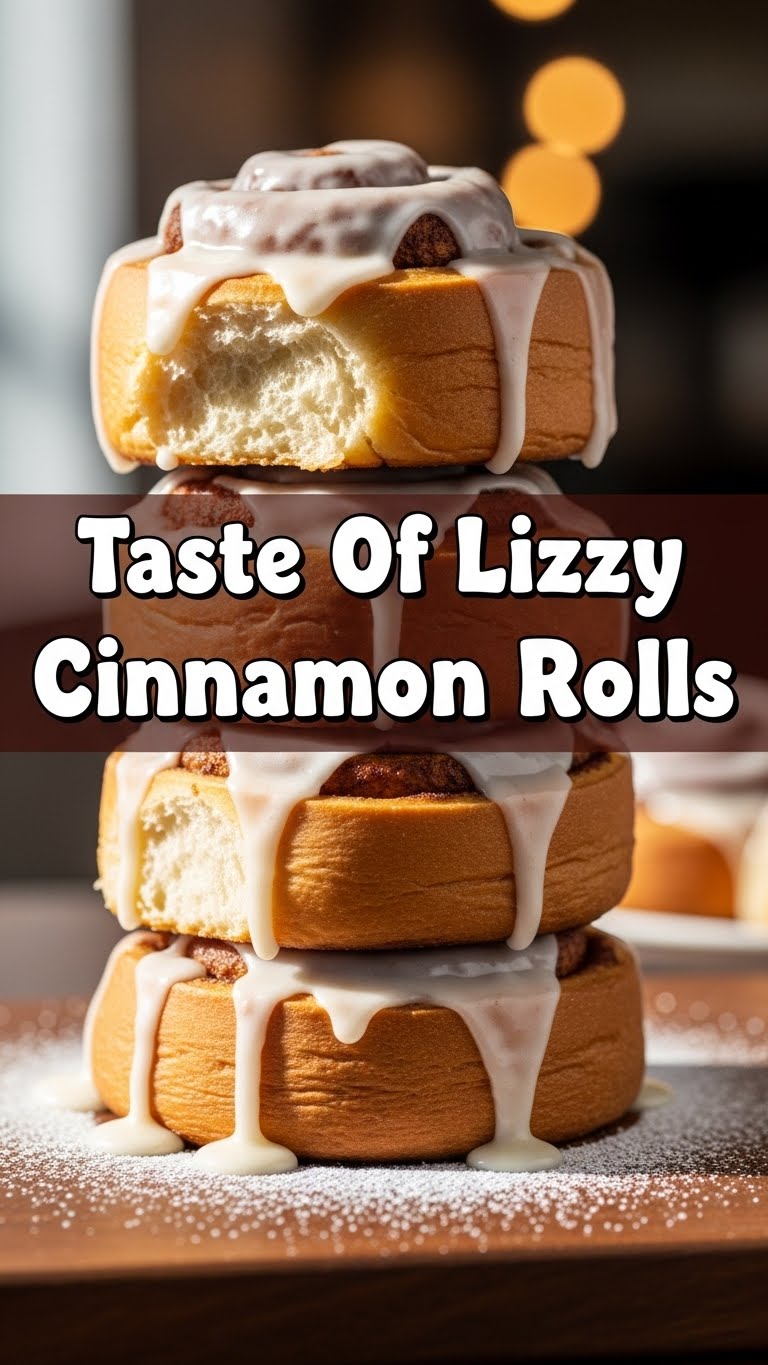
- Glaze and Devour: Drizzle or spread that glorious glaze generously over the warm cinnamon rolls. **The warmer the rolls, the meltier the glaze**, FYI. Serve immediately and prepare for compliments!
Common Mistakes to Avoid
Listen, we all make mistakes. It’s part of the journey! But here are a few classic blunders to dodge:
- Killing the Yeast: Too hot milk? Dead yeast. Too cold? Sluggish yeast. Remember, warm bath water, not boiling lava or ice bath.
- Not Kneading Enough (or Too Much): Under-kneaded dough leads to tough rolls. Over-kneaded dough can also lead to tough, sad rolls. Aim for smooth and elastic.
- Rushing the Rise: Patience is a virtue, especially in baking. Don’t try to speed up the rise by putting the dough in a super hot spot, or you might end up with weird-tasting, dense rolls.
- Skimping on the Filling: This is a cinnamon roll, not a diet snack! Be generous with that buttery, sugary, cinnamony goodness. Your taste buds will thank you.
- **Thinking you don’t need to preheat the oven** – Rookie mistake! A cold oven means uneven baking and sad, underdeveloped rolls. **Always preheat!**
- Over-baking: Dry rolls are a tragedy. Pull them out when they’re golden brown, even if the middle seems a *tiny* bit soft. They’ll continue to cook slightly outside the oven.
Alternatives & Substitutions
Feeling adventurous? Or just realized you’re missing an ingredient? No stress, we’ve got options!
- Dairy-Free? You can totally swap the milk for a non-dairy alternative like almond or oat milk, and use a plant-based butter (like Miyoko’s or Earth Balance) for both the dough and filling. For the glaze, stick with plant-based milk.
- Cream Cheese Glaze: Wanna level up? Swap 2 oz softened cream cheese for a tablespoon of the butter in the glaze, and reduce the milk slightly. Whip it good! **This is my personal favorite**, if you’re asking.
- Add-ins for the Filling: Feel free to sprinkle some chopped pecans or walnuts over the filling before rolling. Or even a pinch of cardamom for a different spice kick.
- No Yeast? No Problem (kinda): This specific recipe relies on yeast for that fluffy texture. If you’re really yeast-averse, you’d need a completely different quick-rise recipe using baking powder. So, for *this* recipe, stick with the yeast!
FAQ (Frequently Asked Questions)
Got questions? I probably do too, but let’s see if I can answer yours first!
- **Can I make these ahead of time?** Absolutely! You can cover the rolls after the second rise (Step 9) and pop them in the fridge overnight. In the morning, pull them out and let them come to room temperature for about 30-60 minutes before baking. Easy peasy!
- **My dough didn’t rise. What gives?** Ugh, the worst! It’s usually a yeast issue. Make sure your milk isn’t too hot (kills the yeast) or too cold (puts it to sleep). Also, check the expiration date on your yeast. Sometimes, it’s just old!
- **How do I store leftover cinnamon rolls?** Ha! “Leftover.” Good one! If by some miracle you have any, store them in an airtight container at room temperature for up to 2-3 days, or in the fridge for up to a week. Reheat gently in the microwave or oven.
- **Can I use margarine instead of butter?** Well, technically yes, but why hurt your soul like that? Butter just tastes better, period. Margarine might work in a pinch, but the flavor won’t be quite the same. Just sayin’.
- **What if I don’t have a stand mixer?** No worries, your arms are your stand mixer! You’ll just get a slightly better workout during the kneading process. Go, you!
- **Can I freeze them?** Yes! You can freeze the baked and glazed rolls (individually wrapped) for up to 1-2 months. Thaw and gently reheat. Or, freeze the unbaked rolls after the second rise; just transfer them from the baking dish to a freezer bag. Thaw in the fridge overnight and let them come to room temp before baking as usual.
Final Thoughts
And there you have it! Your very own batch of scrumptious, homemade Lizzy’s Epic Cinnamon Rolls. Wasn’t that way more fun (and delicious) than scrolling through cat videos? Probably. Now go impress someone—or yourself—with your new culinary skills. You’ve earned it! Or, even better, just hoard them all for yourself. No judgment here. Happy baking, my friend!


