Okay, chocolate fiend, gather ’round! Got that uncontrollable craving for something rich, dark, and utterly divine? And not just *any* chocolate, we’re talking Swiss-level decadence. But let’s be real, you’re probably short on time and patience, right? Same. So, I’ve got the ultimate Swiss Chocolate Cake recipe for you that’s so simple, it’s practically witchcraft. You’re welcome.
Why This Recipe is Awesome
Forget those complicated recipes with 17 steps, obscure ingredients, and a part-time pastry chef degree. This one? It’s like the chill older sibling of chocolate cakes. It’s rich, incredibly moist, and packed with deep chocolate flavor, without making you want to throw your mixing bowl across the kitchen.
Seriously, it’s **idiot-proof**. Even if your baking skills are usually limited to pressing “start” on the microwave, you got this. Plus, it tastes like you slaved away for hours, but shhh, that’ll be our little secret. Perfect for impressing guests, a special occasion, or, let’s be real, devouring solo in your PJs while binge-watching your favorite show. No judgment here!
Ingredients You’ll Need
Grab your apron (or just a t-shirt you don’t mind getting messy) and let’s get cracking. Here’s what you’ll need for this chocolatey masterpiece:
- 2 cups (250g) All-Purpose Flour: The basic building block. No fancy artisanal flour needed, unless “fancy” means “it’s already in my pantry.”
- 2 cups (400g) Granulated Sugar: Because, cake. And a lot of it. Don’t be shy.
- ¾ cup (75g) Unsweetened Cocoa Powder: Dark, good quality stuff. This is a *Swiss* chocolate cake, not a “kinda chocolatey” cake. Quality matters, people!
- 2 tsp Baking Soda: The magic lifter. Don’t confuse it with baking powder, or things get weird.
- 1 tsp Baking Powder: The other magic lifter. Teamwork makes the dream work!
- 1 tsp Salt: Just a pinch. Enhances all that chocolatey goodness. Don’t skip it!
- 1 cup (240ml) Milk: Full-fat if you’re feeling indulgent. Or whatever you have on hand. We’re flexible.
- ½ cup (120ml) Vegetable Oil (or melted butter): Oil for ultimate moistness, or melted butter for an extra layer of flavor. Your call, rockstar.
- 2 Large Eggs: Room temperature, if possible. Because science, people!
- 2 tsp Vanilla Extract: Don’t skimp! It genuinely makes a difference.
- 1 cup (240ml) Hot Water (or hot coffee): This is the secret weapon for deep chocolate flavor and that signature moist crumb. Coffee amplifies the chocolate without tasting like coffee. Trust me on this.
Step-by-Step Instructions
Alright, let’s get this party started! Follow these super easy steps, and you’ll be a chocolate cake champion in no time.
- Prep Your Station: First things first, preheat your oven to **350°F (175°C)**. Then, grease and flour two 8 or 9-inch round cake pans. Or, even easier, line them with parchment paper circles. **Don’t skip this step!** No one likes a stuck cake.
- Whisk the Dry Stuff: In a large mixing bowl, whisk together your flour, sugar, cocoa powder, baking soda, baking powder, and salt. Give it a good whisk to make sure everything is evenly distributed. We’re talking no lumps here, folks.
- Combine the Wet Stuff: In a separate medium bowl, whisk together the milk, oil (or melted butter), eggs, and vanilla extract. Whisk until it’s all smooth and homogenous.
- Mix Wet into Dry: Pour the wet ingredients into the dry ingredients. Mix on low speed with an electric mixer, or by hand with a whisk, until *just* combined. You want to avoid overmixing here – that’s a one-way ticket to tough cake town.
- Add the Hot Secret Weapon: Carefully pour the hot water (or coffee) into the batter. Mix on low speed until the batter is smooth. Don’t panic if it looks thin – that’s exactly how it should be! This is the secret to its incredible moistness.
- Pour and Bake: Divide the batter evenly between your two prepared cake pans. Pop them into your preheated oven and bake for **30-35 minutes**, or until a wooden skewer or toothpick inserted into the center comes out with moist crumbs, not wet batter.
- Cool Down, Buttercup: Let the cakes cool in their pans on a wire rack for about 10-15 minutes. Then, carefully invert them onto the wire rack to cool completely. **Patience is a virtue here!** Don’t even think about frosting a warm cake unless you enjoy a melted, sliding mess.
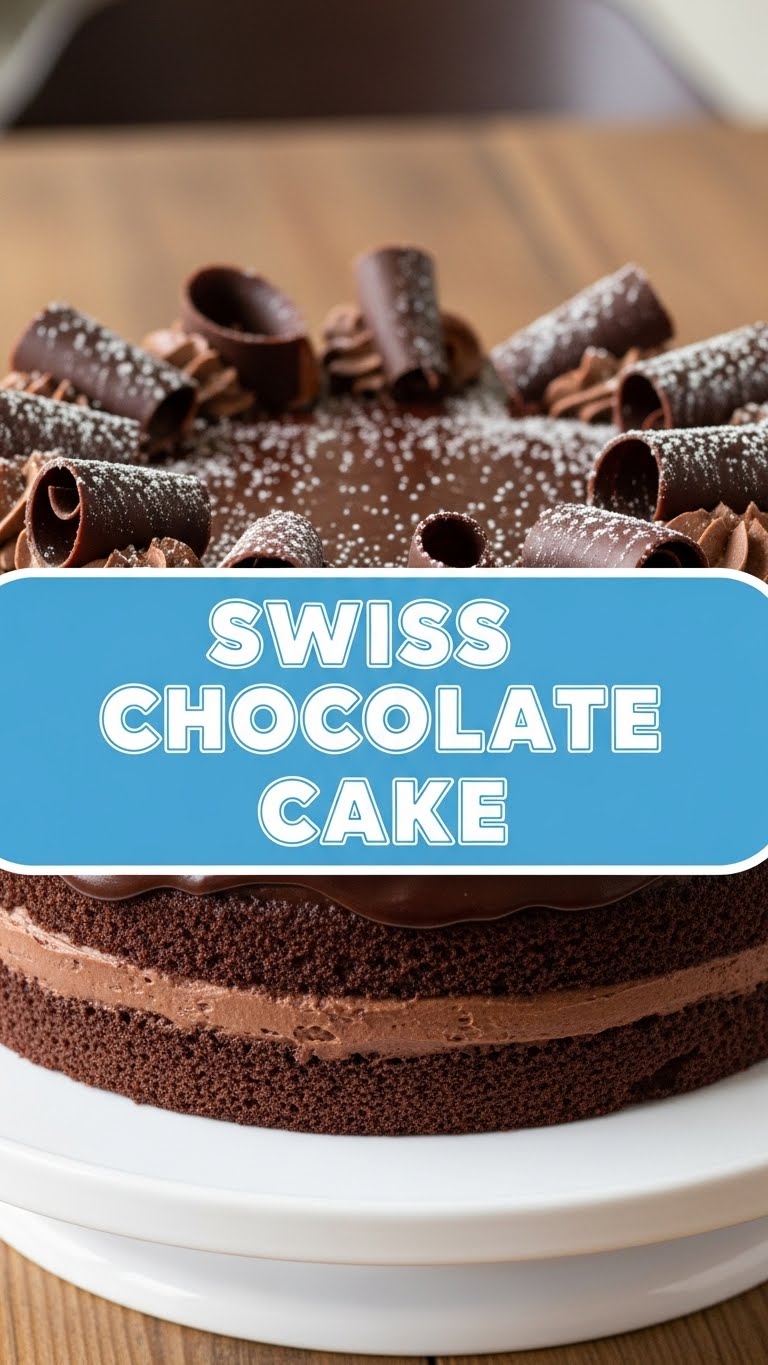
- Frost Away: Once completely cool, frost your beautiful Swiss Chocolate Cake with your favorite chocolate frosting. A simple buttercream or ganache works wonders. Stack ’em high, spread it thick, and enjoy!
Common Mistakes to Avoid
Baking is fun, but sometimes we make oopsies. Here’s how to steer clear of common pitfalls and ensure your cake is nothing short of legendary:
- Overmixing the Batter: This is probably the biggest culprit for dry, tough cakes. Mix *just* until the ingredients are combined. A few small lumps in the batter are totally fine, even desirable!
- Not Preheating the Oven: Rookie mistake! Throwing your cake into a cold oven means it won’t rise properly, leading to a dense, sad cake. Always preheat!
- Opening the Oven Door Too Early: Resist the urge to peek! Opening the oven door lets out heat and can cause your cake to sink. Wait until at least ¾ of the way through the baking time.
- Not Letting the Cake Cool Completely: We talked about this! Frosting a warm cake is a recipe for disaster. Embrace the cool-down period.
- Using Low-Quality Cocoa Powder: Seriously, for a chocolate cake, the quality of your cocoa powder makes a HUGE difference. Splurge a little on the good stuff; your taste buds will thank you.
Alternatives & Substitutions
Life’s about options, right? This recipe is pretty forgiving, so feel free to tweak it a bit if you’re feeling adventurous or just missing an ingredient.
- Milk: Any milk works, even plant-based options like almond or soy. However, full-fat dairy milk generally gives the best texture, IMO.
- Oil vs. Butter: Vegetable oil keeps the cake incredibly moist, which is fantastic. But if you want a richer, buttery flavor, go for an equal amount of melted unsalted butter. Either way, it’ll be delish.
- Hot Water/Coffee: If you’re not a coffee person (gasp!), just use hot water. The key is the heat and the liquid, which helps bloom the cocoa and create that thin, magical batter.
- Frosting: Feeling lazy? Grab a tub of good-quality store-bought chocolate frosting. No shame in that game! For something extra special, try a homemade chocolate ganache, a rich chocolate buttercream, or even a tangy cream cheese frosting.
- Flour: While I haven’t personally tried it for *this specific* recipe, a good gluten-free all-purpose flour blend *might* work. Just make sure it contains xanthan gum.
FAQ (Frequently Asked Questions)
Got questions? I’ve got answers. Probably. Let’s see…
- Can I use margarine instead of butter? Well, technically yes, you *could*. But why hurt your soul like that? Butter is king for a reason – it provides superior flavor and texture. Stick with butter or oil if you can!
- Why is my batter so thin? Is that normal? Absolutely! It’s 100% normal and intentional. That thin consistency, thanks to the hot liquid, is what gives this cake its incredibly moist and tender crumb. Don’t freak out!
- Can I make cupcakes instead of a full cake? You betcha! Just line a muffin tin with paper liners, fill them about two-thirds full, and bake for approximately 18-22 minutes. Keep an eye on them with the toothpick test.
- How do I know when the cake is truly done? The best way is the classic **toothpick test**. Insert a wooden skewer or toothpick into the center of the cake. It should come out with moist crumbs attached, but not wet batter.
- How long does this cake last? Covered tightly at room temperature, it’ll be fantastic for 3-4 days. In the fridge, it can last up to a week. If it lasts that long, that is.
- Can I add chocolate chips to the batter? Um, YES! More chocolate is always the answer. Fold in about a cup of your favorite chocolate chips at the end of mixing the batter.
- What kind of frosting pairs best with this cake? A classic chocolate buttercream is always a winner. A rich chocolate ganache would be divine. Or, for a lovely contrast, try a cream cheese frosting or even a raspberry buttercream.
Final Thoughts
See? I told you it was easy peasy lemon squeezy (but with chocolate, which is way better than lemons, let’s be honest). You just whipped up a show-stopping, incredibly delicious Swiss Chocolate Cake without breaking a sweat. Or at least, not much sweat.
Now go impress someone—or just yourself—with your new culinary skills. You’ve earned it! Seriously, go make this cake. You won’t regret it. And maybe, just maybe, save me a slice?


