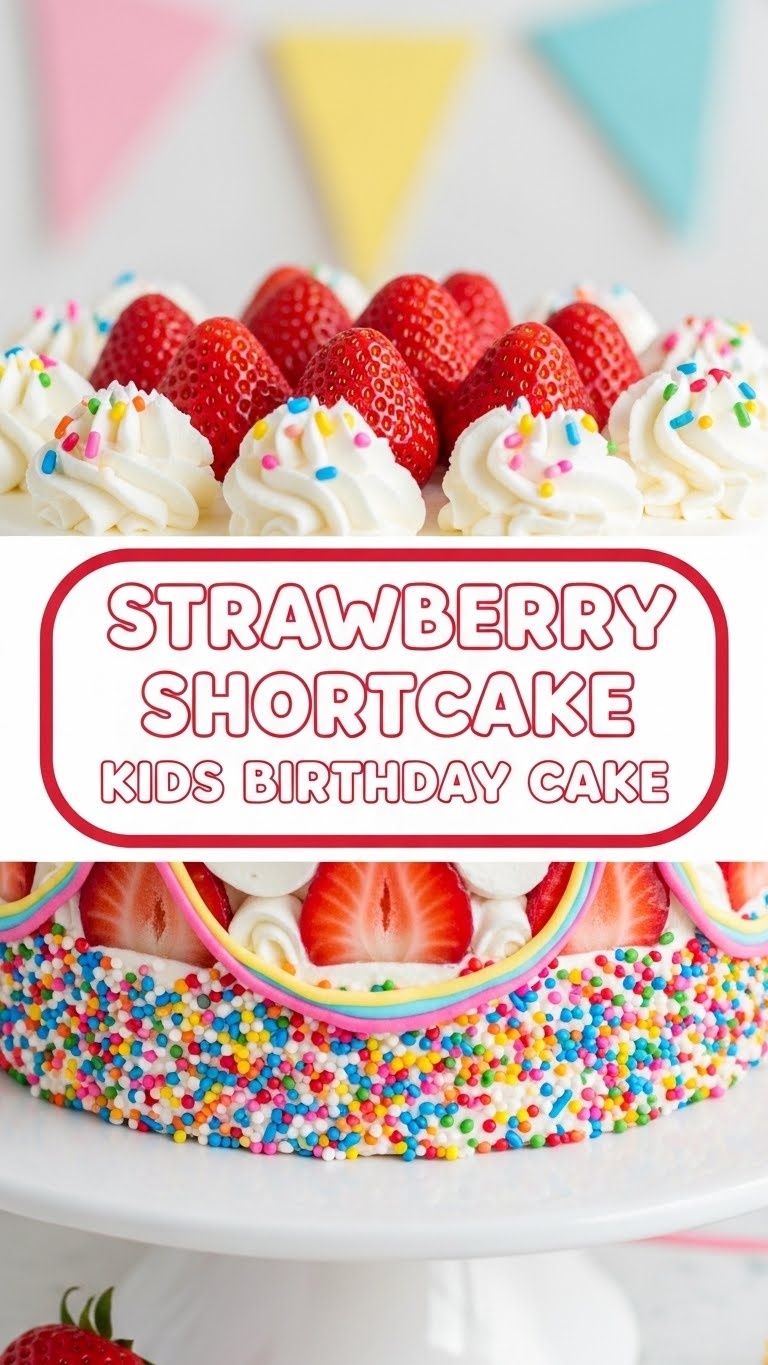
Okay, friend, let’s be real. You’ve got a little human’s birthday coming up, and they’re probably already bouncing off the walls. You *could* buy some store-bought sugar bomb, or you could whip up something that screams ‘I love you and also I’m pretty cool in the kitchen.’ Guess which one we’re doing? Ding, ding, ding! It’s the latter. And trust me, this Strawberry Shortcake Kids Birthday Cake is so delightful, you’ll wonder why you ever bothered with those sad, pre-packaged things.
Why This Recipe is Awesome
Because nobody needs extra stress when tiny humans are involved, am I right? This recipe is basically your secret weapon for looking like a baking superstar without actually breaking a sweat (or a mental state). It’s not just a cake; it’s a fluffy cloud of vanilla goodness, piled high with sweet, juicy strawberries and mountains of whipped cream. What’s not to love?
- It’s a **certified crowd-pleaser** for kids and adults who still believe in magic.
- **Super easy!** Seriously, if I can do it without a major kitchen fire, so can you.
- Looks like you spent hours, but it’s actually a **quick bake**. Win-win!
- Fresh fruit! So, it’s basically health food. Don’t @ me.
- No fancy pants equipment required. Just your basic kitchen tools and a can-do attitude.
Ingredients You’ll Need
Here’s your grocery list, presented with a dose of reality. Get ready to gather your delicious arsenal!
For the Cake (or “Magical Fluffy Base”):
- 2 ½ cups all-purpose flour: The backbone of our fluffy dreams.
- 1 ½ cups granulated sugar: Because, well, it’s cake.
- 3 ½ teaspoons baking powder: To make it rise like your hopes on a Friday night.
- ½ teaspoon salt: Just a pinch, to make all the sweet stuff sing.
- ½ cup unsalted butter: Room temperature, please! Cold butter is the enemy of fluffy.
- 2 large eggs: Also room temperature, for better blending.
- 1 cup whole milk: For richness. Skim milk need not apply.
- 2 teaspoons vanilla extract: The fairy dust of baking, do not skimp!
For the Strawberry Mountain:
- 2 lbs fresh strawberries: Ripe, juicy, the absolute stars of the show!
- ¼ cup granulated sugar: Just a bit, to coax out those delicious juices.
For the Whipped Cloud Cream:
- 2 cups heavy cream: Must be COLD! This is non-negotiable for whipping.
- ½ cup powdered sugar (confectioners’ sugar): For sweetness and a smooth, dreamy texture.
- 1 teaspoon vanilla extract: More fairy dust! You can never have too much.
Step-by-Step Instructions
Alright, let’s get down to business. Follow these steps, and you’ll be a strawberry shortcake wizard in no time!
- **Preheat & Prep:** Fire up your oven to 350°F (175°C). Grease and flour two 8-inch round cake pans. Don’t skip this, unless you enjoy scraping cake out with a spoon later. Trust me.
- **Berry Bliss Begins:** Wash and hull your beautiful strawberries. Slice ’em up (however you like, though thinner slices are easier to stack). Toss them gently in a bowl with that ¼ cup of sugar. Let them hang out and get juicy while you make the cake. This is where the magic starts.
- **Dry Mix It Up:** In a large bowl, whisk together the flour, sugar, baking powder, and salt. Give it a good swirl to combine everything evenly.
- **Wet Mix (Part 1):** In a separate, medium bowl, beat your room temperature butter until it’s light and creamy. Add the eggs one at a time, beating well after each addition. Stir in that glorious vanilla extract.
- **Combine Forces:** Now for the grand merger! Gradually add the dry ingredients to the wet ingredients, alternating with the milk. **Start and end with the dry ingredients.** Mix just until *barely* combined. **DO NOT OVERMIX!** A few small lumps are totally okay, promise. Overmixing leads to tough cake, and nobody wants that.
- **Bake It Up:** Divide your batter evenly between the two prepared cake pans. Pop them into the preheated oven for 25-30 minutes, or until a toothpick inserted into the center comes out clean.
- **Cool Down:** Let the cakes cool in their pans for about 10 minutes. Then, carefully invert them onto a wire rack to cool completely. This is the hardest part for me – **patience, young padawan!** Warm cake + cold cream = disaster.
- **Whip It Good:** While your cakes are cooling their jets, grab that *cold* heavy cream. Pour it into a *chilled* bowl (chilling your bowl and whisk attachment for 15 minutes makes a HUGE difference!). Beat with an electric mixer on medium-high speed until soft peaks form. Then, slowly add the powdered sugar and vanilla. Continue beating until you get stiff, glorious peaks.
- **Assemble Your Masterpiece:** Once your cake layers are completely, utterly cool, place one layer on your serving platter. Spoon about half of your juicy strawberries (and their delicious syrup!) over the cake layer, then dollop on a generous amount of whipped cream. Place the second cake layer on top, and repeat with the remaining strawberries and whipped cream. Garnish with a few whole berries for extra pizzazz.
- **Devour:** Slice and serve your creation! Prepare for oohs, aahs, and requests for seconds. You’ve earned this.
Common Mistakes to Avoid
Let’s sidestep the pitfalls, shall we? Learn from my past kitchen mishaps (so you don’t have to!).
- **Using warm cream for whipping:** This is a cardinal sin. Your whipped cream will be sad soup. **Always chill your cream, bowl, and whisk** for at least 15 minutes before whipping.
- **Overmixing the cake batter:** Rookie mistake! This develops the gluten too much, resulting in a tough, dense cake. Mix *just* until combined. Lumps are your friends here.
- **Not cooling the cakes completely:** I know, the temptation is real. But if your cake layers are even slightly warm, they’ll melt your beautiful whipped cream into a soupy mess. **Patience is key!**
- **Eyeballing ingredients:** Baking is science, folks, not abstract art (well, not entirely). Use proper measuring cups and spoons for accuracy.
- **Using frozen strawberries:** While convenient, frozen strawberries tend to release too much water, making your shortcake soggy. **Fresh is best** for this recipe.
Alternatives & Substitutions
Feeling rebellious? Or just ran out of something? Here are some simple tweaks to keep the party going.
- **Shortcake Base Hack:** If you’re really, *really* short on time (and feeling a bit lazy, no judgment), you *could* use store-bought angel food cake or even pound cake. But, IMO, the homemade fluffy cake base in this recipe is truly superior.
- **Berry Bonanza:** Not just strawberries! Feel free to mix in other berries like raspberries, blueberries, or even sliced peaches. A berry medley would be absolutely delish.
- **Creamy Alternatives:** While heavy cream is the traditional and best choice for classic whipped cream, there are dairy-free whipped cream alternatives out there if needed. Just make sure they’re specifically for whipping.
- **Flavor Twist:** Add a tiny splash of almond extract to your whipped cream for a subtle, nutty note that complements the berries beautifully. Chef’s kiss!
FAQ (Frequently Asked Questions)
Got questions? I’ve got (casual and hopefully helpful) answers!
- **Can I make this cake ahead of time?** Absolutely! You can bake the cake layers a day in advance. Once fully cooled, wrap them tightly in plastic wrap and store at room temperature. The strawberries are best macerated (sugared) a few hours before assembly, and the whipped cream is always best made just before serving.
- **My whipped cream isn’t whipping! What gives?** Oh no! Is your cream *very* cold? Is your mixing bowl and whisk chilled? And most importantly, are you using heavy cream (not whipping cream, half-and-half, or light cream)? These are the usual culprits.
- **How do I store leftovers?** Keep any leftover shortcake covered in the fridge. It’s best eaten within 1-2 days before the cake starts getting too soggy from the berries and cream.
- **Is this recipe *actually* kid-friendly for baking?** Totally! Kids can help hull and slice strawberries (with supervision for knives!), measure dry ingredients, and definitely help with the “decorating” – i.e., enthusiastically piling on berries and cream.
- **Can I use self-rising flour instead of all-purpose?** You *can*, but if you do, omit the baking powder and salt listed in the recipe, as self-rising flour already contains leavening and salt. I personally prefer all-purpose for more control.
- **What if my cake is dry?** This usually happens if you overbaked it (check your oven temp and stick to the recommended baking time!) or if you overmixed the batter (which makes it tough). Follow the steps carefully for a moist crumb!
Final Thoughts
See? You’re practically a pastry chef now. This Strawberry Shortcake isn’t just a cake; it’s a hug in dessert form, perfect for celebrating tiny humans (or just celebrating that you made it through another week). Go on, bask in the glory of your creation. You earned that slice (or three). Happy baking, superstar!
