
So, you’re staring at those sad, spotty bananas on your counter, wondering if they’re still edible or if they’ve officially crossed into ‘pet food’ territory. Don’t worry, we’ve all been there. But what if I told you those overripe beauties are actually a secret ingredient for something *magnificent*? And what if that magnificent thing also involved juicy strawberries and took minimal effort? Enter: your new best friend, Strawberry Banana Bread.
Why This Recipe is Awesome
Because let’s be real, life is too short for bland, complicated recipes. This isn’t just banana bread; it’s banana bread that decided to get dressed up for a party with some fabulous strawberries. It’s moist, it’s flavorful, and frankly, it’s pretty much **idiot-proof**. Even I, Queen of Occasionally Burning Water, have mastered this. Plus, it smells like pure happiness when it’s baking, and who doesn’t need more of that? It’s basically a hug in loaf form.
Ingredients You’ll Need
Gather your troops, folks. Here’s what you’ll need to conquer this delicious quest:
- All-Purpose Flour: 1 ½ cups. The backbone of our bread. Don’t overthink it.
- Granulated Sugar: ¾ cup. For that classic sweet kick. We’re not health gurus here, we’re making bread!
- Baking Soda: 1 teaspoon. Our little leavening hero.
- Salt: ½ teaspoon. Just a pinch to balance things out.
- Large Eggs: 2. Room temperature, if you’re feeling fancy (and for better mixing!).
- Unsalted Butter: ½ cup (1 stick), melted and slightly cooled. Because butter makes everything better. Fight me.
- Vanilla Extract: 1 teaspoon. The liquid gold of baking.
- Super Ripe Bananas: 3 medium-sized, mashed. Seriously, the spottier, the better! This is their moment to shine.
- Fresh Strawberries: 1 cup, hulled and chopped. Because, why not? They’re pretty and delicious. Plus, antioxidants, right? You’re basically eating a fruit salad.
Step-by-Step Instructions
Ready to get your bake on? Let’s do this!
- Prep Your Station: First things first, preheat your oven to 350°F (175°C). Then, grease and flour a 9×5-inch loaf pan. Or, if you’re lazy like me, use parchment paper. It’s a lifesaver, **FYI**.
- Whisk the Dry Crew: In a large bowl, whisk together the flour, granulated sugar, baking soda, and salt. Give it a good mix so there are no surprises later.
- Mash ‘Em Up: In a separate bowl, mash those ripe bananas with a fork until they’re mostly smooth but still have a few chunky bits. Texture, darling!
- Wet Ingredients Party: In another medium bowl (yes, more bowls, embrace it!), whisk the melted butter, eggs, and vanilla extract until well combined.
- Combine & Conquer: Pour the wet ingredients into the dry ingredients. Mix gently with a spatula until just combined. **Do not overmix!** Lumps are okay; tough bread is not.
- Fold in the Stars: Gently fold in the mashed bananas and chopped strawberries. We want to be delicate here so the strawberries don’t turn into pink mush.
- Pan It Up: Pour the batter evenly into your prepared loaf pan. Give it a little wiggle to settle.
- Bake It ‘Til Golden: Pop that beautiful pan into the preheated oven for about 55-65 minutes. You’ll know it’s done when a wooden skewer or toothpick inserted into the center comes out clean.
- Cool Down: Let the bread cool in the pan for about 10-15 minutes before transferring it to a wire rack to cool completely. Patience is a virtue, especially when warm bread is involved.
Common Mistakes to Avoid
Listen, we all make mistakes. But here are a few to sidestep if you want to be a baking superstar:
- Overmixing the Batter: This is the cardinal sin of quick breads. Mix until just combined. Lumpy is lovely, tough is tragic.
- Using Under-ripe Bananas: See those green bananas? Put them back. We need brown spots. Lots of ’em. They’re sweeter and easier to mash.
- Not Preheating the Oven: Rookie mistake! Your oven needs to be at temperature when the bread goes in for proper rising.
- Cutting it While Hot: I know, it’s tempting. But resist! It will crumble and won’t slice cleanly. Give it some time to chill.
Alternatives & Substitutions
Feeling adventurous? Or just out of something crucial? No worries, I got you!
- Frozen Strawberries: Yep, totally fine! Just thaw them out first and pat them dry really well to avoid extra moisture. Soggy bread is sad bread.
- Dairy-Free: Swap the butter for a dairy-free butter alternative or even a neutral oil like canola or vegetable oil.
- Spices: Want to amp up the flavor? Add ½ teaspoon of cinnamon or a pinch of nutmeg to the dry ingredients. It’s a game-changer!
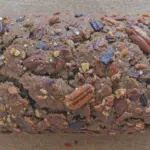
- Nuts/Chocolate: Feel free to toss in ½ cup of chopped walnuts, pecans, or chocolate chips with the strawberries for an extra treat.
FAQ (Frequently Asked Questions)
- Can I use margarine instead of butter? Well, technically yes, but why hurt your soul like that? Butter just tastes better, **IMO**. If you must, use a good quality margarine.
- How ripe should my bananas be? The riper, the better! We’re talking mostly black or very dark brown spots. That’s where all the sweet, banana-y goodness hides.
- My bread isn’t rising! What happened? Did you use fresh baking soda? Old baking soda loses its power. Also, make sure your oven was preheated properly.
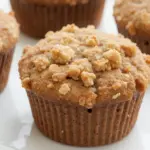
- Can I make muffins instead? Absolutely! Pour the batter into a greased muffin tin and bake for about 20-25 minutes, or until a toothpick comes out clean.
- How do I store this deliciousness? Keep it covered at room temperature for up to 3 days, or in the fridge for up to a week. It also freezes beautifully for up to 3 months!
- Can I add other fruits? Go wild! Blueberries, raspberries, even a diced apple could be fun. Just keep the total fruit volume around 1 ½ cups.
Final Thoughts
There you have it, folks! Your new go-to recipe for when you want something comforting, delicious, and not-too-fussy. This Strawberry Banana Bread is perfect for breakfast, a snack, or just because you deserve a treat. Now go impress someone—or yourself—with your new culinary skills. You’ve earned it!
