So you’re craving something tasty but too lazy to spend forever in the kitchen, huh? Same. We’ve all been there, staring into the fridge like it owes us answers, when all we really want is comfort food that practically makes itself. Enter the Mexican Enchilada Casserole, your new BFF for those ‘I want delicious but also my couch’ kind of nights.
Why This Recipe is Awesome
Okay, first things first: this isn’t your grandma’s enchilada recipe (unless your grandma was secretly a kitchen wizard who also loved binge-watching Netflix). This casserole is basically the cheat code to amazing Mexican-inspired flavors without all the fuss of individually rolling tortillas. Think of it as enchiladas’ chill, laid-back cousin who shows up in sweats but still looks fabulous.
It’s **super forgiving**, uses up leftover shredded chicken (hello, meal prep MVP!), and honestly, it’s pretty much **idiot-proof**. Even I, who once mistook baking soda for baking powder (don’t ask), manage to nail this every single time. Plus, it feeds a crowd or gives you glorious leftovers for days. Win-win-win!
Ingredients You’ll Need
Alright, gather your troops! No need to raid a specialty store; most of this stuff is probably already chilling in your pantry.
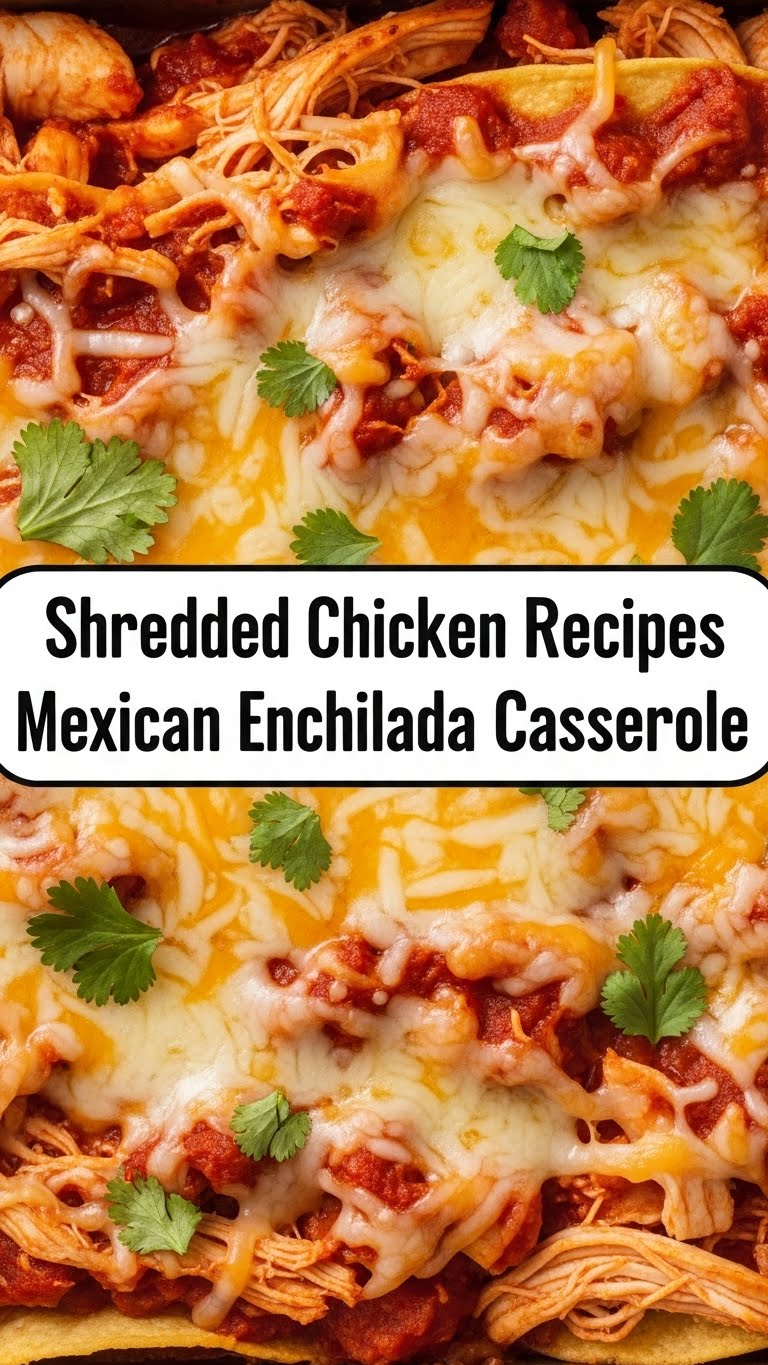
- **Shredded Chicken (about 3 cups):** Your leftover rotisserie chicken’s big moment, or just boil/bake some breasts. Don’t be shy!
- **Corn Tortillas (12-15):** The backbone of our casserole. Or flour, if you’re feeling rebellious, but corn holds up better, IMO.
- **Enchilada Sauce (1 large can, ~28 oz):** Red or green, your call! I usually go red because it’s classic, but green is a zesty party too. Don’t cheap out too much here; it’s a flavor bomb.
- **Canned Diced Green Chiles (1 small can, ~4 oz):** Adds a little somethin’ somethin’ without being face-melting spicy.
- **Onion (1 small, chopped):** Adds depth. Don’t cry over it; it’s worth it.
- **Garlic (2 cloves, minced):** Because everything is better with garlic. Period.
- **Cheese (2 cups, shredded Monterey Jack, Colby Jack, or Mexican blend):** The gooey, melty heart of our masterpiece. More is always an option, just sayin’.
- **Cilantro (fresh, for garnish):** Optional, but adds a pop of color and freshness. If you’re one of those ‘cilantro tastes like soap’ people, skip it. No judgment.
- **Olive Oil (1 tbsp):** Just a tiny bit for sautéing.
- **Salt & Pepper:** To taste, naturally.
Step-by-Step Instructions
Deep breaths, you got this! It’s easier than assembling IKEA furniture, I promise.
- **Preheat & Prep:** Get your oven cranked up to **375°F (190°C)**. Lightly grease a 9×13 inch baking dish. This prevents sad, stuck-on bits.
- **Sauté Aromatics:** Heat olive oil in a skillet over medium heat. Toss in your chopped onion and cook until softened, about 3-5 minutes. Add the minced garlic and cook for another minute until fragrant. **Don’t burn it!**
- **Mix the Filling:** In a large bowl, combine the shredded chicken, sautéed onion and garlic, green chiles, about half a cup of your enchilada sauce, and half a cup of shredded cheese. Stir it all up like you mean it. Season with salt and pepper.
- **Sauce the Base:** Pour about half a cup of enchilada sauce into the bottom of your prepared baking dish. Spread it around. This creates a cozy bed for our tortillas.
- **Layer One (Tortillas):** Arrange about 4-5 corn tortillas over the sauce, overlapping them slightly to cover the bottom. If they don’t fit perfectly, tear them into pieces. Nobody’s judging your tortilla puzzle skills.
- **Layer One (Filling & Cheese):** Spread half of your chicken mixture evenly over the tortillas. Sprinkle about another half cup of cheese on top of the chicken.
- **Repeat:** Drizzle another half cup of enchilada sauce over the cheese. Repeat with another layer of tortillas, the remaining chicken mixture, and another half cup of cheese.
- **Final Top-Off:** Place the last layer of tortillas on top. Pour the remaining enchilada sauce over everything, making sure the tortillas are well-covered. Sprinkle the last cup of cheese generously over the top. **More cheese = more happiness!**
- **Bake It Up:** Pop the dish into your preheated oven. Bake for **25-30 minutes**, or until the casserole is bubbly around the edges and the cheese on top is gloriously melted and slightly golden.
- **Rest & Garnish:** Let it cool for 5-10 minutes before serving. This lets it set up a bit, so it doesn’t just turn into a delicious pile of mush. Garnish with fresh cilantro, sour cream, or avocado slices if you’re feeling fancy. Dig in!
Common Mistakes to Avoid
We’ve all been there, making a glorious mess. Learn from my (many) culinary blunders.
- **Thinking you don’t need to preheat the oven:** Rookie mistake! Your casserole will cook unevenly and take forever. **Always preheat!**
- **Skimping on the enchilada sauce:** This isn’t a dry casserole, friend. It needs that saucy goodness. Use enough to keep things moist and flavorful.
- **Not letting it rest:** Patience, young padawan! Cutting into it immediately will make it fall apart. Give it 5-10 minutes to chill and solidify.
- **Overcooking the garlic:** Burnt garlic is bitter garlic. Add it near the end of the onion sauté and cook just until fragrant, not brown.
- **Using cold tortillas straight from the fridge:** If your corn tortillas are stiff, a quick 10-15 seconds in the microwave (wrapped in a damp paper towel) can make them more pliable and prevent cracking when layering. FYI.
Alternatives & Substitutions
Feeling adventurous? Or just realized you’re missing an ingredient? No worries, we can roll with it.
- **Chicken Swap:** Not a chicken fan? Cooked ground beef, turkey, or even black beans (for a vegetarian version!) work wonderfully here. Just make sure whatever you use is already cooked.
- **Tortilla Talk:** Corn is traditional and holds its shape best, but flour tortillas can be used for a softer casserole. Or, if you’re gluten-free, look for gluten-free corn tortillas or even sweet potato slices (though that’s a whole new adventure).
- **Cheese Please:** Any good melting cheese works! Cheddar, Colby, Monterey Jack, or a Mexican blend are all great. Want a kick? Add some pepper jack!
- **Spice It Up:** Add a pinch of cayenne pepper or a dash of your favorite hot sauce to the chicken mixture if you like extra heat. Or throw in some diced jalapeños (fresh or pickled).
- **Veggies Welcome:** Feel free to sneak in some cooked bell peppers, corn, or black beans into the chicken mixture for extra nutrients and texture. Just don’t overload it!
FAQ (Frequently Asked Questions)
Got questions? I’ve got answers (mostly).
- **Can I make this ahead of time?** Absolutely! Assemble the entire casserole, cover it tightly with foil, and refrigerate for up to 24 hours. When ready to bake, add about 10-15 minutes to the baking time since it’s starting cold.
- **What kind of shredded chicken should I use?** Seriously, any kind! Leftover rotisserie chicken is the ultimate hack. Or boil/bake a couple of chicken breasts and shred them. Easy peasy.
- **Is it spicy?** Generally, no, not unless you add extra chiles or hot sauce. The canned green chiles are usually mild, just adding flavor. You’re in control of the heat!
- **Can I freeze this casserole?** You betcha! Bake it, let it cool completely, then cover tightly with foil and plastic wrap. It’ll last about 2-3 months in the freezer. Thaw overnight in the fridge and reheat (covered) in the oven until warmed through.
- **What should I serve with it?** A simple side salad, some rice, refried beans, or just a big dollop of sour cream and some avocado slices. Keep it simple, it’s a star on its own.
- **My tortillas are getting soggy, help!** For this casserole, a little sogginess is part of the charm; it’s a casserole, not a crispy taco. Embrace the cozy texture!
Final Thoughts
See? Told ya it was easy! You just whipped up a show-stopping (or at least, hungry-stomach-stopping) meal without breaking a sweat. So go ahead, pat yourself on the back, grab a fork, and enjoy the fruits of your effortless labor. Now go impress someone—or yourself—with your new culinary skills. You’ve earned it! BTW, don’t forget to snap a pic and send it to me. Happy eating!


