So you’ve scrolled through Instagram, seen those adorable mini cakes, and thought, “I need that in my life, but also, can it be easy?” Yep, you and me both, friend. Welcome to the world of the Round Bento Cake – your new bestie for instant gratification and impressing literally anyone (or just your cat, no judgment). It’s tiny, it’s cute, and it’s **OMG** so much fun to make!
Why This Recipe is Awesome
Why is this recipe the bee’s knees? First off, it’s tiny! Less cake, less guilt, more “OMG, I made this?!” moments. It’s perfectly portioned for one (or two if you’re feeling generous, but let’s be real). Plus, it’s like the ultimate blank canvas for your inner Picasso, but with frosting. And the best part? It’s genuinely *not* complicated. If I can whip this up without setting off the smoke detector, you totally can too. It’s practically idiot-proof.
Ingredients You’ll Need
- For the Cake:
- All-purpose flour: The backbone of all deliciousness.
- Granulated sugar: Because life’s sweet, and so should your cake be.
- Baking powder: Our little lift-off agent. Don’t skip it unless you like sad, flat cakes.
- Salt: Just a pinch, to make everything pop. Like a tiny flavor wizard.
- Unsalted butter (softened): The good stuff. No cheap margarine, please! Your taste buds deserve better.
- Egg (large): One perfectly sized egg. Not two, not half, just one.
- Milk (whole or 2%): Helps things get moist. Trust me, you want moist.
- Vanilla extract: The **MVP** of flavor. Go for the good stuff, it makes a difference!
- For the Frosting & Decor:
- Unsalted butter (softened): Again, quality matters!
- Powdered sugar: For that smooth, melt-in-your-mouth sweetness. Sift it if you’re feeling fancy (and want to avoid lumps).
- Heavy cream or milk: To get that perfect, spreadable consistency.
- Vanilla extract: More vanilla! Always more vanilla.
- Food coloring (optional): To make it pretty! Or chaotic, your call.
- Sprinkles or other tiny edible bling: Because why not? Sparkle it up!
Step-by-Step Instructions
- Preheat & Prep: Get your oven to 350°F (175°C). **Don’t skip this, seriously.** Grease and flour two 4-inch round cake pans or line a muffin tin (if using large cupcake liners as your ‘pans’).
- Dry Mix Fun: In a medium bowl, whisk together the flour, sugar, baking powder, and salt. Give it a good whisk, like you’re angry at Monday.
- Wet Mix Wonders: In another bowl, cream the softened butter and egg until light and fluffy. Stir in the milk and vanilla. Don’t overmix, just combine.
- Combine Forces: Gently fold the dry ingredients into the wet ingredients. Mix until *just* combined. A few lumps are okay; overmixing makes tough cakes, and we don’t do tough cakes here.
- Bake It Up: Divide the batter evenly between your prepared pans. Bake for 18-22 minutes, or until a toothpick inserted into the center comes out clean. **Keep an eye on them!** Tiny cakes bake fast.
- Cool Down: Let your adorable cake layers cool in the pans for 10 minutes, then gently transfer them to a wire rack to cool completely. Patience, young padawan!
- Frosting Time: While the cakes cool, whip up your buttercream! Beat softened butter until creamy, then gradually add powdered sugar. Pour in cream/milk and vanilla. Beat until light and fluffy. Add food coloring now if you’re going colorful.
- Assemble Your Masterpiece: Once cakes are *fully* cool (this is **crucial**!), place one layer on your serving plate. Spread a dollop of frosting on top, then place the second layer. Frost the top and sides of the whole bento cake.
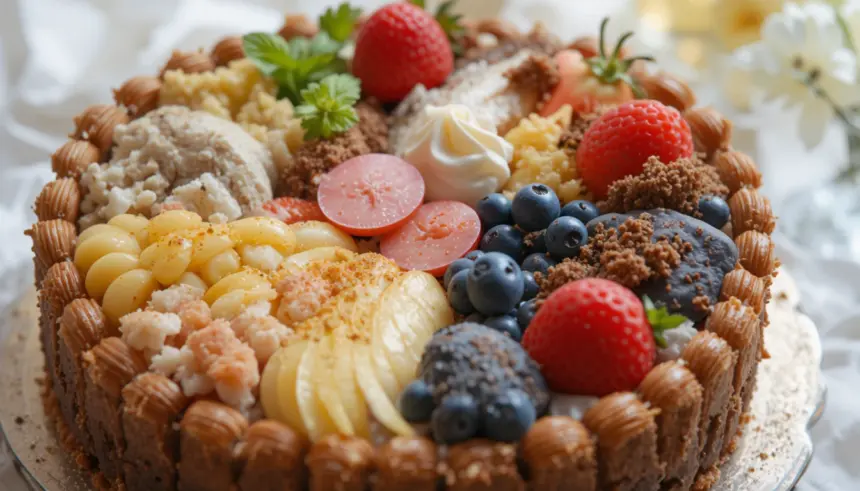
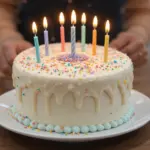
- Decorate & Devour: Go wild with sprinkles, a simple swirl, or whatever makes your heart sing. Snap a pic for the ‘gram, then dig in! You earned this.
Common Mistakes to Avoid
- **Not preheating the oven:** Rookie mistake, seriously. Your cakes won’t rise properly and will look sad. Like me on a Monday morning.
- **Overmixing the batter:** You want tender cake, not a rubber puck. Mix until *just* combined, no more.
- **Opening the oven door too early:** Curiosity killed the cake! Let them bake undisturbed for at least two-thirds of the baking time.
- **Frosting warm cakes:** Oh honey, no. This just leads to a melty, crumbly disaster. **Always wait until your cakes are completely cool.** I learned this the hard way, so you don’t have to.
- **Eyeballing ingredients:** Baking is a science, my friend. Use measuring cups and spoons! Unless you’re a baking wizard, then carry on.
Alternatives & Substitutions
- **Flavor Swap:** Want chocolate? Swap 2 tablespoons of flour for cocoa powder in the dry mix. Lemon lover? Add lemon zest to the batter. **Vanilla is classic, but variety is the spice of life!**
- **Frosting Fun:** Not a buttercream fan? Try a simple cream cheese frosting (cream cheese + butter + powdered sugar) or even a whipped ganache. If you’re feeling lazy, grab a tub of store-bought frosting and **zhuzh** it up with extra vanilla or a pinch of salt. No one’s judging here.
- **Dairy-Free:** Use plant-based milk and vegan butter. It works surprisingly well, though the texture might be slightly different.
- **Gluten-Free:** Swap out regular flour for a 1:1 gluten-free baking blend. Easy peasy!
FAQ (Frequently Asked Questions)
- “Can I use margarine instead of butter?” Well, technically yes, but why hurt your soul (and your cake’s flavor) like that? **Butter just tastes better, IMO.** Treat yourself!
- “My cake stuck to the pan! What happened?” Ah, a classic. Did you grease *and* flour properly? Or maybe your pans are just grumpy. Next time, try parchment paper circles on the bottom for extra insurance.
- “How do I store this tiny masterpiece?” In an airtight container at room temperature for up to 2 days, or in the fridge for up to 4 days. If it lasts that long, you have more willpower than me!
- “Can I make this ahead of time?” Absolutely! Bake the cake layers, let them cool completely, wrap them tightly in plastic wrap, and freeze them for up to a month. Thaw at room temp before frosting. Frosting can be made a day or two ahead and stored in the fridge.
- “What if I don’t have 4-inch pans?” No worries! You can use large muffin tins (fill them about halfway). You’ll probably get 3-4 cupcake-sized layers, which you can stack into mini bento cakes. Creativity is key!
Final Thoughts
See? That wasn’t so scary, was it? You just made yourself an adorable, delicious Round Bento Cake! Now go impress someone—or yourself—with your new culinary skills. You’ve earned it! Seriously, take a bow. And then, for goodness sake, eat that cake!

