So, you’re looking to woo someone special (or just treat yourself ’cause you’re awesome) with a dessert that screams ‘I made an effort!’ but secretly whispers ‘It took like 20 minutes, tops!’? You’ve come to the right place, my friend. We’re about to dive into the world of ridiculously easy, unbelievably delicious, and seriously romantic desserts for two. No stress, maximum impress! Ready to become a kitchen wizard with minimal effort?
Why This Recipe is Awesome
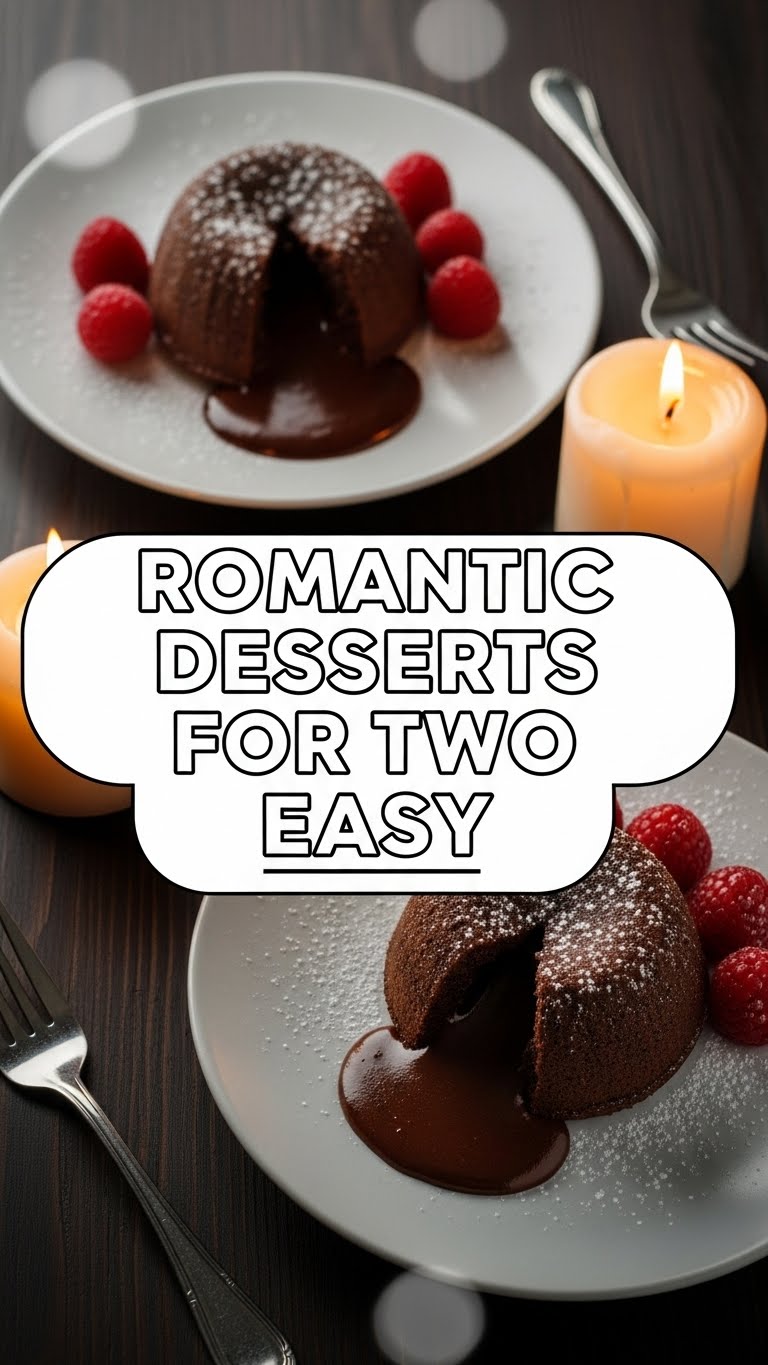
Forget slaving away for hours in a hot kitchen. This recipe is your secret weapon. It’s practically idiot-proof (and trust me, if *I* can nail it, anyone can). We’re talking individual chocolate lava cakes here – the kind that look incredibly fancy, taste divine, and deliver that ‘wow’ factor without the ‘whew, I’m exhausted’ factor. Plus, it’s perfectly portioned for two, so no awkward leftovers or sharing disputes. Score! It’s rich, gooey, chocolaty, and just screams “I love you (and chocolate).”
Ingredients You’ll Need
Gather your magic potion components. These are all pretty standard, so no wild goose chases required!
- 1/2 cup (1 stick) unsalted butter: The unsung hero of all good baking.
- 4 oz (about 115g) good quality dark chocolate: Because life’s too short for bad chocolate, am I right? Aim for 60-70% cocoa for that perfect balance.
- 1 large egg: Just one, ’cause we’re keeping it simple.
- 1 large egg yolk: For extra richness and that dreamy, custardy center. Hello, decadence!
- 1/4 cup granulated sugar: Sweet, but not *too* sweet – we want the chocolate to shine.
- 1 teaspoon vanilla extract: Your trusty flavor friend.
- 2 tablespoons all-purpose flour: A tiny bit for structure, not much. Don’t overdo it!
- Pinch of salt: It makes everything better, seriously. Balances the sweetness and enhances the chocolate.
- Optional for serving: Powdered sugar for dusting, fresh raspberries, or a scoop of vanilla bean ice cream (because presentation matters!).
Step-by-Step Instructions
Let’s get cooking! These steps are so simple, you’ll wonder why you haven’t made these sooner.
- **Preheat that oven, baby!** Get it to a scorching 425°F (218°C). While it’s heating, grab two 6-ounce ramekins. Lightly grease them with butter and dust with flour. Don’t skip this, unless you want your precious cakes stuck forever!
- In a microwave-safe bowl (or a double boiler if you’re feeling fancy), combine the butter and chopped dark chocolate. Microwave in 30-second bursts, stirring in between, until completely melted and smooth. Let it cool slightly for about 5 minutes.
- In a separate medium bowl, whisk together the large egg, egg yolk, granulated sugar, and vanilla extract until the mixture is pale and slightly thickened. You don’t need a stand mixer for this, just a good old whisk and a little elbow grease.
- Gently fold the cooled chocolate mixture into the egg mixture. Be gentle, we’re building dreams here, not battling a beast. Stop as soon as it’s just combined.
- Sift the flour and salt over the chocolate mixture. Fold again until *just* combined. **Overmixing is the enemy!** We want a light, tender crumb, not a tough one.
- Divide the luscious batter evenly between your two prepared ramekins. Place them on a baking sheet.
- Bake for 12-14 minutes. The edges should be set, but the center should still be jiggly when you gently shake the ramekin. That jiggle is your molten lava in the making!
- Carefully remove from the oven. Let them cool for just one minute. Run a knife around the edge of each ramekin, then invert each cake onto a serving plate. Dust with powdered sugar, add some fresh raspberries, or a scoop of ice cream. **Serve immediately!** Seriously, don’t wait.
Common Mistakes to Avoid
Even though this recipe is pretty foolproof, there are a few little pitfalls that can turn your molten masterpiece into a solid disappointment. Watch out for these:
- **Not preheating the oven:** Rookie move. Your oven needs to be blazing hot for that perfect rise and gooey center. Cold ovens yield sad, flat cakes.
- **Overbaking:** This is the *biggest* sin. You want lava, not a dry hockey puck. Keep a keen eye on that jiggle! Every oven is different, so start checking early.
- **Overmixing the batter:** This develops the gluten in the flour and makes your cake tough. We want tender, folks, not chewy. Fold gently until *just* combined.
- **Forgetting to grease and flour your ramekins:** Unless you want to serve your dessert *in* the ramekin (which is totally fine, but defeats the ‘invert and serve’ aesthetic), don’t skip this crucial step!
Alternatives & Substitutions
Feeling creative? Here are a few ways to tweak this perfect dessert to your liking!
- **White chocolate:** Feeling adventurous? Swap dark chocolate for white! It might be a tad sweeter, so adjust the sugar down by a tablespoon if you prefer. IMO, dark is king here, but you do you!
- **Add a kick:** A tiny splash (think 1/2 teaspoon) of Kahlua, Grand Marnier, or even espresso powder mixed in with the melted chocolate can really elevate the flavor profile. Just a touch, though!
- **Gluten-free:** Simply swap the all-purpose flour for a good quality GF all-purpose blend. Easy peasy.
- **Dairy-free:** Use a good quality dairy-free dark chocolate and vegan butter. These days, there are some fantastic options out there that won’t compromise on flavor.
FAQ (Frequently Asked Questions)
Got questions? I’ve got answers (and probably a sarcastic comment or two).
- Can I make these ahead? You can prep the batter and chill it in the fridge for a few hours. Just let it sit at room temperature for 15-20 minutes before baking. Freshly baked is always best, though, for maximum lava flow!
- My lava wasn’t runny! What happened? You probably overbaked it, friend. Less time in the oven next time! Remember, the center should still be quite jiggly.
- Do I really need good quality chocolate? Yes! It’s the absolute star of the show. Don’t skimp here, unless you want your dessert to taste ‘meh’ instead of ‘Mmm-mmm-MMMM!’
- Can I use regular eggs if I don’t have an extra yolk? You can, but that extra yolk adds a wonderful richness and helps achieve that perfect custardy texture. It’s a small detail that makes a big difference, FYI.
- What if I don’t have ramekins? No worries! You can use oven-safe mugs or small ceramic bowls. Just make sure they’re similar in size to ensure even baking. The baking time might vary slightly depending on their shape.
- Can I add a filling? Absolutely! For an extra surprise, drop a piece of caramel candy, a spoonful of Nutella, or a mini peanut butter cup into the center of the batter before baking. Talk about next-level indulgence!
Final Thoughts
See? Told ya it was easy! Now you’ve got a dazzling, decadent dessert that looks like it came straight from a fancy restaurant, but only *you* know it was a breeze. Go ahead, impress your S.O., or just enjoy a magnificent treat all to yourself. You’ve earned it, superstar! You’re officially a romantic dessert master. Now go get gooey!


