“`html
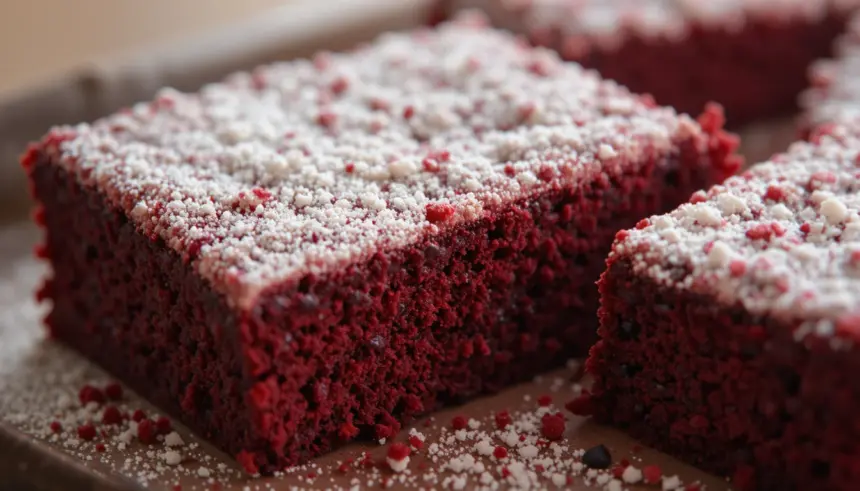
Red Velvet Brownies From a Box: Because Adulting is Hard (And Sometimes Deliciously Cheaty)
So you’re craving something tasty but too lazy to spend forever in the kitchen, huh? Same. We’ve all been there. You want that decadent chocolatey goodness, that pop of red velvet magic, but the thought of measuring fifty-leven ingredients makes you want to just order pizza. Well, my friend, I have a secret weapon for you, and it comes in a box. Let’s whip up some ridiculously easy Red Velvet Brownies that’ll make you feel like a baking genius, even if your main contribution was opening a bag.
Why This Recipe is Awesome
Let’s be real, life is too short for complicated dessert recipes. This one? It’s practically idiot-proof. We’re taking a shortcut with a trusty box mix and turning it into something that tastes like you spent all day slaving away. It’s the ultimate cheat code for impressing your friends, your significant other, or just your own discerning taste buds. Plus, who doesn’t love the vibrant color of red velvet? It’s like baking a little bit of joy. And the best part? Minimal cleanup. My kinda baking!
Ingredients You’ll Need
Here’s the really easy part. You probably have half of this stuff already.
- 1 box (about 18.3 oz) Devil’s Food cake mix (This is key for that deep chocolatey base!)
- 1/4 cup red food coloring (Go for the gel if you can, it gives a richer color without making things watery)
- 1/2 cup vegetable oil (Or whatever neutral oil you’ve got hiding in the pantry)
- 2 large eggs (The binder of champions)
- 1/4 cup water
- Optional, but highly recommended: A sprinkle of white chocolate chips or cream cheese frosting for drizzling. Because, why not?
Step-by-Step Instructions
Ready to feel like a culinary rockstar in 5 easy steps? Let’s do this.
- Preheat your oven to 350°F (175°C). **Grease and flour an 8×8 inch baking pan.** This is non-negotiable, folks. Nobody likes brownies stuck to the pan.
- In a medium bowl, combine the Devil’s Food cake mix, red food coloring, vegetable oil, eggs, and water. Stir it all together until it’s just combined. Don’t overmix, or your brownies might get tough. We’re going for fudgy, not leathery.
- The batter will be thick and gloriously red. If you’re adding white chocolate chips, now’s the time to gently fold them in. Resist the urge to lick the spoon. I know it’s tempting.
- Pour the batter into your prepared baking pan and spread it out evenly. It’s going to look a little… rustic. That’s okay!
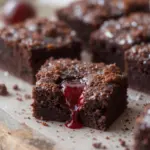
- Bake for 25-30 minutes, or until a toothpick inserted into the center comes out with moist crumbs attached. **Don’t overbake!** A slightly gooey center is the sign of a perfect brownie. Let them cool completely in the pan before cutting. Patience, my friend, patience.
Common Mistakes to Avoid
Even with a box mix, there are a few pitfalls to sidestep.
- Skipping the Preheat: Seriously, don’t do it. Your brownies will be sad and pale.
- Overmixing the Batter: A few lumps are fine! Overmixing develops gluten and leads to tough brownies. We want tender, fudgy goodness.
- Overbaking: This is probably the most common brownie crime. A dry brownie is a tragedy. Err on the side of underbaking slightly.
- Cutting While Hot: I know, I know, the smell is intoxicating. But let them cool completely for clean cuts. Trust me.
Alternatives & Substitutions
Feeling a little adventurous? Here are some easy swaps.
- Cake Mix: If you can’t find Devil’s Food, a regular chocolate cake mix will work, but you might need to add a touch more red food coloring to get that signature hue.
- Oil: Melted butter works too, but oil generally yields a fudgier brownie. I’m partial to the oil for this one.
- Add-ins: Feel free to toss in some chopped nuts, M&Ms, or even a swirl of cream cheese to the batter before baking. Just don’t go overboard, or things might not bake evenly.
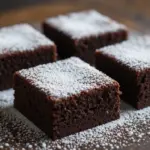
- Frosting Drizzle: Once cooled, melt some white chocolate chips and drizzle them over the top, or mix a little cream cheese frosting with milk to thin it out and drizzle that. So pretty!
FAQ (Frequently Asked Questions)
Got questions? I’ve got (mostly) casual answers.
- Can I use a different flavor of cake mix? Well, technically yes, but then they won’t be *red velvet* brownies, will they? Stick to chocolate for the best flavor base.
- My batter looks really stiff. Is that normal? Yep! Red velvet batters are usually on the thicker side. Just make sure you mix until the dry ingredients are incorporated.
- Can I make these in a different pan size? A 9×13 inch pan will work, but they’ll be thinner and bake faster. Keep an eye on them!
- How do I store these? Keep them in an airtight container at room temperature for up to 3 days. Though, let’s be honest, they probably won’t last that long.
- Can I freeze them? Absolutely! Wrap them well in plastic wrap and then foil, and they should be good in the freezer for about 2-3 months. Thaw at room temp.
- Do I *really* need red food coloring? If you want them to be red velvet, then yes. Otherwise, you’ve just made chocolate brownies. Which is fine, but not what we’re going for here!
Final Thoughts
See? Told you it was easy! These red velvet brownies are the perfect blend of convenience and deliciousness. They’re proof that you don’t need to be a master baker to create something truly delightful. So go forth, embrace the box mix, and whip up a batch of these gorgeous, fudgy treats. Now go impress someone—or yourself—with your new culinary skills. You’ve earned it! Happy baking (or, you know, assembling)!
“`
