So you’re craving something tasty but too lazy to spend forever in the kitchen, huh? Same. And let’s be real, those sad, spotty bananas on your counter are practically begging for a glow-up. Good news: we’re turning those overripe beauties into pure joy, one loaf of banana bread at a time. Get ready for a recipe so easy, you’ll wonder why you ever bought it from a cafe.
Why This Recipe is Awesome
This isn’t just *any* banana bread recipe; it’s *the* banana bread recipe for people who like to eat delicious things without too much fuss. Here’s why it’s about to become your new best friend:
- It’s **idiot-proof**. Seriously, if I can do it without setting off the smoke alarm, you’re golden. This recipe is super forgiving.
- **Minimal fuss, maximum flavor.** We’re talking one bowl (mostly), simple ingredients, and a payoff that’ll make your taste buds sing louder than a boy band.
- It’s a fantastic way to use up those bananas you *swore* you’d eat, but then… life happened. No food waste guilt here, just pure, unadulterated deliciousness.
- Your kitchen will smell like a warm hug. Trust me, it’s an instant mood booster and makes everyone think you’re Martha Stewart.
Ingredients You’ll Need
Gather your troops! Most of these are probably already lurking in your pantry, just waiting for their moment to shine.
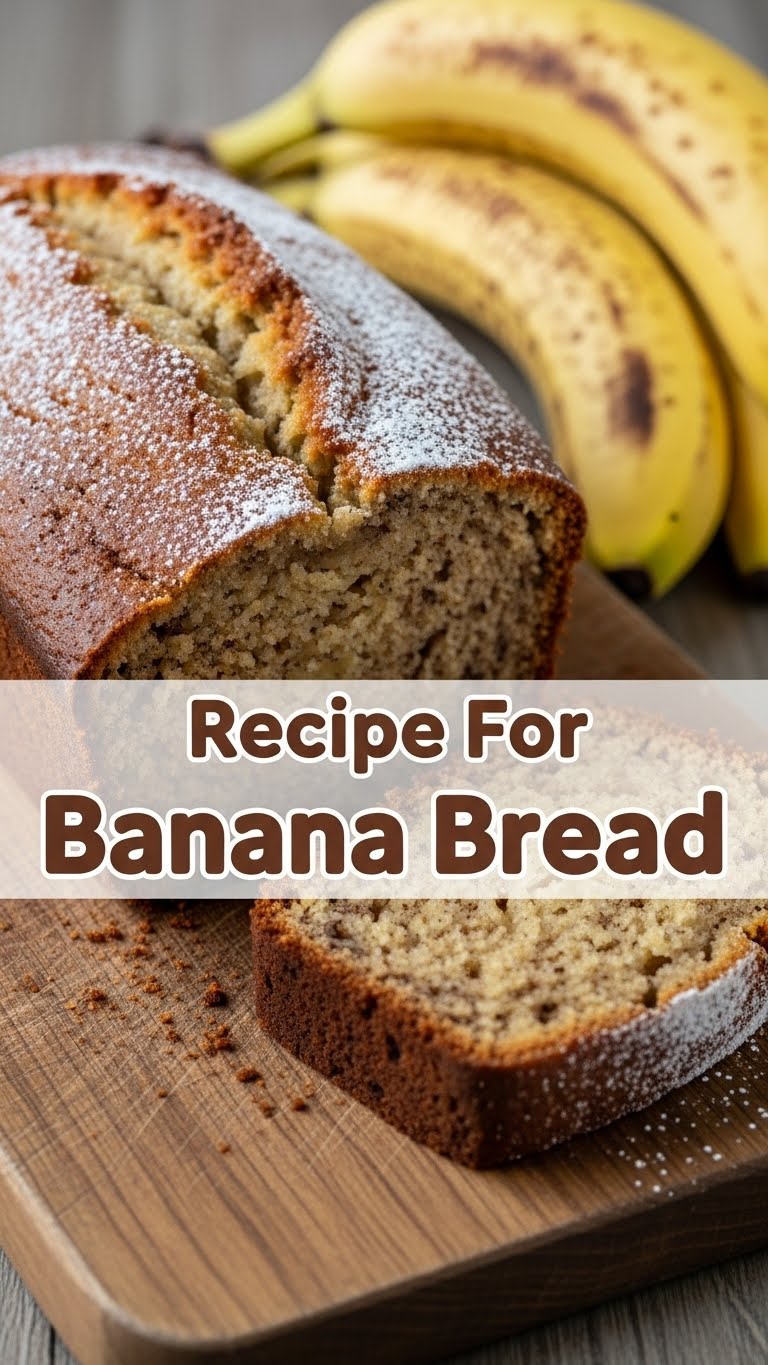
- Overripe Bananas (3-4 medium): The spottier, the better! We’re talking brown, mushy, practically liquified. Don’t be shy; these are the secret to epic flavor and moisture.
- All-Purpose Flour (1 ½ cups): The backbone of our bread. Nothing fancy needed here.
- Granulated Sugar (¾ cup): Sweetness! Adjust if your bananas are *super* sweet or if you prefer less.
- Egg (1 large): Our trusty binder, making everything stick together like glue.
- Unsalted Butter (½ cup, melted): Adds richness and moisture. If you only have salted, just reduce the added salt by a tiny pinch.
- Baking Soda (1 teaspoon): The magic leavening agent that makes it rise and get all fluffy. Don’t skip this, unless you want a banana brick.
- Salt (½ teaspoon): Balances the sweetness and enhances all those lovely banana flavors. Crucial!
- Vanilla Extract (1 teaspoon): Because everything is better with a splash of vanilla. Duh.
- Optional Mix-ins: Chocolate chips, walnuts, pecans (½ cup-1 cup) – because sometimes you gotta live a little.
Step-by-Step Instructions
Follow these steps, and you’ll be swimming in banana bread bliss in no time. Promise!
- **Preheat & Prep:** First things first, preheat your oven to **350°F (175°C)**. Then, generously grease and flour a 9×5 inch loaf pan. Or, if you’re feeling fancy (and want super easy cleanup), line it with parchment paper.
- **Mash ‘Em Up:** In a large bowl, unleash your inner Hulk on those gloriously ugly bananas. Mash them with a fork until they’re mostly smooth but still have a few small lumps. We’re going for texture, not baby food.
- **Wet Ingredients Party:** Add the melted butter, sugar, egg, and vanilla extract to the mashed bananas. Whisk it all together until well combined. It’ll look a little messy, but trust the process – it’s going to be delicious.
- **Dry Ingredients Unite:** In a separate medium bowl, whisk together the flour, baking soda, and salt. Make sure it’s all mixed evenly to avoid weird pockets of baking soda later. Nobody wants that!
- **Combine Forces (Gently!):** Gradually add the dry ingredients to the wet ingredients. Mix just until *barely* combined. **Overmixing is the enemy of tender banana bread!** A few streaks of flour are totally fine; don’t stress.
- **Optional Goodies:** If you’re using chocolate chips or nuts, fold them in now. Be gentle, we don’t want to overmix!
- **Into the Pan:** Pour the glorious batter into your prepared loaf pan. Spread it evenly with a spatula, making sure it fills the corners nicely.
- **Bake Away!** Slide that pan into your preheated oven. Bake for **50-65 minutes**, or until a wooden skewer or toothpick inserted into the center comes out clean. If the top starts browning too fast, loosely tent it with foil.
- **Cool Down:** Let the bread cool in the pan for about 10-15 minutes before carefully transferring it to a wire rack to cool completely. Or, you know, cut into it warm because who has that kind of patience? Definitely not me.
Common Mistakes to Avoid
Don’t be that person. Learn from my past (and often hilarious) blunders.
- **Underripe bananas:** Don’t even think about using yellow bananas. They won’t give you the flavor or moisture you need. Wait for the spots! It’s worth it, I promise.
- **Overmixing the batter:** This is a big one! Mixing too much develops the gluten, resulting in tough, dry bread. We want tender, moist goodness, so mix just until the dry ingredients are incorporated.
- **Opening the oven door constantly:** Resist the urge! Every time you peek, you let out heat and mess with the baking process, potentially causing your bread to sink. Be patient, my friend.
- **Not preheating your oven:** Rookie mistake. A cold oven means uneven baking and a weird texture. Give it time to get to temperature; it’s worth the wait.
- **Not greasing your pan properly:** Unless you want your delicious creation permanently fused to the pan, make sure it’s well-greased (or use parchment!). This is not the time for laziness.
Alternatives & Substitutions
Feeling adventurous? Or just missing an ingredient? No worries, we’ve got options!
- **Butter vs. Oil:** You can totally use a neutral oil (like vegetable or canola) instead of butter if you’re out or prefer it. It might make the bread a tad more moist, but you’ll lose a bit of that rich, buttery flavor. Your call!
- **Sugar Swap:** Brown sugar can replace white sugar for a deeper, molasses-y flavor. Maple syrup or honey could also work, but you might need to slightly adjust other liquid components. I usually stick to granulated because it’s fuss-free.
- **Flour Power:** Want to make it *slightly* healthier? Swap out a ¼ cup of all-purpose flour for whole wheat flour. Don’t go crazy, or it’ll get dense. Gluten-free? Use a good 1:1 GF baking blend.
- **Dairy-Free?** Use a plant-based milk (like almond or oat) if you’re adding any liquid, and a dairy-free butter substitute. Easy peasy, lemon squeezy.
- **Spice it Up:** A pinch of cinnamon or nutmeg can add a lovely warmth. Just a little, don’t go full pumpkin spice unless that’s your vibe.
FAQ (Frequently Asked Questions)
- **Can I use margarine instead of butter?** Well, technically yes, but why hurt your soul like that? Butter just tastes better, IMO. But if it’s all you have, go for it, just know it won’t be quite the same.
- **My banana bread sank in the middle! What happened?** Probably one of two things: either your baking soda was old (always check the expiry date!), or you opened the oven door too soon, letting out all that precious heat. Sometimes too much moisture can also be the culprit.
- **How do I store banana bread?** Keep it at room temperature, tightly wrapped, for 2-3 days. If you want it to last longer (who are we kidding?), pop it in the fridge for up to a week, or freeze slices for quick grab-and-go treats!
- **Can I make muffins instead of a loaf?** Absolutely! Just fill muffin liners about two-thirds full and bake for 20-25 minutes. Keep an eye on them, they bake faster!
- **My bananas aren’t ripe enough! Help!** Okay, desperate times call for desperate measures. You can bake them in their skins on a baking sheet at 300°F (150°C) for 15-30 minutes until they turn black and soft. Let them cool before using. **FYI**, this method changes the texture a bit, but it works in a pinch!
- **What’s the best way to enjoy it?** Warm, with a generous slather of butter. Or cream cheese. Or plain. Honestly, any way is the best way.
Final Thoughts
So there you have it, folks! Your new go-to, stress-free banana bread recipe. It’s the kind of thing that makes you feel like a domestic goddess (or god) with minimal effort. Plus, the smell alone is worth the price of admission. Now go impress someone—or yourself—with your new culinary skills. You’ve earned it! Don’t forget to send me a slice (or, you know, just tell me how amazing it was). Happy baking!

