So, your sweet tooth is doing a tap dance, and your inner chef is whispering “something warm, gooey, and utterly divine,” huh? And you’re thinking, “Cinnamon Rolls… but are they *really* worth the effort?” Oh honey, buckle up! We’re about to dive into a recipe that’s so good, you’ll wonder why you ever bought those sad, deflated things from the store. And guess what? It’s not nearly as complicated as your Instagram feed makes it seem. We’re talking maximum deliciousness for minimum existential dread. Ready to get sticky? Let’s do this!
Why This Recipe is Awesome
Okay, let’s be real. There are a million cinnamon roll recipes out there. So why *this* one? Because it’s the perfect balance of utterly decadent and surprisingly unfussy. Think about it: soft, pillowy dough, a sticky, spiced brown sugar swirl, and a creamy, tangy frosting that just *melts* into every nook and cranny. This isn’t just a recipe; it’s a hug in baked form. Plus, it’s practically **idiot-proof**. Seriously, even I haven’t messed it up, and my kitchen adventures sometimes involve accidental smoke alarms and questionable culinary decisions. The best part? Your house will smell like a bakery exploded, in the best possible way. You’re welcome in advance.
Ingredients You’ll Need
No fancy shmancy ingredients here, just the good stuff you probably already have lurking in your pantry. Or, you know, the stuff you can grab at the store without taking out a second mortgage.
For the Dough:
- **1 cup (240ml) warm milk** (think bathwater warm, not lava hot, unless you want to murder your yeast, you monster).
- **2 ¼ teaspoons (1 packet) active dry yeast** (the magic dust that makes things fluffy).
- **¼ cup (50g) granulated sugar** (just enough sweetness to get the party started).
- **1 large egg**, room temperature (helps with richness and color).
- **¼ cup (56g) unsalted butter, melted** (because everything’s better with butter).
- **½ teaspoon salt** (don’t skip it! It balances the sweetness).
- **3 ½ – 4 cups (420-480g) all-purpose flour**, plus more for dusting (start with less, add if needed, **FYI**).
For the Filling:
- **½ cup (113g) unsalted butter, softened** (not melted, we’re spreading, not pouring).
- **¾ cup (150g) packed light brown sugar** (the key to that gooey, caramelly goodness).
- **2 tablespoons ground cinnamon** (the star of the show, obvi).
For the Cream Cheese Icing:
- **4 oz (113g) cream cheese, softened** (full fat, because we’re not calorie counting today, okay?).
- **¼ cup (56g) unsalted butter, softened** (more butter, less problems).
- **1 ½ cups (180g) powdered sugar** (the fluffy white stuff).
- **½ teaspoon vanilla extract** (a little splash of happy).
- **1-2 tablespoons milk or cream** (to get that perfect drizzle consistency).
Step-by-Step Instructions
Deep breaths! We’re making dough, not defusing a bomb. You got this.
- **Wake up the Yeast:** In a large bowl (or your stand mixer bowl), combine the warm milk, yeast, and a tablespoon of the granulated sugar. Give it a gentle stir and let it sit for about 5-10 minutes. It should get frothy and bubbly—that means your yeast is alive and ready to party! If it doesn’t, your milk was probably too hot or too cold, or your yeast is dead. Start over, friend.
- **Mix the Dough:** Add the remaining granulated sugar, egg, melted butter, and salt to the yeast mixture. Stir it up. Then, gradually add the flour, starting with 3 ½ cups. Mix until a shaggy dough forms.
- **Knead it Out:** Turn the dough out onto a lightly floured surface. Knead for 5-8 minutes until it’s smooth, elastic, and just a little tacky. Or, if you have a stand mixer with a dough hook, let it do the work for 5 minutes. The dough should spring back when you poke it. If it’s too sticky, add a tiny bit more flour, but **don’t overdo it**!
- **First Rise (The Nap Time):** Lightly grease the mixing bowl with a little oil. Place the dough in the bowl, turning it once to coat. Cover the bowl with plastic wrap or a clean kitchen towel. Let it rise in a warm place for 1-1.5 hours, or until it’s doubled in size. Patience is a virtue, especially here.
- **Prep the Filling:** While your dough is rising, mix the softened butter, brown sugar, and cinnamon in a small bowl until it’s smooth and well combined.
- **Roll ‘Em Out:** Once the dough has doubled, gently punch it down (satisfying!). Turn it out onto a lightly floured surface. Roll it into a large rectangle, about 18×12 inches (45×30 cm). Try to keep the edges somewhat straight.
- **Spread the Love:** Evenly spread the cinnamon-sugar filling over the entire surface of the dough, leaving a small ½-inch border along one of the long edges (this helps seal it).
- **Roll and Slice:** Starting from the other long edge, tightly roll the dough into a log. Pinch the seam to seal it. Now, with a sharp knife or, even better, unflavored dental floss (seriously, try it!), slice the log into 12 equal rolls, about 1 ½ inches thick.
- **Second Rise (More Napping!):** Arrange the rolls in a lightly greased 9×13 inch baking pan. Cover them loosely with plastic wrap or a towel. Let them rise again in a warm place for another 30-45 minutes, or until they look puffy and have nearly doubled in size. This step is crucial for ultimate fluffiness!
- **Bake ‘Em Up:** While your rolls are enjoying their second nap, preheat your oven to **375°F (190°C)**. Once preheated, bake for 20-25 minutes, or until they’re golden brown and baked through. If they’re browning too quickly, you can loosely tent them with foil.
- **Whip Up the Icing:** While the rolls are baking, beat the softened cream cheese and butter together in a medium bowl until smooth and creamy. Add the powdered sugar, vanilla, and 1 tablespoon of milk/cream. Beat until smooth. If it’s too thick, add another tablespoon of milk/cream until it’s spreadable but not watery.
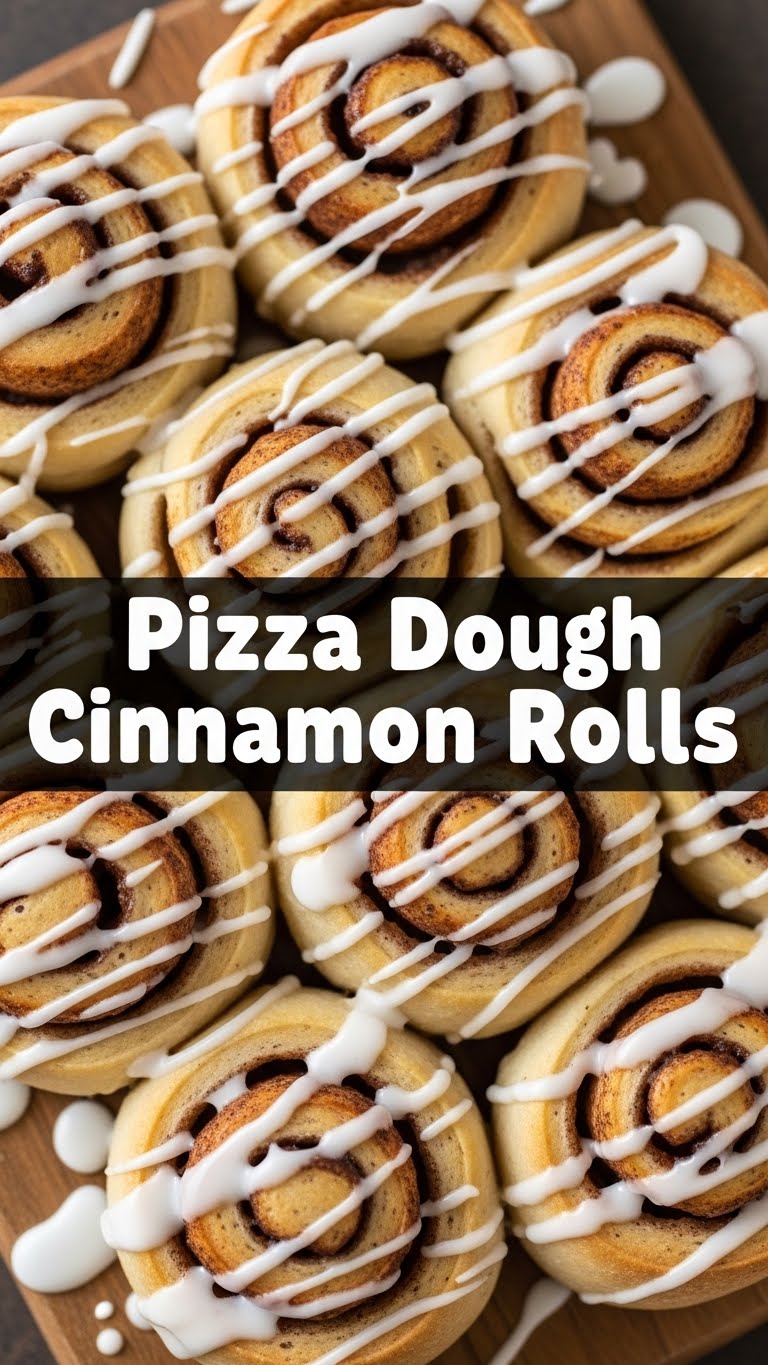
- **Glaze and Devour:** As soon as the rolls come out of the oven, generously spread or drizzle the cream cheese icing over the warm rolls. The warmth helps it melt and soak into all those lovely cracks. Serve immediately and prepare for compliments (and possibly a food coma).
Common Mistakes to Avoid
We all make ’em, so let’s laugh at them together before you make one!
- **Killing the Yeast:** Your milk was either scorching hot (RIP yeast) or ice-cold (yeast never woke up). Aim for that baby-bottle temperature. **Don’t skip the initial yeast proofing!** It’s your quality control check.
- **Over-flouring the Dough:** You’ll end up with tough, dry rolls that feel more like frisbees than fluffy clouds. Add flour gradually and stop when the dough is smooth and slightly tacky. A little sticky is okay!
- **Not Kneading Enough:** Undernourished dough will be dense and won’t develop that lovely gluten structure. Get those muscles working (or let your mixer do it!).
- **Skipping the Second Rise:** Think of it as a mandatory pre-bake spa day for your rolls. It’s where they get their final puffiness. Neglect it, and you’ll have bricks.
- **Over-baking:** A dry roll is a sad roll. Keep an eye on them! They should be golden brown, not deep mahogany. The middle ones might look a tiny bit underdone, but they’ll finish baking as they cool.
- **Thinking you don’t need to preheat the oven:** Rookie mistake. Your oven needs to be at the correct temperature from the start for even baking and proper rise.
Alternatives & Substitutions
Feeling a little rebellious? Want to try something new? I got you!
- **Milk:** Don’t have whole milk? Almond milk, oat milk, or even skim milk can work, but full-fat definitely gives the best richness. Just adjust the flour if needed.
- **Butter (for the dough):** You can use margarine, but let’s be honest, why would you? Butter just *hits different*. IMO, it’s worth the real deal here.
- **Cream Cheese Icing:** Not a cream cheese fan? Just make a simple glaze with powdered sugar, milk/cream, and vanilla extract. It’ll still be delicious, just less tangy.
- **Add-ins:** Feel free to sprinkle some chopped pecans, walnuts, or even raisins into the cinnamon filling for extra texture and flavor. Go wild!
- **Spice It Up:** Swap out some of the cinnamon for cardamom for a more Scandinavian-inspired roll. Nutmeg is also a fun addition.
FAQ (Frequently Asked Questions)
Got questions? I’ve got (casual) answers!
- **Can I make these ahead of time?** Oh, absolutely! You can make the dough, let it complete its first rise, then roll, fill, and slice the rolls. Arrange them in the pan, cover tightly, and refrigerate overnight (up to 18 hours). Pull them out about 1.5-2 hours before baking to let them come to room temp and get their second rise on.
- **My dough isn’t rising, help!** Did you check your yeast’s expiration date? Was your milk too hot or too cold? Is your kitchen super chilly? Try moving your covered bowl to a warmer spot (like a slightly warm oven, or near a sunny window).
- **Can I freeze cinnamon rolls?** You betcha! You can freeze the baked rolls (without icing) for up to a month. Thaw and reheat, then ice. Or, you can freeze the unbaked, proofed rolls, then thaw them overnight in the fridge and let them finish rising at room temp before baking.
- **How long do these stay fresh?** Best on day one, obviously, but they’ll keep in an airtight container at room temperature for 2-3 days. Reheat gently in the microwave for that fresh-baked feel.
- **Is a stand mixer essential?** Nah, not at all! Your hands are perfectly capable kneading machines. It just takes a little more elbow grease. Think of it as a bicep workout!
- **Can I use regular sugar instead of brown sugar in the filling?** Technically yes, but brown sugar gives that signature chewy, caramel-like texture and depth of flavor that’s just *chef’s kiss*. Trust me on this one.
Final Thoughts
See? That wasn’t so scary, was it? You just made a batch of glorious, homemade cinnamon rolls. You’re basically a baking wizard now! So go on, grab one (or three, I’m not judging), pour yourself a coffee, and bask in the glory of your culinary triumph. Share them with loved ones, or hoard them all for yourself (I won’t tell). You’ve earned this deliciousness. Now go impress someone—or yourself—with your new culinary skills. You’ve earned it!


