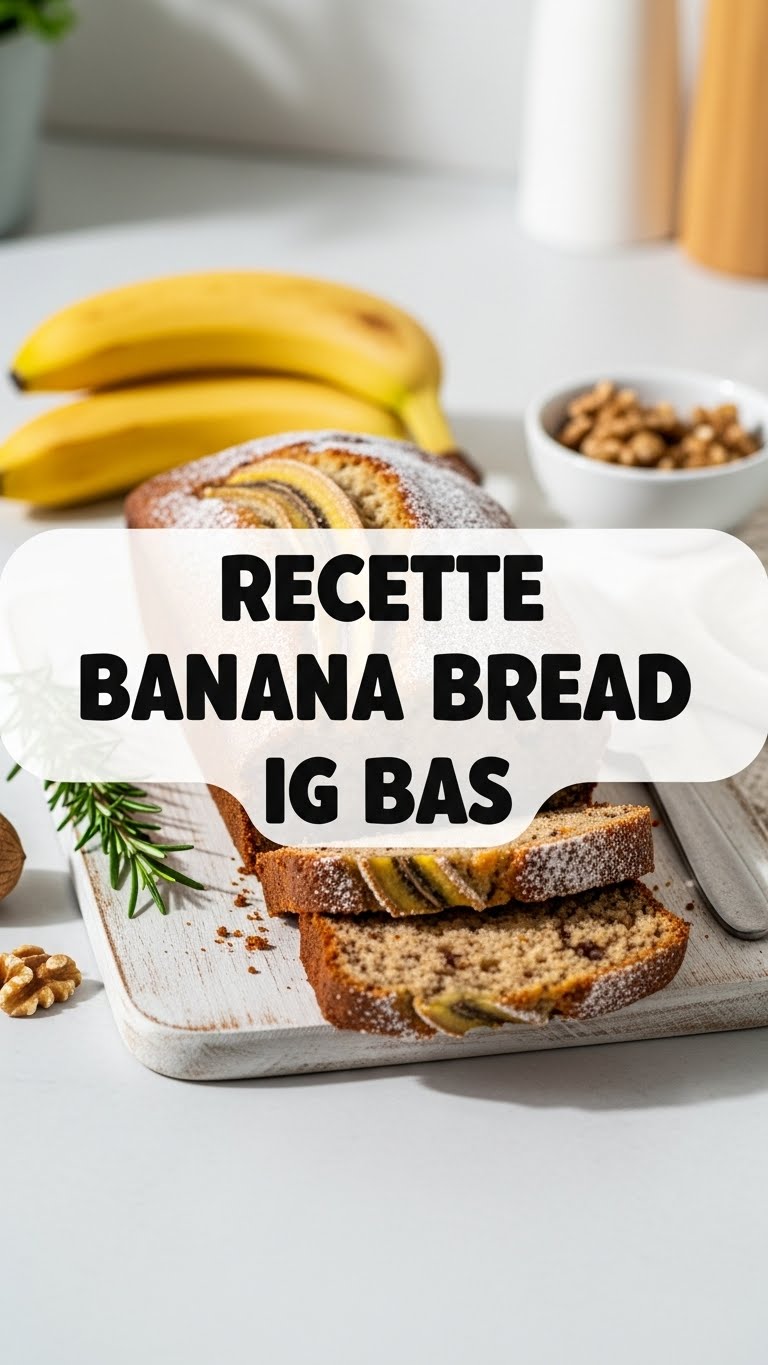
So, your bananas are looking a bit… shall we say, *enthusiastic* about ripening? And you’re craving something warm, comforting, and sweet, but without the sugar crash that makes you question all your life choices? My friend, you’ve come to the right place. We’re about to dive into the magical world of **Banana Bread Ig Bas** – that’s Low Glycemic Index for the non-French speakers among us. Get ready for a treat that’s as kind to your blood sugar as it is to your taste buds!
Why This Recipe is Awesome
Okay, buckle up, because this isn’t just *any* banana bread. This is the unicorn of banana breads. First off, it’s **low GI**, which means no wild blood sugar rollercoasters. You get that sustained energy goodness, perfect for tackling your afternoon to-do list or, let’s be real, another Netflix binge. Secondly, it’s practically idiot-proof. Seriously, I’m not known for my delicate baking touch, and even I didn’t mess this up. It’s forgiving, moist, and tastes like a hug in loaf form. Plus, it’s a fantastic way to use up those super-ripe bananas staring at you from the fruit bowl, practically begging for a glorious purpose. Don’t let them go to waste, **FTW**!
Ingredients You’ll Need
Gather your troops! Here’s what you’ll need to make this magic happen:
- **3 very ripe bananas:** The browner, the better! Think “almost compost” brown. That’s where all the sweetness lives, folks.
- **2 large eggs:** Room temp if you can remember, but honestly, it’s not a deal-breaker.
- **75g low-GI sweetener:** Erythritol, xylitol, or a stevia-erythritol blend works wonders. You want the sweetness without the sugar spike, right?
- **60ml neutral oil:** Coconut oil (melted), olive oil, or even avocado oil. Whatever’s chilling in your pantry.
- **1 teaspoon vanilla extract:** Because everything is better with a splash of vanilla. Duh.
- **190g whole wheat flour (or spelt flour):** This is our low-GI hero. Spelt flour is awesome for a slightly nuttier flavor and great texture.
- **1 teaspoon baking soda:** Our leavening friend, making sure our bread rises to the occasion.
- **½ teaspoon baking powder:** For that extra lift and fluffiness.
- **¼ teaspoon salt:** Don’t skip this! It balances all the flavors beautifully.
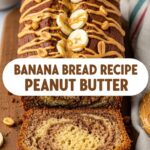
- **Optional add-ins:** A handful of chopped walnuts, pecans, or **low-sugar dark chocolate chips** (because life’s too short not to have chocolate).
Step-by-Step Instructions
Ready to get your hands a little sticky? Let’s do this!
- **Preheat Power:** First things first, get your oven to **180°C (350°F)**. Grease and flour (or line with parchment paper) a standard loaf pan. Nobody wants their banana bread stuck to the pan, trust me.
- **Mash those Bananas:** In a medium bowl, go wild on your ripe bananas with a fork until they’re mostly smooth but still have a few chunky bits. Texture is good!
- **Wet Ingredients Party:** In a separate large bowl, whisk together the eggs, low-GI sweetener, oil, and vanilla extract until well combined.
- **Combine the Wet & Mashed:** Pour your mashed bananas into the wet ingredients bowl and stir until just incorporated. Don’t overmix; we’re going for moist, not tough!
- **Dry Ingredient Dream Team:** In another small bowl (yes, three bowls, we’re serious bakers now!), whisk together the whole wheat flour, baking soda, baking powder, and salt.
- **Marry Them Gently:** Gradually add the dry ingredients to the wet ingredients. Mix just until no streaks of flour remain. **Overmixing is the enemy of tender banana bread**, so stop as soon as it’s combined. If you’re using any add-ins, gently fold them in now.
- **Loaf Pan Love:** Pour the batter into your prepared loaf pan. Give it a gentle tap on the counter to settle.
- **Bake Away!** Pop it into your preheated oven and bake for **45-55 minutes**, or until a wooden skewer inserted into the center comes out clean. If the top starts browning too quickly, you can loosely tent it with foil.
- **Cool Down:** Once baked, let it cool in the pan for about 10-15 minutes before carefully transferring it to a wire rack to cool completely. Patience is a virtue here, my friend.
Common Mistakes to Avoid
Nobody’s perfect, but we can learn from past blunders! Steer clear of these common banana bread pitfalls:
- **Using Under-Ripe Bananas:** This is a cardinal sin! You won’t get that intense banana flavor or natural sweetness. Your bread will be sad, and so will you. **Always go for brown, spotty, squishy bananas.**
- **Overmixing the Batter:** This is a biggie. Mixing too much develops the gluten in the flour, resulting in a dense, chewy (not in a good way) loaf. Mix just until combined, then stop!
- **Not Preheating the Oven:** Thinking you can skip this step is a rookie mistake. A cold oven leads to uneven baking and a weird texture. Give your oven time to get hot and bothered.
- **Cutting It Too Soon:** I know, the smell is intoxicating, but seriously, let it cool! Cutting a warm banana bread means it’s more likely to crumble and fall apart. Resist the urge!
Alternatives & Substitutions
Feeling adventurous? Or just missing an ingredient? No stress, we’ve got options!
- **Flour Power:** Not a fan of whole wheat? Spelt flour is a fantastic low-GI alternative that provides a lovely texture. You could also try a blend of whole wheat and almond flour, but you might need to adjust the liquid a tiny bit.
- **Sweetener Swaps:** If you’re out of erythritol, xylitol or a monk fruit blend works just as well. For a slightly different (but still lower GI than refined sugar) option, you could use a small amount of agave nectar or maple syrup, but remember that will increase the overall glycemic load.
- **Oil-Free Option:** For a lower-fat version, you can substitute half or all of the oil with unsweetened applesauce or plain Greek yogurt. Just be aware the texture might be slightly different – perhaps a bit more cake-like and less rich.
- **Spice It Up:** Add a teaspoon of cinnamon, a pinch of nutmeg, or even a dash of ginger for an extra layer of warmth and flavor. So good!
FAQ (Frequently Asked Questions)
Got questions? I’ve got answers! (Mostly.)
- **”My bananas aren’t brown enough, help!”** Well, technically, you *can* use them, but your bread won’t be as sweet or flavorful. **Pro tip:** Microwave them unpeeled for 30-60 seconds, or roast them in their skins at 150°C (300°F) for 15-20 mins until black. Instant ripeness!
- **”Can I make this vegan?”** Absolutely! Swap the eggs for flax eggs (1 tbsp ground flaxseed + 3 tbsp water per egg, let sit for 5 mins). Make sure your oil is plant-based, and you’re good to go!
- **”How long does this low-GI banana bread last?”** At room temperature, tightly wrapped, it’s good for 2-3 days. In the fridge, it’ll last up to a week. For longer storage, slice it up and freeze individual portions for up to 3 months. Perfect for a quick, healthy snack!
- **”Is it *really* low GI, or are you just saying that?”** With the whole wheat/spelt flour and low-carb sweetener, yes, it’s significantly lower GI than traditional banana bread. It’s a much smarter choice for stable energy, **IMO**. Still, enjoy in moderation – it’s a treat, not a salad!
- **”Can I add other fruits or nuts?”** Heck yeah! A handful of blueberries, raspberries, or even shredded unsweetened coconut would be amazing. Just don’t overload it, or it won’t bake properly.
- **”What if I don’t have a loaf pan?”** No worries! You can bake this as muffins (fill liners about two-thirds full, bake for 20-25 mins) or even in a round cake pan (adjust baking time as needed).
Final Thoughts
And there you have it, folks! Your very own, incredibly delicious, and surprisingly wholesome **Banana Bread Ig Bas**. This recipe is your new secret weapon for satisfying those sweet cravings without the guilt or the energy slump. It’s perfect for breakfast, a snack, or even a lighter dessert. So go ahead, whip up a batch, make your kitchen smell divine, and enjoy every single bite. Now go impress someone – or just yourself – with your new culinary skills. You’ve earned it!

