So You’ve Got a Brownie Craving (But None of the Patience)?
Let’s be real. Sometimes the only thing standing between you and pure chocolatey bliss is the daunting prospect of preheating an oven, greasing pans, and *actually* baking. Well, my friend, I’ve got your back. We’re diving into the magical world of raw brownies, and trust me, it’s as easy as it sounds. Think rich, fudgy, and ridiculously decadent, without a single speck of heat involved. You’re welcome. 😉
Why This Recipe is Pure Genius (IMO)
Because it’s *raw*. That’s right. No oven means no burning, no under-baking anxiety, and practically zero cleanup. It’s the ultimate “I want dessert NOW” solution. Plus, it’s packed with good stuff (or at least, stuff that sounds healthy, which totally counts, right?). It’s also ridiculously forgiving, so even if your measuring skills are as questionable as your Netflix binge history, you’ll likely still nail it.
Ingredients You’ll Need (The Good Stuff)
- 1 cup of pitted Medjool dates: These are your magic sticky binders. If they’re a bit dry, soak ’em in warm water for 10 mins.
- 1 cup of walnuts or pecans: Or a mix! Whatever nuts you have lurking in the pantry.
- 1/2 cup of unsweetened cocoa powder: The darker, the better. This is where the chocolatey soul comes from.
- 1/4 cup of shredded unsweetened coconut: For that little bit of chew and texture.
- 2 tablespoons of melted coconut oil (or almond butter): Helps everything stick together and adds richness.
- 1 teaspoon of vanilla extract: Because, well, vanilla makes everything better.
- A pinch of salt: To make all those sweet flavors pop!
- For the Frosting (optional, but highly recommended):
- 1/2 cup of soaked cashews: Soak them in hot water for at least an hour, or overnight in cold water. Drain them well!
- 1/4 cup of melted coconut oil
- 2-3 tablespoons of maple syrup (or other liquid sweetener): Adjust to your sweetness preference.
- 1-2 tablespoons of cocoa powder
- 1 teaspoon of vanilla extract
- Splash of non-dairy milk (if needed for consistency)
Step-by-Step Instructions (Let’s Get This Party Started!)
- First, toss those glorious dates (pitted, remember!) and nuts into a food processor. Blitz them until they start to form a sticky ball. Don’t be shy, give it a good whirl!
- Now, add the cocoa powder, shredded coconut, melted coconut oil (or almond butter), vanilla extract, and that all-important pinch of salt. Process again until everything is well combined and looks like delicious, crumbly brownie batter.
- Press this mixture into a small, lined square pan (like an 8×8 or even a loaf pan if you’re feeling fancy). Use the bottom of a glass or your hands to get it nice and compact. Chill this in the freezer for about 30 minutes while you whip up the frosting.
- For the frosting: Drain those soaked cashews really well and pop them into a clean food processor or a high-speed blender. Add the melted coconut oil, maple syrup, cocoa powder, and vanilla. Blend until super smooth and creamy. If it’s too thick, add a tiny splash of non-dairy milk and blend again until you reach your desired consistency.
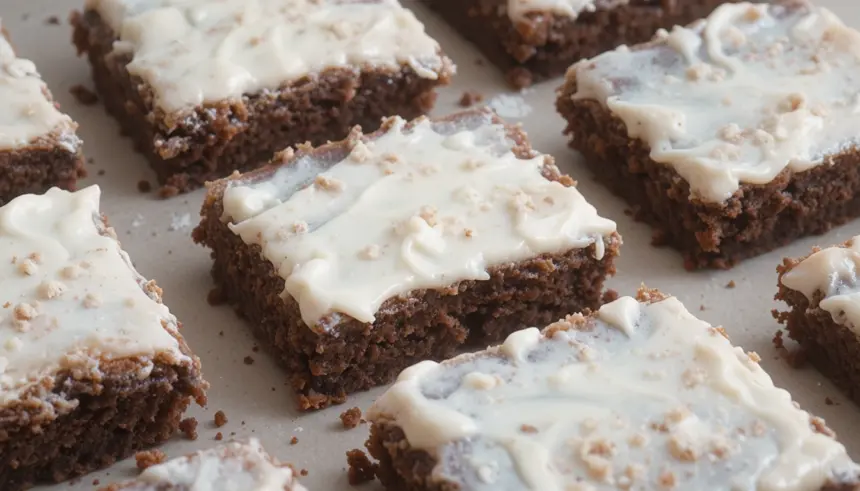
- Once the brownie base is firm, pour the frosting over the top and spread it evenly. Pop the whole thing back into the freezer for at least an hour to set.
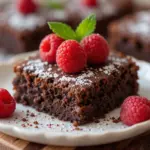
- Cut into squares and behold your masterpiece! You can store these in the fridge or freezer. They’re best served chilled, FYI.
Common Mistakes to Avoid (Don’t Be That Guy/Gal)
- Skipping the date soaking: If your dates are like little rocks, your brownie base will be too. Soaking is key for that fudgy texture.
- Not processing enough: You want it to be a cohesive, sticky mass, not just loose crumbs. Keep processing!
- Frosting impatience: Seriously, let that brownie base chill. It makes spreading the frosting so much easier (and less messy).
- Over-blending the frosting: You want smooth and creamy, not a watery mess. Keep an eye on it!
Alternatives & Substitutions (Because We’re Flexible)
- Nuts: Almonds, macadamia nuts, or even sunflower seeds if you’re nut-averse! Just make sure they’re unsalted.
- Sweetener in frosting: Agave, date syrup, or even a sugar-free option like erythritol would work. Experiment!
- Coconut oil: If you’re not a fan of coconut oil’s flavor, use almond butter or even a neutral-flavored oil like avocado oil for the brownie base. For the frosting, though, coconut oil really helps it firm up.
- Cocoa powder: You could try carob powder, but it’s a very different flavor. Stick with cocoa for that classic brownie taste.
FAQ (The Burning Questions You Probably Have)
- Can I make these nut-free? Yep! Swap the walnuts for sunflower seeds or pumpkin seeds. For the frosting, you can try a cream cheese-based frosting (if you’re not strictly raw-vegan) or a seed butter.
- Do I *really* need a food processor? It makes things SO much easier. If you don’t have one, you can try a really powerful blender, but it might be a bit more challenging.
- How long do these last? In the fridge, they’re good for about a week. In the freezer, they can hang out for a couple of months. Just be sure to store them in an airtight container.
- Can I add anything else? Heck yes! Feel free to toss in some chocolate chips (for the brownie base or on top), a sprinkle of sea salt on top of the frosting, or even a dash of cinnamon.
- Is this “healthy”? It’s definitely more wholesome than a traditional brownie! It’s full of fiber, healthy fats, and natural sugars from the dates. But remember, it’s still a treat, so enjoy it in moderation!
- My dates are super sticky, help! That’s the goal! If they’re *too* sticky to handle, just chill your hands under cold water before pressing the base into the pan.
Final Thoughts
See? I told you it was easy! You’ve just made a ridiculously delicious treat with minimal effort and maximum flavor. High five! Now go impress someone—or yourself—with your new culinary skills. You’ve earned it! Enjoy every fudgy, chocolatey bite. Happy raw brownie-ing!
