Ever woken up and thought, “My life needs more color… and carbs”? Yeah, me too. Especially if those carbs are gonna make me look like a kitchen wizard without actually *being* one. Good news, my friend, because today we’re making Rainbow Bread, and trust me, it’s so easy even your cat could supervise. Get ready to bake something that looks like it came straight out of a fairy tale, but tastes like pure, comforting magic!
Why This Recipe is Awesome
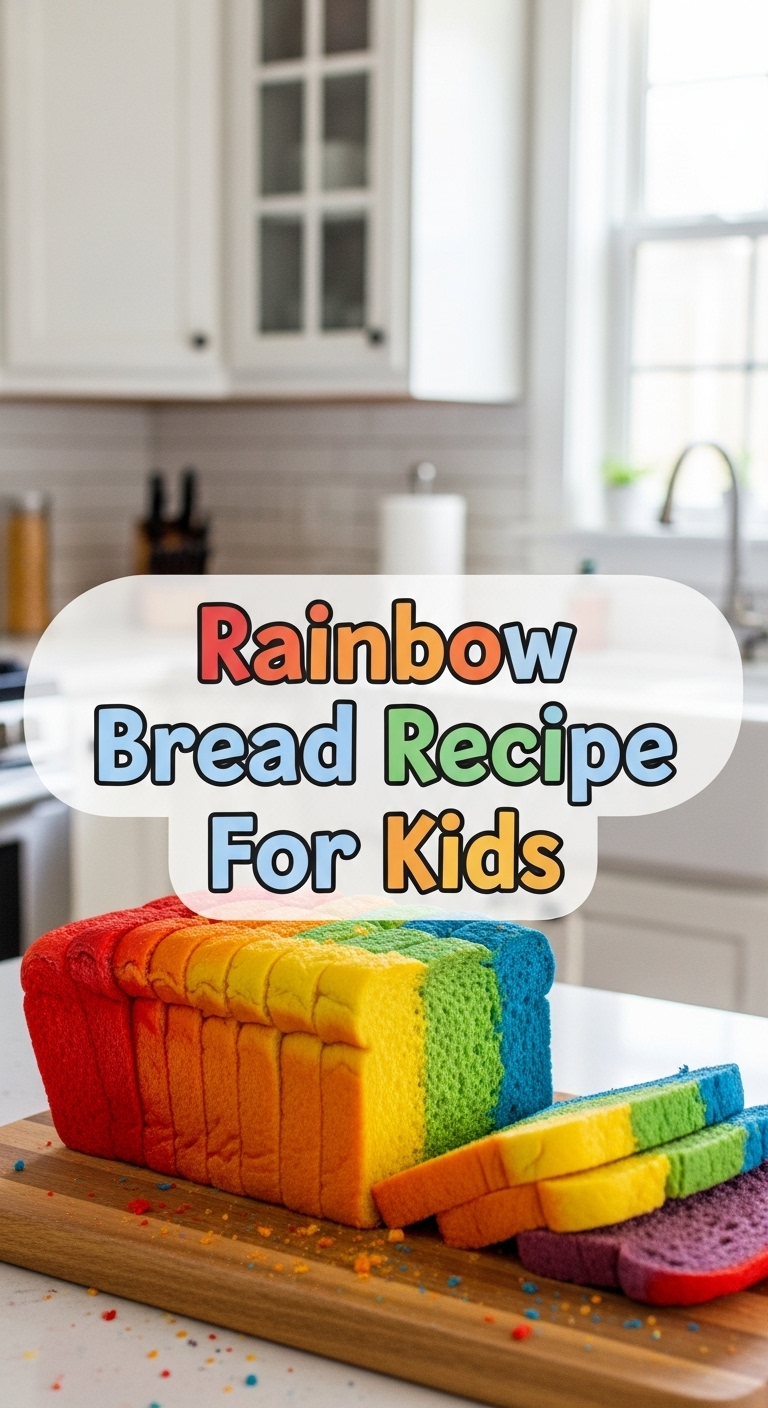
Okay, so why this particular bread? Well, for starters, it’s basically a party in a loaf pan. It’s visually stunning (hello, Instagram!), surprisingly simple, and a fantastic way to get kids involved without *actually* letting them burn anything. Plus, it uses basic pantry staples, so no obscure ingredients from a magical forest required. It’s practically fail-proof, which is good because, let’s be honest, we’ve all had our moments with kitchen disasters. This recipe? It’s your redemption. Prepare for oohs and aahs!
Ingredients You’ll Need
- All-purpose flour: 3 cups (the trusty backbone of all good bread. Don’t cheap out here!)
- Granulated sugar: 1/4 cup (just a little sweetness to balance things out, not too much, we’re making bread, not a cake… *yet*.)
- Instant yeast: 2 and 1/4 teaspoons (one packet usually. The magical tiny things that make bread rise and give us hope.)
- Salt: 1 teaspoon (enhances flavor, don’t skip it, unless you like bland bread, you monster.)
- Warm water: 1 cup (think bathwater warm, not lava hot. Hot water kills yeast, and nobody wants a bread funeral.)
- Milk: 1/2 cup (whole milk works best for richness, but any kind will do the trick.)
- Butter: 2 tablespoons, melted (adds richness and a lovely texture. Don’t judge, it’s delicious.)
- Food coloring: Gel food coloring works best for vibrant colors (red, orange, yellow, green, blue, purple – or whatever colors spark joy in your soul!).
Step-by-Step Instructions
- Get Mixing: In a large bowl, whisk together your flour, sugar, yeast, and salt. Make sure they’re all friends before introducing the wet stuff.
- Add the Wet Stuff: Pour in the warm water, milk, and melted butter. Stir with a spoon until everything *just* comes together and forms a shaggy dough.
- Knead it Out: Turn the dough out onto a lightly floured surface. Knead it for about 5-7 minutes until it’s smooth and elastic. It should spring back when you poke it. This is your arm workout for the day, FYI.
- Divide and Conquer (with Color!): Divide your dough into equal portions – one for each color you’re using. I usually go for 6.
- Color Me Impressed: Take each portion and flatten it slightly. Add a few drops of gel food coloring to the center. Now, knead the color into the dough until it’s evenly distributed and vibrant. You might want to wear gloves unless you fancy rainbow hands for a day. Repeat for all colors.
- Rise and Shine: Lightly oil a large bowl. Place all your colorful dough balls inside, cover with plastic wrap or a clean kitchen towel, and let it rise in a warm place for about 1-1.5 hours, or until doubled in size. This is where patience pays off!
- Shape Your Masterpiece: Once risen, gently punch down each colored dough ball. Roll each one into a long rope, roughly the length of your loaf pan.
- The Rainbow Braid: Lay your colored ropes side-by-side on a lightly floured surface. Gently pinch them together at one end, then carefully braid them together. Don’t overthink it; messy braids are charming too! Pinch the other end to secure.
- Loaf Pan Living: Carefully transfer your braided rainbow dough into a greased 9×5-inch loaf pan. Cover it again and let it rise for another 30-45 minutes, or until it looks puffy and happy.
- Bake It ‘Til You Make It: While it’s doing its second rise, preheat your oven to 375°F (190°C). Once preheated and risen, pop the loaf pan in the oven and bake for 25-30 minutes, or until the top is golden brown and it sounds hollow when you tap it.
- Cool Down: Let it cool in the pan for 10 minutes before transferring it to a wire rack to cool completely. Resist the urge to cut into it immediately! It needs to cool to set properly.
Common Mistakes to Avoid
- Ignoring the yeast’s temperature needs: Using water that’s too hot or too cold. Remember, yeast is a diva; treat it right, or your bread won’t rise. Warm water is key!
- Not kneading enough: A sticky, dense loaf is usually a sign of under-kneading. Don’t be lazy, give those muscles a workout!
- Overdoing the food coloring: While it’s rainbow bread, too much liquid food coloring can mess with the dough’s consistency. Gel colors are your best bet.
- Cutting too soon: I know, the smell is intoxicating. But cutting into hot bread can make it gummy and sad. Let it cool, trust the process.
- Thinking you can skip the second rise: Rookie mistake! That second rise gives your bread its lovely, fluffy texture. Don’t rush perfection.
Alternatives & Substitutions
- Vegan Version: Swap out milk for a non-dairy alternative (almond, soy, oat milk work great!) and use a plant-based butter substitute or coconut oil. Easy peasy!
- Whole Wheat Flour: You *could* substitute some of the all-purpose flour for whole wheat, but IMO, for this vibrant, kid-friendly bread, all-purpose gives the best fluffy texture and bright colors. If you go whole wheat, start with half and see how the dough feels.
- Natural Food Colors: If you’re feeling extra wholesome, you can experiment with natural food colorings from things like spirulina (blue/green), beetroot powder (red), turmeric (yellow), or spinach powder (green). Just be aware the colors won’t be as vibrant and might impart a subtle flavor.
- Different Shapes: Instead of a braid, you can just layer the colorful doughs in the pan, or roll them into a swirl. Get creative!
FAQ (Frequently Asked Questions)
- My dough isn’t rising! What did I do wrong? Oh no! Did you check your yeast’s expiry date? Was your water too hot or too cold? Yeast needs to be alive and kicking, and happy with its warm, cozy environment. If it’s not bubbling, it’s probably dead, bless its little heart.
- Can I use liquid food coloring instead of gel? You can, but you’ll need *a lot* more to get vibrant colors, and that extra liquid can change the dough’s consistency, making it stickier. Gel food coloring is truly superior here.
- How long does rainbow bread stay fresh? It’s best eaten within 2-3 days at room temperature, stored in an airtight container. If it lasts that long, you’re doing better than me!
- Can I freeze rainbow bread? Absolutely! Once completely cooled, slice it up and freeze the slices in an airtight bag for up to a month. Pop a slice in the toaster for a quick, colorful treat.
- Is this recipe good for beginners? YES! It’s designed to be super friendly for first-timers. The hardest part is probably waiting for it to cool down before you devour it.
- What if I don’t have a loaf pan? You can shape it into a round loaf and bake it on a baking sheet, or even make colorful rolls! Just adjust baking time accordingly.
Final Thoughts
And there you have it! Your very own, totally gorgeous, undeniably delicious rainbow bread. You’ve just leveled up your baking game and probably impressed yourself (and anyone lucky enough to share a slice). Go on, bask in the glory of your colorful creation. Now go impress someone—or yourself—with your new culinary skills. You’ve earned it!


