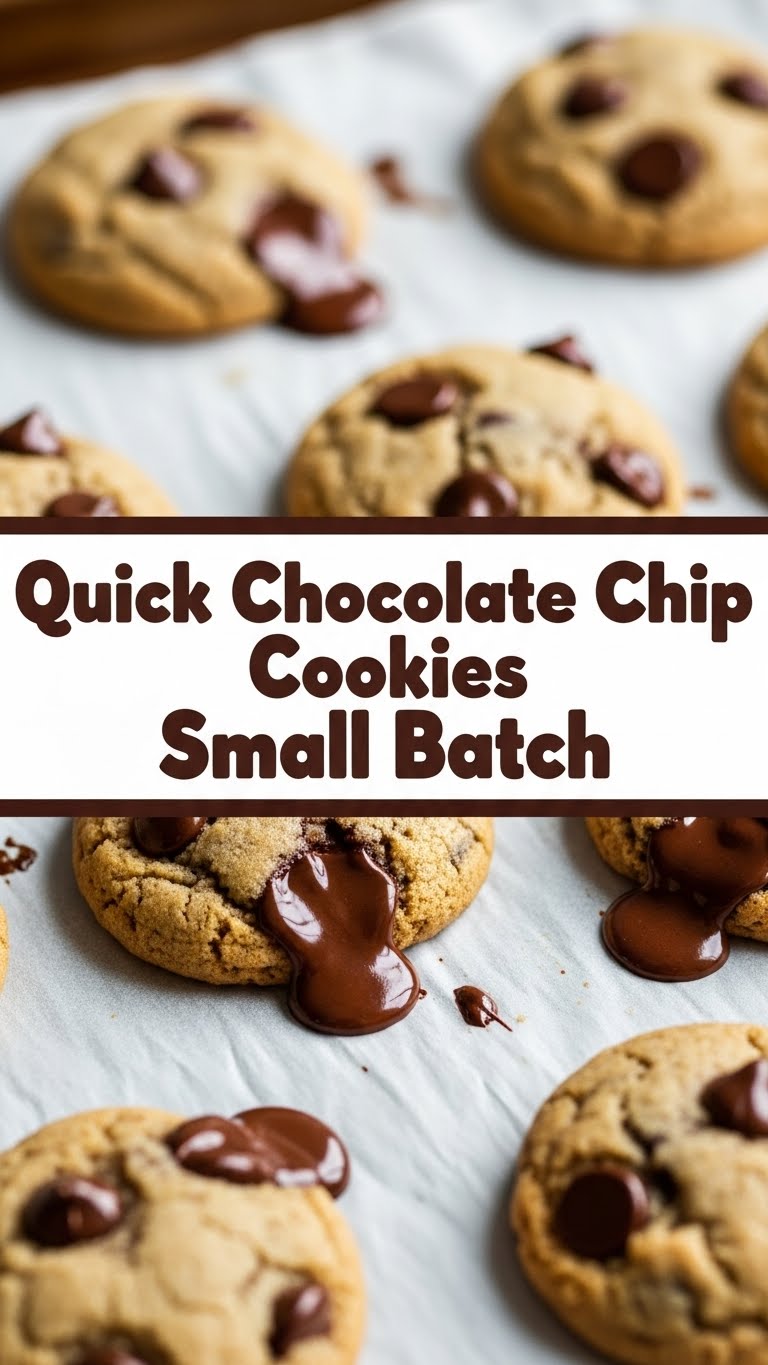
So you’re craving something warm, gooey, chocolatey, and utterly delicious but the thought of baking a gigantic batch of cookies (and then having to share them, *gasp*) feels like too much effort? Same. Welcome, my friend, to the glorious world of small-batch baking! Specifically, a recipe for Quick Chocolate Chip Cookies that’s so easy, it practically bakes itself. (Okay, maybe not *that* easy, but pretty darn close.)
Why This Recipe is Awesome
Let’s be real, sometimes you just need a few cookies, not a whole army’s worth. This recipe is your secret weapon for instant gratification without the commitment. Here’s the lowdown on why it’s a total game-changer:
- Speed Demon: From zero to warm cookie in under 20 minutes. Beat that, delivery apps!
- Minimal Dishes: Because nobody wants to spend an hour scrubbing pots after a cookie craving.
- Idiot-Proof: Seriously, I’ve had my moments in the kitchen, and even I didn’t mess this up. It’s basically foolproof.
- Portion Control (ish): Makes just enough for you, or maybe you and one very lucky friend. No excuses for eating 2 dozen in one sitting! (Unless you want to, no judgment here.)
Ingredients You’ll Need
Get ready for a super short shopping list. We’re keeping it simple, because complicated is for taxes, not cookies.
- 3 tablespoons Unsalted Butter: Just a tiny pad of buttery goodness. Melted, please!
- 2 tablespoons Granulated Sugar: For that crisp edge.
- 2 tablespoons Packed Light Brown Sugar: The secret to chewiness and a richer flavor. Don’t skimp on the “packed” part.
- 1 large Egg Yolk: Yup, just the yolk! It’s the magic behind that perfect chewy texture.
- ½ teaspoon Vanilla Extract: The soul of a good chocolate chip cookie. Don’t even *think* about skipping it.
- ½ cup All-Purpose Flour: The structural engineer of our cookie empire.
- ¼ teaspoon Baking Soda: For a little lift and puff.
- ⅛ teaspoon Salt: Don’t underestimate this tiny hero! It balances the sweetness.
- ⅓ cup Chocolate Chips: The undisputed star! Use your favorite—milk, dark, semi-sweet, chunky. Go wild!
Step-by-Step Instructions
Time to get your bake on! Follow these easy steps, and you’ll be munching in no time.
Preheat & Prep: First things first, crank up your oven to 375°F (190°C). Line a small baking sheet with parchment paper. Trust me, parchment paper is your friend here.
Melt the Butter: In a small, microwave-safe bowl, melt your 3 tablespoons of butter. You can also do this on the stovetop if you’re feeling fancy. Let it cool for a minute, you don’t want scrambled eggs for butter.
Wet Ingredients Mix: Pour the slightly cooled melted butter into a medium mixing bowl. Add both the granulated sugar and the brown sugar. Whisk them together until they’re nice and combined, looking all golden and delicious. Next, stir in that glorious egg yolk and the vanilla extract until everything is smooth and glossy. FYI, this is where the magic begins!
Dry Ingredients Unite: In a separate small bowl, whisk together the flour, baking soda, and salt. Give it a good swirl so everything is evenly distributed.
Combine & Conquer: Add the dry ingredients to your wet ingredients. Mix until *just* combined. Do not overmix! A few streaks of flour are totally fine. Overmixing makes tough cookies, and nobody wants a tough cookie.
Chocolate Time!: Fold in those chocolate chips. Be gentle, we’re building cookies, not a war machine.
Scoop ‘Em Out: Drop the dough in two equal mounds onto your prepared baking sheet. You can make them a bit taller than they are wide. If you want a prettier cookie, press a few extra chocolate chips on top. (Totally optional, but IMO, it makes them look extra inviting!)
Bake ‘Em Up: Pop that baking sheet into your preheated oven. Bake for 8-10 minutes, or until the edges are golden brown and the centers are still looking a little soft and underbaked. That’s the secret to gooey perfection!
Cool Down (if you can wait): Let them cool on the baking sheet for 5 minutes before transferring them to a wire rack. Or, if you’re impatient like me, just eat one right off the tray. Burned fingers are a small price to pay for warm, fresh cookies!
Common Mistakes to Avoid
Even the simplest recipes have their booby traps. Dodge these common pitfalls like a ninja:
- Thinking you don’t need to preheat the oven: Rookie mistake! A properly preheated oven ensures even baking.
- Overmixing the dough: Seriously, I cannot stress this enough. Mix until *just* combined. Too much mixing develops gluten, leading to hockey pucks instead of soft cookies.
- Using cold butter: This recipe calls for melted butter, not softened, not rock-hard from the fridge. Follow the instructions for that perfect texture.
- Baking too long: Keep an eye on those cookies! They’re often done when they still look slightly underbaked in the center. They’ll continue to set as they cool.
- Eating all the dough before baking: Okay, not a mistake, per se, but then you won’t have actual cookies. Exercise some self-control (I know, it’s hard).
Alternatives & Substitutions
Feeling adventurous? Here are some tweaks you can make to this already stellar recipe:
- Chocolate Choices: Mix it up! Try dark chocolate chunks, white chocolate chips, butterscotch chips, or even a mix of two different kinds. A sprinkle of sea salt on top right after baking? Chef’s kiss!
- Nutty Nuances: If you’re into nuts, a tablespoon or two of chopped pecans or walnuts would be a delicious addition. Just fold them in with the chocolate chips.
- Spice it Up: A tiny pinch of cinnamon or a dash of espresso powder (about ⅛ tsp) can add depth to the chocolate flavor.
- Flour Power: While all-purpose flour works best here, some folks have success with a 1:1 gluten-free baking blend. Just be aware the texture might be slightly different.
- Vegan-ish? You *could* try a plant-based butter substitute, but results may vary. The egg yolk is pretty crucial for texture, so replacing that might be tricky for this specific recipe.
FAQ (Frequently Asked Questions)
Got questions? I’ve got (casual) answers!
Can I double the recipe for more cookies? Well, technically yes, but then it’s not a “small batch” anymore, is it? Go for it if you’re feeling ambitious, but remember it might mean more dishes!
Why only an egg yolk? What about the white? Ah, a keen eye! The yolk adds richness, moisture, and chewiness without making the cookies cakey or dry. The white would make them crispier and less tender. It’s all about that perfect balance!
My cookies spread too much! What did I do wrong? A few culprits here: your butter might have been too warm when mixed, your oven might not be at the correct temperature, or (less likely with this recipe) you might need a tiny bit more flour next time. Also, sometimes it’s just humid!
Can I make the dough ahead of time and bake later? Absolutely! You can keep the dough in an airtight container in the fridge for up to 2-3 days. When ready to bake, let it sit at room temp for 10-15 minutes before scooping, or add a minute or two to the bake time.
Do I *have* to use both granulated and brown sugar? For the best results, yes! Granulated sugar gives crispiness, while brown sugar adds moisture, chewiness, and that lovely caramel note. They’re a power couple, don’t break them up!
What if I don’t have vanilla extract? Don’t tell anyone, but you *could* skip it. But your cookies will miss their soulmate! It really makes a difference in rounding out the flavor.
Final Thoughts
See? Told ya it was easy! Now you have no excuse not to whip up a couple of warm, gooey, chocolate chip masterpieces whenever the craving strikes. No need to wait for a party, no need to share with the masses (unless you want to). This recipe is all about you and your immediate cookie needs.
Now go impress someone—or yourself—with your new culinary skills. You’ve earned it! Enjoy those delightful cookies, you baking wizard, you!


