So you’re craving something tasty but too lazy to spend forever in the kitchen, huh? Same. High five! You want that warm, spiced, creamy goodness of a pumpkin pie, but the thought of wrestling with pie crust dough makes you want to curl up and cry. Fear not, my friend! We’re ditching the fancy-pants traditional crust for something much, much better (and easier): the glorious graham cracker crust. Get ready to impress everyone (mostly yourself) with minimal effort.
Why This Recipe is Awesome
Let’s be real, life is too short for complicated recipes. This pumpkin pie with a graham cracker crust is basically the culinary equivalent of a warm hug and a pat on the back. It’s idiot-proof – even I, a seasoned pro at kitchen disasters, didn’t mess it up. Seriously, no blind baking, no weird shrinking crusts, just pure, unadulterated pumpkin bliss. It comes together faster than you can say “more whipped cream, please,” uses surprisingly few dishes, and tastes like autumn exploded in your mouth. Plus, the crunchy crust perfectly complements the silky filling. It’s a texture party!
Ingredients You’ll Need
Gather your troops! Here’s what you need for your pie adventure:
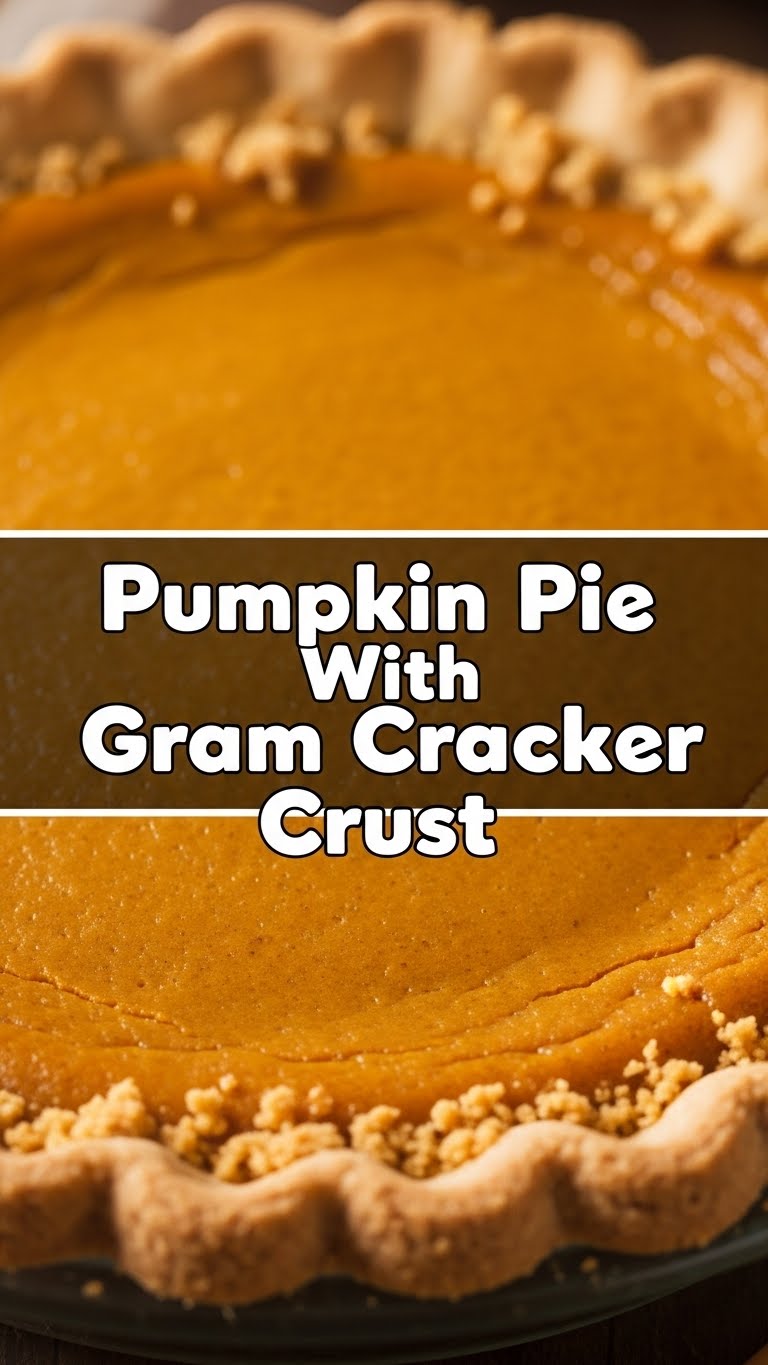
- For the Crust:
- 1 ½ cups (about 10-12 full sheets) Graham Cracker Crumbs: Get the pre-crushed kind if you’re feeling extra lazy, otherwise, grab a rolling pin and unleash some aggression.
- ¼ cup Granulated Sugar: Just a touch, for that sweet, sweet crunch.
- 6 tablespoons Unsalted Butter, melted: Because butter makes everything better, period.
- For the Filling:
- 1 (15-ounce) can Pumpkin Puree: And I mean PUREE. Not pumpkin pie filling! Read the label, folks. This is a common rookie mistake.
- 1 (14-ounce) can Sweetened Condensed Milk: This is the magic ingredient that makes it so creamy and sweet. Don’t skip it!
- 2 Large Eggs: The binding agents, keeping everything together.
- 1 teaspoon Pumpkin Pie Spice: The superstar flavor booster. If you don’t have this, see the “Alternatives” section for a DIY blend.
- ½ teaspoon Salt: Don’t skip it! It balances the sweetness and really makes the pumpkin flavor sing.
Step-by-Step Instructions
Let’s get this deliciousness going! Follow these super simple steps:
- Preheat your oven to 350°F (175°C). Seriously, don’t skip this. A properly preheated oven is key to even baking.
- Crush those crackers! If you have whole graham crackers, put them in a zip-top bag and smash them with a rolling pin or the bottom of a heavy pan. Or, use a food processor for super fine crumbs. Aim for about 1 ½ cups.
- Make the crust. In a medium bowl, combine your graham cracker crumbs, ¼ cup sugar, and melted butter. Mix it all up until it looks like wet sand.
- Press it in. Pour the crumb mixture into a 9-inch pie plate. Using the bottom of a flat glass or your fingers, firmly press the mixture evenly over the bottom and up the sides of the pie plate. Press firmly! This helps prevent a crumbly or soggy crust.
- Whip up the filling. In a large bowl, whisk together the pumpkin puree, sweetened condensed milk, eggs, pumpkin pie spice, and salt until it’s smooth and well combined.
- Fill ‘er up. Carefully pour the pumpkin filling into your prepared graham cracker crust.
- Bake it! Place the pie in the preheated oven and bake for 50-60 minutes, or until a knife inserted near the center comes out clean (or mostly clean with just a few moist crumbs). The edges might puff up slightly, but the center should be mostly set.
- Cool down. Let the pie cool completely on a wire rack. This is crucial! Patience, my friend.
- Chill out. Once cool, pop that beauty into the fridge for at least 3-4 hours, or even better, overnight. This helps it set perfectly and makes for clean slices. IMO, it tastes even better the next day!
Common Mistakes to Avoid
We’re all human, but let’s try to dodge these common blunders:
- Thinking you don’t need to preheat the oven. Rookie mistake! Your pie needs a hot start.
- Grabbing the wrong can. I cannot stress this enough: Pumpkin PUREE, not pumpkin PIE FILLING. They are not the same!
- Not pressing the crust firmly enough. A loosely packed crust is a sad, crumbly crust. Get in there and show it who’s boss.
- Overbaking your pie. This leads to cracks and a drier texture. Watch for that jiggle test – the center should have a slight wobble but not be liquid.
- Impatience. Seriously, letting it cool and chill is vital. Cutting into a warm, unset pie is just asking for a gloopy mess.
Alternatives & Substitutions
Feeling adventurous or missing an ingredient? Here are some ideas:
- Crust Variations: Not a graham cracker fan? Try crushed gingersnaps for a spicier kick, or shortbread cookies for a buttery, less sweet option.
- DIY Pumpkin Pie Spice: No pre-made blend? No problem! Mix together 1/2 tsp cinnamon, ¼ tsp ginger, ⅛ tsp nutmeg, and a tiny pinch of ground cloves. Voilà!
- Toppings Galore: While perfect on its own, a dollop of fresh whipped cream is non-negotiable for many (myself included!). A drizzle of caramel sauce or a sprinkle of toasted pecans also wouldn’t hurt anyone.
- Dairy-Free Option: You can find dairy-free sweetened condensed milk and use a plant-based butter alternative for the crust.
FAQ (Frequently Asked Questions)
Got questions? I’ve got (casual) answers!
- Can I use margarine instead of butter for the crust? Well, technically yes, but why hurt your soul like that? Butter just tastes better and sets up nicer. If you *must*, use it, but don’t say I didn’t warn you.
- Can I make this pie ahead of time? Absolutely! This pie is a superstar make-ahead dessert. In fact, it often tastes even better the next day as the flavors meld. Just cover it loosely and keep it in the fridge for up to 3-4 days.
- How do I know when the pie is done? Give it a gentle jiggle! The edges should be set, but the center should have a slight wobble, like jello. If it’s still very liquidy in the middle, give it a bit more time. A knife inserted near the center should come out clean.
- My crust got soggy! What happened? You likely didn’t press it firmly enough, or maybe your butter wasn’t fully melted and incorporated. Ensure it’s packed tightly and evenly. Sometimes overfilling can also contribute.
- Can I use a larger or smaller pie plate? You can! Just be aware you might need to adjust baking times. A smaller, deeper pie might need a bit longer, while a wider, shallower one will bake faster.
- What if I don’t have pumpkin pie spice? No worries! See the “Alternatives & Substitutions” section for how to make your own blend from common spices like cinnamon, ginger, nutmeg, and cloves.
Final Thoughts
See? That wasn’t so hard, was it? You’ve just created a masterpiece of fall deliciousness with minimum fuss and maximum flavor. Now go impress someone—or yourself—with your new culinary skills. You’ve earned it! Grab a slice, maybe add a generous dollop of whipped cream, and bask in the glory of your effortless baking prowess. Happy pie-making, my friend!


