Ever had one of those days where you just need something ridiculously pretty and delicious, but the thought of spending hours in the kitchen makes you want to curl up and cry? Yeah, me too. But fear not, my lazy-but-gourmet friend! Today, we’re whipping up a Pink and Chocolate Cake that’s so stunning, it’ll look like you slaved all day, but shhh… it’s our little secret how easy it actually is. Let’s get baking!
Why This Recipe is Awesome
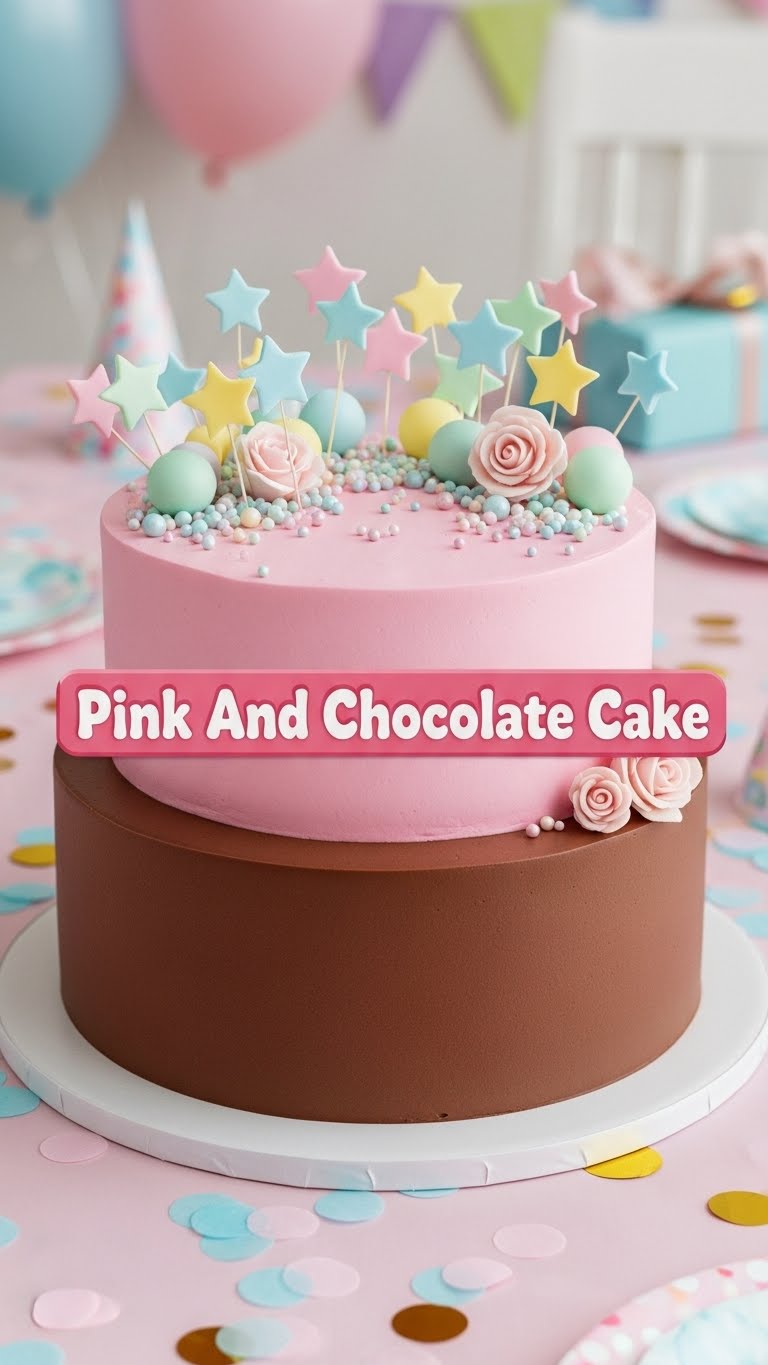
Okay, so why should you bother with this particular recipe? First off, it’s a chocolate cake, so already winning. Second, it’s got a vibrant pink frosting that just screams ‘joy’ and ‘eat me now!’ It’s the kind of cake that makes people gasp – in a good way, I promise. Plus, it’s honestly pretty darn hard to mess up. Even if you usually burn water, you might just nail this one. **Seriously, it’s that forgiving.** It looks fancy, tastes incredible, and doesn’t require a culinary degree. What’s not to love, right?
Ingredients You’ll Need
Gather ’round your inner chef, here’s your shopping list. Don’t worry, nothing too wild here:
- For the Ridiculously Easy Chocolate Cake:
- 1 ½ cups all-purpose flour (the basic stuff)
- 1 ½ cups granulated sugar (for that sweet, sweet life)
- ¾ cup unsweetened cocoa powder (the dark, mysterious kind)
- 1 ½ teaspoons baking soda (your cake’s fluffy secret)
- 1 teaspoon baking powder (more fluff power!)
- 1 teaspoon salt (don’t skip this, it makes a difference)
- 2 large eggs (room temp, they mix better)
- 1 cup milk (any kind, but whole milk is richer, just sayin’)
- ½ cup vegetable oil (or canola, for moisture)
- 2 teaspoons vanilla extract (the scent of pure happiness)
- 1 cup hot water or hot coffee (yes, coffee! It makes the chocolate sing)
- For the Pretty-in-Pink Buttercream Frosting:
- 1 cup unsalted butter, softened (this is non-negotiable for good frosting)
- 4-5 cups powdered sugar (sifted, unless you like lumps)
- ¼ cup milk or heavy cream (to get that dreamy consistency)
- 1 teaspoon vanilla extract (more happiness!)
- Pink food coloring gel (your secret weapon for vibrant pink!)
Step-by-Step Instructions
Alright, let’s get down to business. Follow these simple steps, and you’ll be a cake boss in no time!
- Preheat & Prep: First things first, preheat your oven to 350°F (175°C). Grease and flour two 8-inch round cake pans. Or, line them with parchment paper if you’re feeling extra fancy and want zero sticking anxiety.
- Mix Dry Stuff: In a large bowl, whisk together the flour, sugar, cocoa powder, baking soda, baking powder, and salt. Give it a good whisk until everything is super combined. **Nobody wants a lumpy cake, right?**
- Add Wet Stuff: Add the eggs, milk, oil, and vanilla extract to the dry ingredients. Beat with an electric mixer on medium speed for about 2 minutes, scraping down the sides of the bowl as needed.
- The Hot Secret: Carefully pour in the hot water (or coffee). The batter will be thin, don’t freak out! Gently stir until just combined. Don’t overmix, or your cake might get tough.
- Bake It Up: Divide the batter evenly between your prepared cake pans. Bake for 30-35 minutes, or until a toothpick inserted into the center comes out clean.
- Cool Down: Let the cakes cool in the pans for about 10-15 minutes before inverting them onto a wire rack to cool completely. **Patience, young grasshopper! Frosting a warm cake is a rookie mistake.**
- Make the Pink Frosting: While the cakes cool, beat the softened butter in a large bowl with an electric mixer until light and fluffy. Gradually add the powdered sugar, one cup at a time, alternating with the milk/cream and vanilla extract, until smooth and creamy.
- Color Blast: Add a few drops of pink food coloring gel. Start small and add more until you get your desired shade of fabulous pink. Mix until it’s evenly colored and looks like a unicorn sneezed joy.
- Assemble Your Masterpiece: Once the cakes are completely cool, place one layer on your serving plate. Spread a generous amount of pink frosting on top. Place the second cake layer on top and cover the entire cake with the remaining frosting. Decorate as desired – maybe some chocolate shavings or sprinkles for extra pizzazz!
Common Mistakes to Avoid
We’ve all been there, staring at a baking disaster. Here’s how to sidestep some common blunders:
- Not Preheating the Oven: Seriously? C’mon, this isn’t amateur hour. Your cake won’t rise properly if the oven isn’t at the right temp from the start. **Rookie mistake!**
- Overmixing the Batter: When you’re adding the wet ingredients or the hot water, mix just until combined. Overmixing develops the gluten, leading to a tough, dry cake. Nobody wants that.
- Opening the Oven Door Too Early: Resist the urge! Opening the oven door lets out heat and can make your cake sink in the middle. Wait until the last 5-10 minutes of baking time to check on it.
- Frosting a Warm Cake: Unless you enjoy soupy, melted frosting, wait until your cakes are 100% cool. I mean, completely stone-cold. Otherwise, you’ll have a melty mess. You’ve been warned!
Alternatives & Substitutions
Feeling a little rebellious or just out of an ingredient? No stress, we’ve got options!
- Pink Power: Don’t have pink food coloring? You can use a tiny bit of beet powder for a natural pink hue (it won’t taste like beets, I promise!), or a few tablespoons of pureed strawberries or raspberries. Just adjust your powdered sugar if using fresh fruit to keep the frosting thick.
- Dairy-Free? Swap the milk for a plant-based alternative like almond or oat milk, and use a good quality dairy-free butter substitute for the frosting. Easy peasy!
- Coffee Hater? If coffee isn’t your jam (or you’re making this for kids), just use hot water instead. The coffee just deepens the chocolate flavor without making it taste like coffee, but water works perfectly fine.
- Gluten-Free Flour: You can often substitute an equal amount of your favorite 1:1 gluten-free flour blend for the all-purpose flour. Just make sure it contains xanthan gum.
- Extra Chocolatey: Want even more chocolate? Throw in ½ cup of chocolate chips into the batter before baking. Because, why not?
FAQ (Frequently Asked Questions)
Got questions? I’ve got answers, delivered with a side of sass.
- Can I use a boxed cake mix for the base? Well, technically yes, but why shortchange yourself when this scratch recipe is so darn easy and tastes a million times better? You’re better than that!
- How do I get the pink so vibrant? Good quality gel food coloring is your best friend here. A little goes a long way, and it won’t thin out your frosting like liquid colors might.
- My frosting is too thin/thick, help! Too thin? Add more sifted powdered sugar, a tablespoon at a time. Too thick? Add more milk or cream, a teaspoon at a time. It’s like a delicious science experiment!
- Can I make this cake ahead of time? Absolutely! The unfrosted cake layers can be wrapped tightly and frozen for up to a month, or kept in the fridge for a couple of days. The frosted cake keeps well at room temperature (covered) for 2-3 days.
- Do I *really* need to use hot water/coffee? Yes, for optimal results. The hot liquid helps bloom the cocoa powder, giving you a richer chocolate flavor and a more tender crumb. It’s like magic, but science.
- What if I don’t have two 8-inch pans? You can use two 9-inch pans, but baking time might be slightly less (check at 25 minutes). Or, you can bake it in a 9×13-inch pan for about 35-40 minutes and make it a sheet cake. It’ll still be delicious!
Final Thoughts
So there you have it, your ticket to a world of delicious pink and chocolate glory! This cake isn’t just a dessert; it’s a statement. A statement that says, ‘Yes, I can bake, and yes, it looks fabulous, and no, you can’t have the last slice.’ You’ve tackled a gorgeous cake with minimal fuss, and that, my friend, is a victory. Go forth, bake, and enjoy. You totally deserve it after all that ‘hard work’ (wink, wink). Now go impress someone—or yourself—with your new culinary skills. You’ve earned it!


