So you’re craving something tasty but too lazy to spend forever in the kitchen, huh? Same. But what if I told you there’s a way to get your cozy, cinnamon-spiced fix with a juicy, unexpected twist, without needing a culinary degree or a whole weekend? Enter: Pear Cinnamon Rolls, your new BFF. Get ready to have your mind (and taste buds) blown without breaking a sweat. Mostly.
Why This Recipe is Awesome
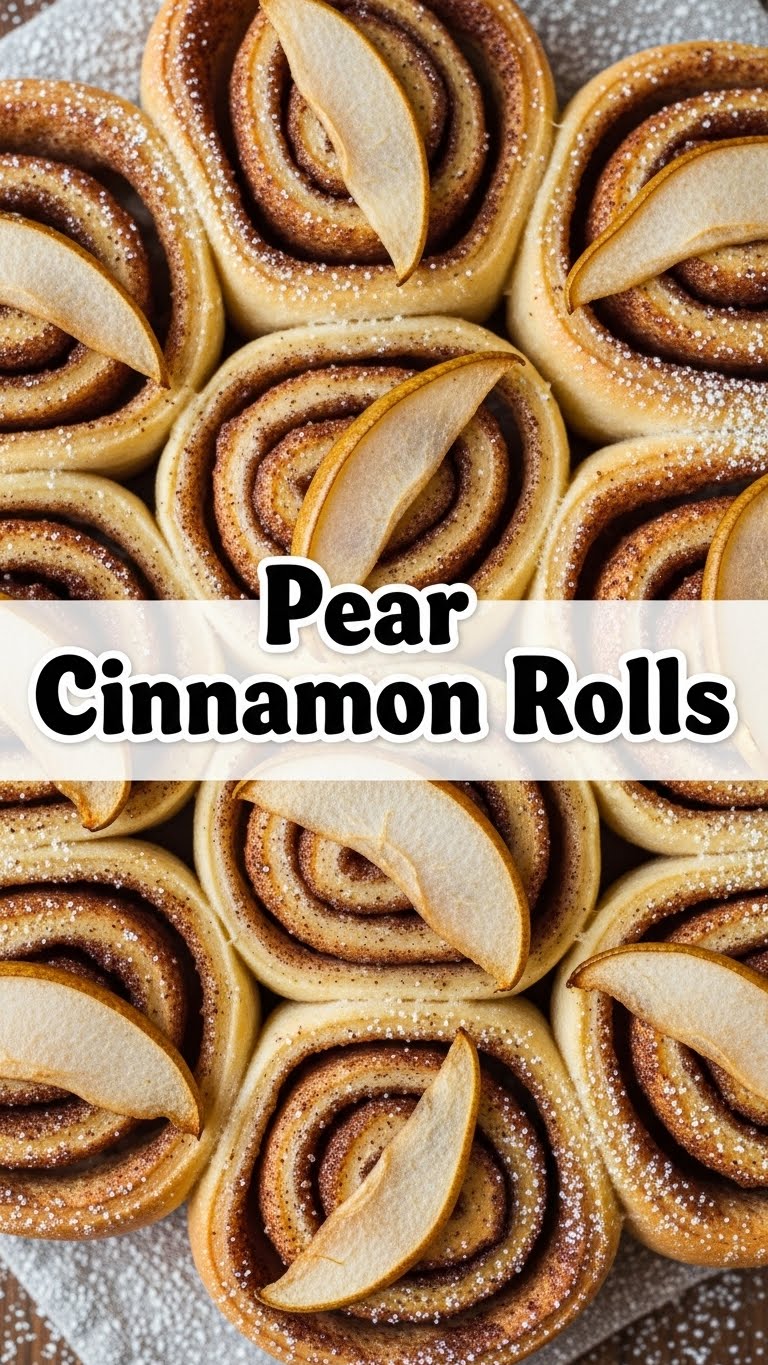
Okay, let’s be real. Most cinnamon rolls are great, but sometimes you need a little… extra. These pear cinnamon rolls are that extra. They’re basically regular cinnamon rolls that went on a fancy vacation and came back even better. The pears add these amazing pockets of warmth and sweetness, cutting through the richness perfectly. It’s like a hug for your soul, but edible. And way less awkward.
Plus, **it’s surprisingly idiot-proof** – seriously, if I can do it without setting off the smoke alarm, you’re golden. The added fruit makes them feel a *little* healthier, too, right? Don’t argue with me on this one. It’s for the best.
Ingredients You’ll Need
Gather ’round, my sweet-toothed friends. Here’s your shopping list for pure bliss:
For the Dough (the actual hero):
- 1 cup warm milk (think bathwater, not boiling lava – you’ll kill the yeast otherwise, and that’s just sad)
- ½ cup granulated sugar (for yeast food, and general deliciousness)
- 2 ¼ teaspoons active dry yeast (one packet, the magical poof-maker)
- 4 cups all-purpose flour (the structural integrity of your dreams)
- 1 teaspoon salt (don’t skip, it brings out all the flavors, trust me)
- ½ cup unsalted butter, melted (because everything’s better with butter, duh)
- 2 large eggs (for richness and binding everything together)
For the Filling (the sweet surprise):
- ½ cup unsalted butter, softened (room temp, not melted soup, people!)
- 1 cup light brown sugar, packed (deep, caramel-y goodness)
- 2 tablespoons ground cinnamon (the star of the show, obviously)
- 2 medium fresh pears, peeled, cored, and finely diced (the plot twist! Bosc or Anjou work great)
For the Glaze (the glorious finish):
- 1 ½ cups powdered sugar (makes it look fancy and taste even better)
- 2-3 tablespoons milk or cream (for that perfect drizzly consistency)
- 1 teaspoon vanilla extract (a splash of pure joy)
Step-by-Step Instructions
- **Activate the Yeast:** In a large bowl, whisk together warm milk, 1 tsp of the granulated sugar, and the yeast. Let it hang out for 5-10 minutes until it gets nice and foamy. This means it’s alive and ready to party!
- **Mix the Dough:** Add the remaining granulated sugar, flour, salt, melted butter, and eggs to the yeast mixture. Mix with a wooden spoon or a stand mixer (with a dough hook, if you’re fancy) until a shaggy dough forms.
- **Knead It Out:** Turn the dough onto a lightly floured surface. Knead for 5-8 minutes until it’s smooth and elastic. Or, let your stand mixer do the hard work for about 3-5 minutes. Your arms will thank you.
- **First Rise (the nap time):** Place the dough in a greased bowl, flip it once to coat, then cover with plastic wrap. Let it rise in a warm spot for 1-1.5 hours, or until doubled in size. **Patience, young grasshopper!**
- **Prep the Filling:** While the dough is rising, mix softened butter, brown sugar, and cinnamon in a small bowl until combined. Stir in the finely diced pears. Set aside, trying not to eat it all with a spoon.
- **Roll it Out:** Once risen, gently punch down the dough (so satisfying, right?). Roll it out on a lightly floured surface into a large rectangle, about 12×18 inches.
- **Spread the Love:** Evenly spread the pear-cinnamon filling over the dough, leaving a small border on one long edge (this helps seal it).
- **Roll ‘Em Up:** Tightly roll the dough from the long edge into a log. **Keep it snug to avoid gaps and sad, exploded rolls.**
- **Slice and Dice:** Using a sharp knife or, my personal favorite, unflavored dental floss (seriously, Google it!), cut the log into 12 equal rolls.
- **Second Rise (almost there!):** Arrange the rolls in a greased 9×13 inch baking dish. Cover and let rise again for 30-45 minutes, or until puffy. During this time, preheat your oven to 375°F (190°C).
- **Bake ‘Em:** Bake for 20-25 minutes, or until golden brown and cooked through. If they’re browning too fast, loosely tent with foil to prevent over-toasting.
- **Whip up the Glaze:** While rolls cool slightly, whisk powdered sugar, milk/cream, and vanilla extract in a small bowl until smooth. Adjust milk/cream as needed for your desired drizzly consistency.
- **Glaze and Devour:** Drizzle (or slather, no judgment here) the warm rolls with the glorious glaze. Serve immediately and bask in the glory you’ve created!
Common Mistakes to Avoid
Listen, we all make mistakes. Let’s try to avoid these rookie blunders:
- **Killing the Yeast:** Hot milk = dead yeast = no rise = flat, sad rolls. **Aim for bathwater temperature**, not a scalding hot tub.
- **Not Kneading Enough:** Your dough needs to develop gluten for that lovely chew. Don’t be lazy here; a well-kneaded dough is a happy dough.
- **Over-flouring:** Adding too much flour makes your rolls tough and dry. Start with the suggested amount and only add more if your dough is super sticky and unmanageable.
- **Not Letting Them Rise Enough:** Rushing the rise times gives you dense, sad rolls. Let them do their thing; patience is a virtue, especially in baking.
- **Uneven Slicing:** Use a ruler or dental floss for even rolls. Otherwise, some will be underdone, others overdone, and no one wants that kind of drama.
Alternatives & Substitutions
Feeling a little rebellious? Here are some ways to shake things up:
- **Fruit Swap:** Not a pear person? **Apples (Granny Smith or Honeycrisp are great)** work wonderfully. Peaches or even berries (just mind the moisture, maybe pat them dry a bit) could be a fun experiment too!
- **Spices:** Feeling adventurous? A pinch of nutmeg or cardamom in the filling would be divine and add an extra layer of warmth.
- **Glaze Variations:** A classic cream cheese frosting is always a winner (just beat cream cheese, butter, powdered sugar, and a splash of milk). Or, if you’re a minimalist, go naked (but why, though?).
- **Flour Power:** You *could* try whole wheat flour, but honestly, white flour just gives that classic, soft cinnamon roll texture. IMO, stick to the tried and true here for maximum comfort.
FAQ (Frequently Asked Questions)
- **Can I make these ahead of time?** Absolutely! You can assemble the rolls, cover tightly with plastic wrap, and refrigerate overnight after the second rise. Then, let them sit at room temp for 30-60 minutes before baking as usual. Or, bake and freeze once cooled, then reheat!
- **My dough isn’t rising, what gives?** Uh oh. Your yeast might be dead (hot milk? old yeast?) or your spot isn’t warm enough. **Try a warmer spot**, maybe a slightly warmed (but turned off!) oven or near a sunny window.
- **What kind of pears should I use?** Ripe but firm pears are best. Bosc or Anjou work great. You don’t want them mushy, but not rock hard either.
- **Can I use margarine instead of butter?** Well, technically yes, but why hurt your soul like that? Butter just tastes better, period. **Seriously, use butter.**
- **My rolls are dry. Help!** You might have overbaked them. Keep an eye on the clock and the color. Also, not enough liquid in the dough or too much flour can lead to dryness.
- **Do I have to peel the pears?** For a smoother texture, yes. The peels can get a bit tough when baked. It’s a small extra step that makes a big difference in the final product.
- **How long do these last?** If you manage not to eat them all in one go (good luck with that!), they’re best on day 1. Store covered at room temp for up to 2-3 days, or refrigerate for longer. They warm up beautifully!
Final Thoughts
So there you have it, folks! Pear Cinnamon Rolls – proof that sometimes, a little twist on a classic is exactly what you need. These aren’t just rolls; they’re an experience. They’re what you make when you want to impress someone, or just treat yourself to something truly spectacular. Now go forth, conquer your kitchen, and make some pear-y good memories. You’ve earned it!


