So, you’re looking for a dessert that screams “I’m fancy!” but secretly whispers “I spent like, 15 minutes on this, tops”? My friend, you’ve stumbled into the right corner of the internet. We’re talking about a Peanut Butter Pie so ridiculously easy, you’ll wonder if you accidentally missed a step. But nope, it’s just that magical. Get ready to impress everyone (or just your couch, no judgment here) with minimal effort and maximum deliciousness.
Why This Recipe is Awesome
Let’s be real, life’s too short for complicated recipes unless you’re, like, a professional pastry chef with a lot of time on your hands. This pie? It’s basically the culinary equivalent of putting on sweatpants after a long day – pure comfort and zero fuss. Here’s why you’re about to fall head over heels for it:
- It’s almost entirely **no-bake**, which means less oven time and more “Netflix and chill” time for you.
- **Idiot-proof.** Seriously. Even I didn’t mess it up, and my kitchen adventures often resemble a small-scale disaster movie.
- Uses ingredients you probably already have lurking in your pantry. No obscure, “where do I even find that?” stuff.
- The combination of creamy vanilla pudding and salty-sweet peanut butter is a flavor bomb. Your taste buds will throw a party.
- It looks super impressive, like you slaved away for hours. Your secret is safe with me.
Ingredients You’ll Need
Gather ’round, buttercups! Here’s your shopping list. Most of these are probably already giving you the side-eye from your fridge or cupboard.
- 1 (9-inch) graham cracker crust: Store-bought is totally fine, my lazy-gourmet friend. If you’re feeling ambitious and want to make your own, go for it, but honestly, why bother?
- 1 cup creamy peanut butter: The regular stuff, not the natural oil-separation kind. Unless you love a challenge, but again, why?
- 1 (3.4-ounce) package instant vanilla pudding mix: Key word: INSTANT. Don’t grab the cook-and-serve unless you’re looking for an adventure (and a soupy pie).
- 1 ½ cups cold milk: Any kind works, but whole milk makes it extra creamy. We’re not cutting corners on deliciousness, are we?
- 1 (8-ounce) package cream cheese, softened: This is my secret weapon for extra richness and stability. Totally optional, but **highly recommended** for a pie that holds its shape like a boss.
- 1 (8-ounce) container frozen whipped topping, thawed (like Cool Whip): Or if you’re feeling fancy and have a stand mixer, make your own fresh whipped cream! But for ultimate ease, Cool Whip is your MVP.
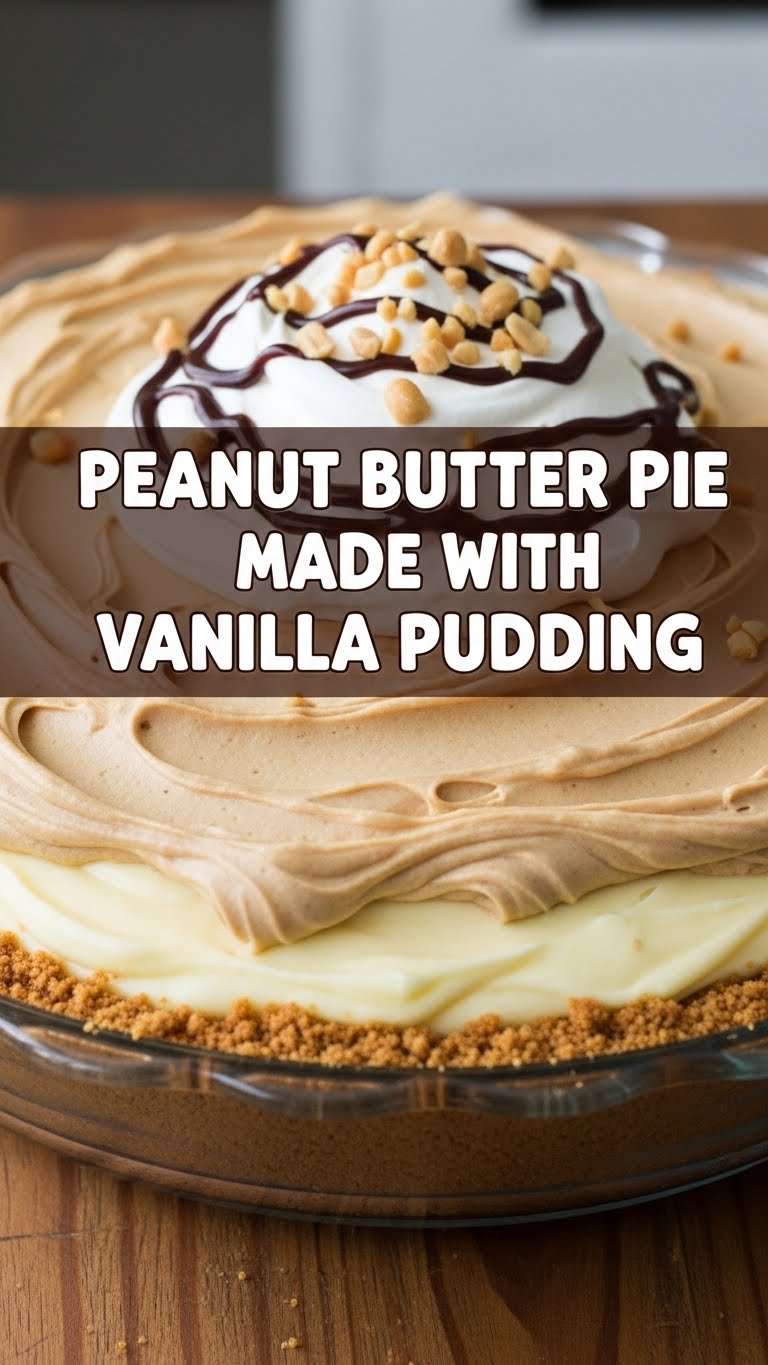
- For garnish (optional, but makes it pretty!): Chopped roasted peanuts, chocolate syrup drizzle, or mini peanut butter cups. Go wild!
Step-by-Step Instructions
Alright, apron on (or just your favorite comfy tee), let’s get this show on the road. These steps are so easy, you could probably do them blindfolded. (Please don’t.)
- **Prep the Crust:** If you’re using a store-bought graham cracker crust, congratulations, you’re basically done with this step! Just unwrap it. If you’re a DIY hero, make your crust and let it cool completely.
- **Whip the Cream Cheese (if using):** In a large mixing bowl, beat the softened cream cheese with an electric mixer until it’s super smooth and fluffy. This makes sure there are no lumpy surprises later.
- **Mix the Pudding:** Add the instant vanilla pudding mix and the cold milk to the bowl with the cream cheese (or just a large bowl if skipping cream cheese). Beat with the electric mixer for about 2 minutes until it starts to thicken up. You want it nice and creamy, not soupy.
- **Introduce the Peanut Butter:** Now, add that glorious cup of peanut butter to the pudding mixture. Beat again until everything is well combined and gloriously smooth. Scrape down the sides of the bowl to make sure no peanut butter is left behind, plotting its escape.
- **Fold in the Fluff:** Gently fold in the thawed whipped topping. Use a spatula for this, not the mixer. You want to keep all that beautiful air in the whipped topping for a light, airy pie. Keep folding until no white streaks remain.
- **Fill ‘er Up:** Pour the entire peanut butter concoction into your prepared graham cracker crust. Spread it out evenly. Make it look pretty!
- **Chill Out:** This is the hardest part: waiting. Cover the pie loosely with plastic wrap and **refrigerate for at least 4 hours**, or ideally, overnight. This gives it time to set up perfectly so it slices like a dream.
- **Garnish & Serve:** Once it’s firm, go nuts with your chosen garnishes. Slice, serve, and accept all the compliments like the dessert superstar you are.
Common Mistakes to Avoid
Because nobody wants a pie fail, am I right? Heed these warnings, young padawan, and your pie will be legendary.
- **Using “Cook & Serve” Pudding:** This is a one-way ticket to a runny disaster. **Always grab the “instant” kind.** You’ve been warned.
- **Not Softening Cream Cheese:** If you’re using cream cheese and it’s cold, you’ll end up with lumps. Lumps are for mashed potatoes, not peanut butter pie. Plan ahead, or microwave it for 10-15 seconds.
- **Impatience is Not a Virtue:** Seriously, that chill time is non-negotiable. Trying to slice it too soon will result in a sad, messy puddle. **Give it time to set!**
- **Over-Mixing Whipped Topping:** Once the Cool Whip is in, switch to a gentle hand with a spatula. You want to fold, not beat, to keep it light and fluffy.
- **Eating Half the Ingredients Before They Make It Into the Pie:** Okay, this isn’t a *mistake* per se, but it might mean you’ll have to buy more ingredients. Just sayin’.
Alternatives & Substitutions
Feeling rebellious? Want to put your own spin on it? I like your style. Here are some ideas:
- **Crust Swap:** Not a graham cracker fan? Try an **Oreo or chocolate cookie crust** for a delightful peanut butter-chocolate combo. Dreamy!
- **Pudding Power-Up:** Instead of vanilla, experiment with **instant chocolate pudding** for a deeper chocolate-peanut butter experience. Or even butterscotch, if you’re feeling wild!
- **Whipped Cream Freshness:** If you’re anti-Cool Whip (I get it, sometimes you just want the real deal), make your own whipped cream! Just whip 2 cups heavy cream with ¼ cup powdered sugar and 1 tsp vanilla until stiff peaks form.
- **Nut-Free Zone:** Got allergies? Use a **sunflower seed butter** (like SunButter) instead of peanut butter. The flavor will be slightly different, but still delicious and safe!
- **Health-ish Version (sort of):** Use sugar-free pudding and light whipped topping. It won’t be *healthy* healthy, but it’s a step in a slightly less indulgent direction. YOLO, though.
FAQ (Frequently Asked Questions)
Got questions? I’ve got answers. Mostly.
Can I use natural peanut butter for this pie?
Well, technically yes, but why hurt your soul like that? Kidding! But seriously, natural peanut butter (the kind you have to stir) can make the pie less stable and give it a different texture. For best results, stick to the creamy, no-stir kind.
How long does this pie last in the fridge?
If you manage to not devour it all in one sitting, it’ll last covered in the fridge for 3-4 days. But honestly, it rarely makes it past day two in my house.
Can I make this pie ahead of time for a party?
Absolutely! It actually tastes even better after it’s had a good, long chill. Make it the day before your event, and you’ll be golden. **Pro tip:** garnish right before serving for maximum visual impact.
What if I don’t have an electric mixer? Can I mix by hand?
You can! But your arm might get a serious workout. The cream cheese (if using) and peanut butter can be tough to get smooth without a mixer. If you’re strong and patient, go for it! Just make sure everything is super smooth.
Can I freeze peanut butter pie?
You bet your sweet pie it freezes! Wrap it tightly in plastic wrap, then foil, and it’ll keep for up to a month. Thaw in the fridge for a few hours before serving. It’s also amazing slightly frozen on a hot day.
My pie is runny! What went wrong?
Oh no! Most likely culprits: using “cook and serve” pudding instead of instant, or not chilling it long enough. Make sure your milk was cold, and you gave it ample time in the fridge. Sometimes using a non-dairy milk can also affect setting, FYI.
Final Thoughts
See? I told you it was easy! You’ve just whipped up a dessert that tastes like a dream, looks like a million bucks, and required minimal fuss. Now go impress someone—or yourself—with your new culinary skills. You’ve earned it! Grab a slice, put your feet up, and enjoy the sweet, sweet victory of a perfectly delicious, perfectly effortless peanut butter pie. You’re basically a dessert wizard now. Don’t forget to send me a slice!


