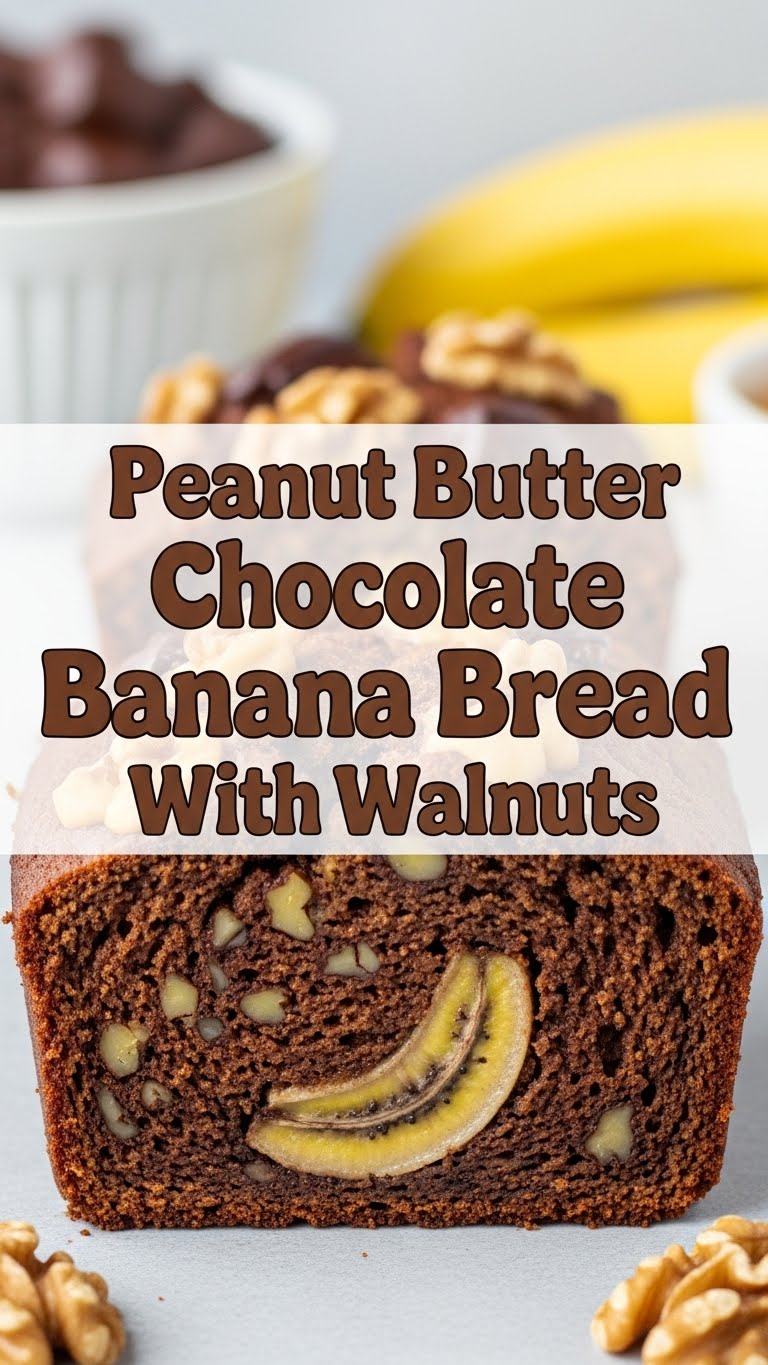
The “Oops, I Accidentally Made the Best Banana Bread Ever” Recipe
So, you’re hovering over the banana bowl, those spotted beauties whispering sweet nothings about becoming a delicious baked good, but the thought of a complicated recipe makes your spirit wilt like a forgotten houseplant? Been there, friend. We’ve all been there. But fear not, for I have conjured a creation so simple, so ridiculously tasty, it might just become your new go-to. Prepare yourselves for the glorious union of peanut butter, chocolate, and banana, all cozy in a loaf of bread with a nutty crunch. Yep, it’s a thing, and it’s about to be your favorite thing.
Why This Recipe is Absolute Genius
Let’s be real, this bread isn’t just good; it’s a hug in loaf form. It’s the perfect balance of sweet, salty, and utterly decadent. Plus, it uses up those sad, overripe bananas that are practically begging for a redemption arc. And the best part? It’s practically idiot-proof. Seriously, if I can make this without setting off the smoke alarm (most of the time), you absolutely can. It’s the kind of recipe that makes you look like a domestic goddess or god, even if your other culinary adventures involve microwave popcorn.
Ingredients You’ll Need (Don’t Sweat It!)
Here’s what you need to wrangle:
- 3 very ripe bananas (the mushier, the better. Black spots are your friends here.)
- 1/2 cup unsalted butter, softened (or, you know, microwaved for 20 seconds because you’re impatient, like me.)
- 3/4 cup granulated sugar (or a smidge less if you’re watching your sweet intake… or not, we’re not judging.)
- 2 large eggs (room temperature is ideal, but who actually plans for that?)
- 1 teaspoon vanilla extract (the secret weapon of all baked goods.)
- 1 1/2 cups all-purpose flour (don’t overthink it, just measure!)
- 1 teaspoon baking soda (this is the magic lift.)
- 1/2 teaspoon salt (to balance all that sweetness.)
- 1/2 cup creamy peanut butter (use your favorite! Jif, Skippy, that artisanal stuff you paid too much for – it all works.)
- 1/2 cup chocolate chips (milk, semi-sweet, dark – whatever floats your boat. Or, you know, melts your heart.)
- 1/2 cup chopped walnuts (optional, but highly recommended for that satisfying crunch. Almonds or pecans are cool too.)
Step-by-Step (It’s Easier Than Adulting)
1. Preheat your oven to 350°F (175°C). Grease and flour a 9×5 inch loaf pan. You can also line it with parchment paper if you’re feeling fancy and want to make cleanup a breeze.
2. Mash those bananas! In a large bowl, vigorously mash the ripe bananas with a fork. Get them nice and smooth-ish. A few lumps are totally fine; they just add character.
3. Cream it good. Add the softened butter and sugar to the mashed bananas. Beat them together until they’re well combined and look a bit fluffy. Then, crack in the eggs and stir in the vanilla. Mix until everything is just incorporated.
4. Dry ingredients time. In a separate medium bowl, whisk together the flour, baking soda, and salt. This helps distribute everything evenly. Nobody wants a bite that’s just baking soda, trust me.
5. Combine the wet and dry. Gradually add the dry ingredients to the wet ingredients, mixing until just combined. **Don’t overmix!** Overmixing is the enemy of tender banana bread. Just a few streaks of flour left is perfectly acceptable.
6. Peanut butter swirl! Dollop the peanut butter into the batter. You can either gently swirl it in with a knife for cool patterns or just mix it in somewhat evenly. Your call, Picasso.
7. Choc-and-nut overload. Fold in the chocolate chips and chopped walnuts. Save a few chocolate chips to sprinkle on top for extra visual appeal (and immediate gratification when it comes out of the oven).
8. Bake it ’til it’s done. Pour the batter into your prepared loaf pan and spread it out evenly. Bake for 50-65 minutes, or until a wooden skewer inserted into the center comes out clean (or with a few moist crumbs, but no wet batter).
9. Cool down. Let the bread cool in the pan for about 10-15 minutes before turning it out onto a wire rack to cool completely. Patience, my friend! It’s tough, I know.
Common Mistakes to Avoid (Or Not, We Learn From Our Oopsies)
- Using green bananas: They won’t be sweet enough, and you’ll end up with a bland, dense brick. Embrace the spots!
- Overmixing the batter: This develops the gluten too much, resulting in tough, rubbery bread. Just mix until you don’t see dry flour anymore.
- Not preheating the oven: This is like showing up to a party without pants. Everything bakes unevenly and sad.
- Opening the oven door too much: Resist the urge to peek every five minutes! Let the oven do its magic.
- Cutting it too soon: This is the ultimate test of willpower. Cutting into a hot loaf can make it fall apart. Let it cool!
Alternatives & Substitutions (Because Life Isn’t One-Size-Fits-All)
- No walnuts? No problem! Pecans, almonds, or even pumpkin seeds can add a lovely crunch. Or just skip ’em if nuts aren’t your jam.
- Dairy-free? Use a plant-based butter alternative and non-dairy milk (a splash might be needed if the batter is too thick, but usually not). For the chocolate chips, make sure they’re dairy-free.
- Gluten-free? You can try a good quality gluten-free all-purpose flour blend. It might change the texture a bit, but it’s definitely doable!
- Want it extra chocolatey? Add some cocoa powder to your dry ingredients (start with 1-2 tablespoons).
- Nutella instead of peanut butter? Ooh, you fancy! Go for it, but expect a different, albeit delicious, flavor profile.
FAQ (The Burning Questions You Might Have)
- Can I make muffins instead of a loaf? Absolutely! Spoon the batter into greased muffin tins, filling them about two-thirds full. Baking time will be shorter, around 20-25 minutes.
- My bananas aren’t *that* ripe. What do I do? You can try to speed up the ripening process by popping them in a brown paper bag with an apple for a day or two. Or, if you’re really in a pinch, you can bake them on a baking sheet at 300°F (150°C) for about 10-15 minutes until they’re soft and spotted. Just let them cool before mashing!
- Can I use self-rising flour? If you use self-rising flour, omit the baking soda and salt. Just add the self-rising flour directly to your wet ingredients and mix. Easy peasy!
- What if I don’t have butter? You *can* use oil (like vegetable or canola), but butter adds a certain richness that’s hard to beat in banana bread. If you must use oil, use about 1/3 cup less than the butter amount.
- How do I store this deliciousness? Store it in an airtight container at room temperature for up to 3 days. If you live in a super humid climate, the fridge might be better, but it can dry it out a bit. It also freezes beautifully!
- Can I skip the peanut butter swirl? Sure, but why would you?! It adds a whole extra layer of awesome. But if you must, just leave it out and add a few more chocolate chips. More chocolate is *never* a bad idea.
Go Forth and Bake!
There you have it! A ridiculously good peanut butter chocolate banana bread that’s pretty much foolproof. It’s perfect for breakfast, snacking, or when you just need something sweet to make the world feel a little bit better. Now go impress someone—or yourself—with your new culinary skills. You’ve earned it! Happy baking!
