So, you’re staring into the abyss of your pantry, dreaming of something sweet, maybe a little nutty, and definitely chocolatey, but the thought of a complicated recipe makes you want to nap? Been there, bought the T-shirt, probably ate a whole sleeve of cookies while wearing it. Good news, my friend: today, we’re making the kind of cookies that scream “effortlessly delicious” without actually demanding much effort from you. Get ready for Peanut Butter Chip and Chocolate Chip Cookies – the ultimate “I need this NOW” treat.
Why This Recipe is Awesome
Let me tell you, this isn’t just *any* cookie recipe. This is the “I’m a kitchen wizard” recipe disguised as a “I just threw things in a bowl” recipe. Here’s why it’s about to become your new best friend:
- It’s practically **idiot-proof**. Seriously, if I can do it without setting off the smoke alarm, so can you.
- **Double the chip, double the fun!** Why settle for just chocolate when you can have that glorious peanut butter punch too? It’s a flavor party, and everyone’s invited.
- **Quick and relatively painless.** We’re talking minimal chill time (unless you wanna, but who has that kind of patience?).
- You’ll smell like a baking goddess/god/culinary genius for hours, and frankly, that’s half the appeal.
Ingredients You’ll Need
Alright, gather your goodies. Most of this stuff is probably already lurking in your cupboards, waiting for its moment to shine.
- **1 cup (2 sticks) unsalted butter, softened:** Leave it out on the counter. Don’t microwave it into a sad, melty mess. We’re aiming for “spreadable,” not “liquid lava.”
- **¾ cup granulated sugar:** The regular stuff. Sweet, simple, classic.
- **¾ cup packed light brown sugar:** This is your secret weapon for chewiness. Don’t skip it, or your cookies will be less “OMG” and more “meh.”
- **2 large eggs:** Room temperature, please! They mix better. No cold eggs straight from the fridge unless you *want* a lumpy dough.
- **1 teaspoon vanilla extract:** The good stuff. Not that imitation vanilla that smells like disappointment.
- **2 ¼ cups all-purpose flour:** Just your basic flour. Don’t get fancy with cake flour or bread flour unless you know what you’re doing (and we’re not aiming for *that* kind of stress today).
- **1 teaspoon baking soda:** For lift! Gives your cookies that lovely puff.
- **½ teaspoon salt:** Balances all that sweetness. Crucial, trust me.
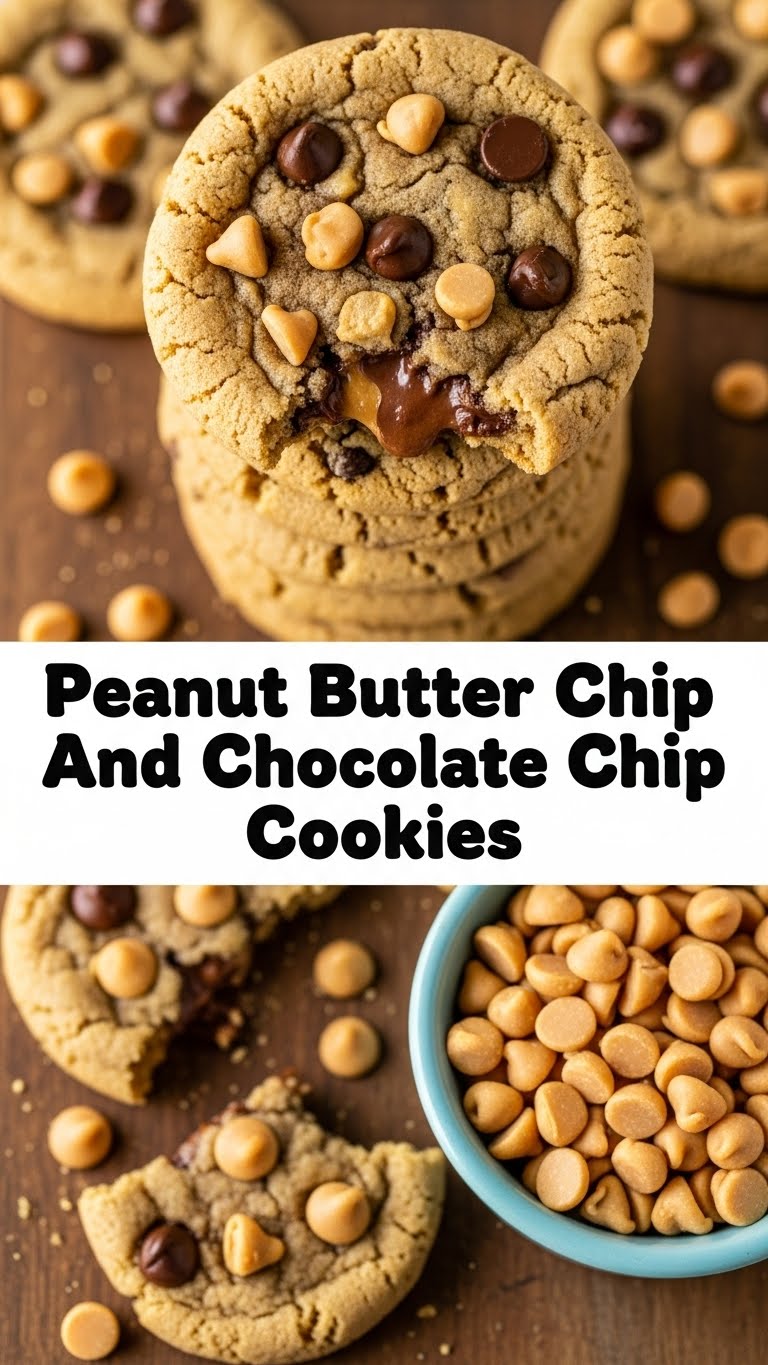
- **1 cup (about 6 oz) semi-sweet chocolate chips:** The OG. Can you ever have too many? Debatable.
- **1 cup (about 6 oz) peanut butter chips:** The star of our show! Get ready for nutty deliciousness.
Step-by-Step Instructions
Ready to get your bake on? Let’s do this. Follow these simple steps, and you’ll be munching in no time.
- **Preheat Power-Up:** First things first, get that oven hot. Preheat it to 375°F (190°C). Line a couple of baking sheets with parchment paper or silicone mats. This makes cleanup a breeze, FYI.
- **Cream It Good:** In a large bowl (or stand mixer, if you’re fancy), beat together the softened butter, granulated sugar, and brown sugar until it’s light and fluffy. This usually takes about 2-3 minutes. Scrape down the sides of the bowl as needed.
- **Egg-cellent Addition:** Add the eggs one at a time, mixing well after each addition. Stir in the vanilla extract. Make sure everything is nicely incorporated.
- **Dry Goods Unite:** In a separate, medium bowl, whisk together the flour, baking soda, and salt. Give it a good whisk to make sure everything is evenly distributed.
- **Combine & Conquer:** Gradually add the dry ingredients to the wet ingredients, mixing on low speed until *just* combined. **Don’t overmix!** Overmixing makes tough cookies, and nobody wants that.
- **Chip In!:** Fold in both the chocolate chips and the peanut butter chips. Do this gently with a spatula. We want them evenly spread, not crushed.
- **Scoop & Bake:** Drop rounded tablespoons of dough onto your prepared baking sheets, leaving about 2 inches between each cookie. They will spread!
- **Golden Goodness:** Bake for 9-12 minutes, or until the edges are lightly golden and the centers are just set. They might look slightly underdone in the middle, but that’s what makes them perfectly soft and chewy once cooled.
- **Cool Down, Buttercup:** Let the cookies cool on the baking sheets for a few minutes before transferring them to a wire rack to cool completely. Or, you know, eat one warm. I won’t tell.
Common Mistakes to Avoid
Don’t be *that* person. Learn from my past kitchen mishaps (so you don’t have to relive them).
- **Not preheating the oven:** Rookie mistake. Your cookies won’t bake evenly, and you’ll end up with weird, flat, sad discs.
- **Using cold butter:** It won’t cream properly with the sugars, leading to a dense, not-so-fluffy dough. Patience is a virtue here, or just plan ahead.
- **Overmixing the flour:** I cannot stress this enough! Once you add the flour, mix *just until combined*. Developing too much gluten makes your cookies tough. We’re going for tender, not tire rubber.
- **Not lining your baking sheets:** You want to spend 20 minutes scrubbing burnt cookie bits? Didn’t think so. Parchment paper is your friend.
- **Baking too long:** Keep an eye on them! Ovens vary. If they look too dark, they’ll be hard. Pull them when the edges are set and lightly golden, even if the center looks a tad soft.
Alternatives & Substitutions
Feeling adventurous? Or maybe you just ran out of something crucial. No sweat, here are some ideas:
- **Chocolate Chips:** You can totally swap semi-sweet for milk chocolate, dark chocolate, or even white chocolate chips. Or a mix! Go wild.
- **Peanut Butter Chips:** Can’t find them? Or not a fan (gasp!)? Try butterscotch chips for a different kind of sweet, nutty vibe, or even chopped peanuts for crunch.
- **Brown Sugar:** If you’re really in a pinch and only have white sugar, you *can* use all white sugar, but your cookies will be less chewy and spread a bit more. For **best results**, stick to the brown sugar. It’s worth it, IMO.
- **Butter:** Margarine *can* be used, but your cookies won’t have the same rich flavor or texture. Plus, butter just tastes better. Your call, though!
FAQ (Frequently Asked Questions)
Because you’ve got questions, and I’ve got (casual) answers.
- **Q: Can I chill the dough?** A: Absolutely! Chilling the dough for at least 30 minutes (or even overnight) can deepen the flavors and result in a thicker, chewier cookie. But if you’re like me and need cookies ASAP, it’s not strictly necessary for this recipe.
- **Q: My cookies spread too much! What happened?** A: A few culprits here! Your butter might have been too soft (verging on melted), your oven might not have been hot enough, or you might have used too little flour (or too much leavening). Make sure your ingredients are precise and your oven is properly preheated.
- **Q: Can I freeze the dough?** A: Heck yes! Scoop the dough onto a parchment-lined baking sheet, then freeze until solid. Transfer the frozen dough balls to an airtight freezer bag for up to 3 months. Bake from frozen, adding a couple of extra minutes to the baking time. Future you will thank present you.
- **Q: What if I don’t have parchment paper?** A: You can lightly grease your baking sheet, but **parchment paper is highly recommended** for easy release and even baking. A silicone baking mat works wonders too!
- **Q: Can I use crunchy peanut butter instead of chips?** A: That’s a fun idea for texture! If you’re referring to substituting *peanut butter chips* with actual crunchy peanut butter, that’s a different beast and would change the dough’s consistency too much. Stick to the chips, or add a tablespoon of crunchy peanut butter to the dough along with the chips for an extra kick!
- **Q: My cookies are too crispy!** A: You likely overbaked them. Next time, pull them from the oven when the edges are just set and lightly golden, even if the center looks a little soft. They’ll continue to bake on the hot sheet.
- **Q: Should I eat them all myself?** A: **Yes.** But also, sharing is caring, I guess. Your choice, no judgment here.
Final Thoughts
And there you have it! A batch of ridiculously delicious Peanut Butter Chip and Chocolate Chip Cookies, ready to make your day (or night, no judgment). See? I told you it wouldn’t be painful. Now go impress someone—or yourself—with your newfound culinary superpower. You’ve earned those warm, gooey masterpieces. Happy baking, my friend!


