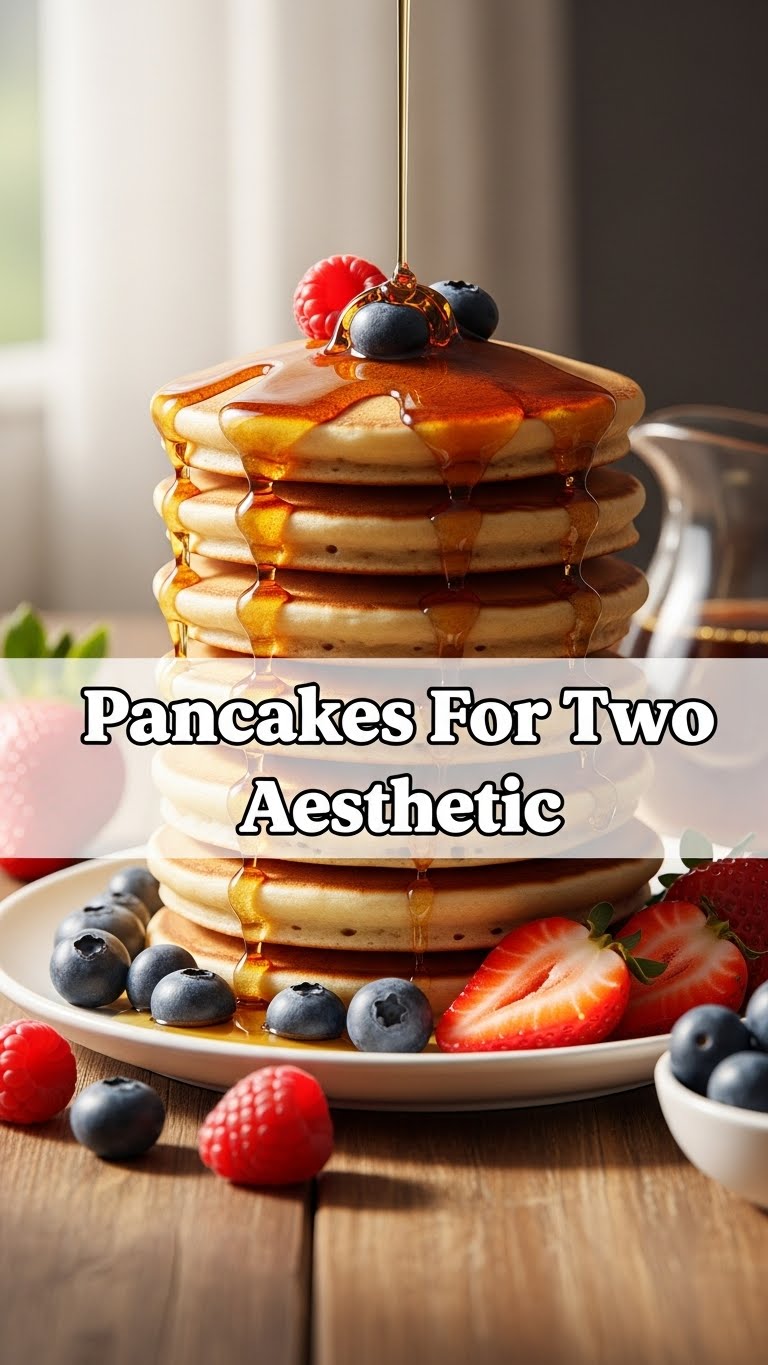
So you woke up, stared at your phone, then at your empty stomach, and thought, “Brunch, but make it *cute*?” Yeah, me too. Sometimes you just need a little something special, a little moment of zen, a little stack of fluffy goodness that says, “I love myself (and maybe one other person) enough to make these.” But let’s be real, who wants to cook for an army when it’s just you and your aesthetic vibes?
Why This Recipe is Awesome
Because it’s practically idiot-proof, that’s why! Seriously, even I, a master of burning toast, can nail these. This isn’t just any pancake recipe; it’s specifically crafted for a perfect two-person portion, meaning no weird leftovers, no sad, half-empty batter bowls, and no excessive dishwashing (thank goodness!). It’s fast, it’s fluffy, and it gives you those Instagram-worthy stacks without the drama. Plus, it hits that sweet spot between “I tried” and “I didn’t try *too* hard.” It’s like a warm hug for your soul, but edible. It’s your new go-to for low-effort, high-reward deliciousness.
Ingredients You’ll Need
- All-Purpose Flour: Just ½ cup. The OG, the foundation, the reason we’re here.
- Granulated Sugar: 1 tablespoon. Just a whisper, darling, to sweeten the deal.
- Baking Powder: 1 ½ teaspoons. Our little magic trick for lift and fluffiness. Don’t skip this!
- Salt: ¼ teaspoon. Balances everything out, like a good therapist for your taste buds.
- Milk: ½ cup. Any kind works! Dairy, almond, oat – whatever your heart desires.
- Large Egg: 1, lightly beaten. The binder, the glue, the reason things don’t fall apart.
- Unsalted Butter (melted): 1 tablespoon, plus extra for the pan. Because everything’s better with butter, amirite?
- Vanilla Extract: ½ teaspoon. Optional, but highly recommended for that “fancy” vibe.
- Your Favorite Toppings: Berries, maple syrup, whipped cream, chocolate chips, sprinkles (we’re not judging your adulting choices).
Step-by-Step Instructions
- Grab two bowls. In the first (your dry bowl), whisk together the flour, sugar, baking powder, and salt. Make sure there are no lumpy surprises hiding in there.
- In the second bowl (your wet bowl), gently whisk the milk, egg, and melted butter (and vanilla extract, if you’re using it). Keep it light and airy.
- Now for the magic! Pour the wet ingredients into the dry ingredients. Stir them together with a spoon or spatula until they are **just combined**. A few lumps are totally okay, even encouraged! Resist the urge to overmix; that’s how you get tough pancakes.
- Let the batter chill out for 5-10 minutes. This little rest gives the gluten a chance to relax and the baking powder a chance to get to work, promising you maximum fluff.
- While your batter rests, heat a non-stick pan or griddle over medium heat. Lightly grease it with a pat of butter or a tiny bit of oil. You’ll know it’s ready when a drop of water sizzles.
- Pour about ¼ cup of batter for each pancake onto the hot pan. Cook for 2-3 minutes, or until you see little bubbles forming on the surface and the edges look set.
- Flip those beauties! Cook for another 1-2 minutes on the other side, until they’re golden brown and perfectly cooked through.
- Stack ’em high on a plate, add your glorious toppings, and dive in immediately. Because who wants cold pancakes?
Common Mistakes to Avoid
- Overmixing the Batter: We already mentioned this, but it bears repeating! Seriously, stop stirring once it’s *just* combined. Overmixed batter leads to flat, rubbery pancakes, and no one wants that.
- Too High Heat: Patience, grasshopper. A pan that’s too hot will give you burnt outsides and raw, gooey insides. A culinary tragedy! **Medium heat is your BFF here.**
- Not Letting the Batter Rest: Thinking you can skip the 5-10 minute rest? Rookie mistake! That time is crucial for developing flavor and fluffiness. Don’t rush perfection.
- Flipping Too Early: Resist the urge to poke and prod! Wait for those glorious bubbles to appear on the surface and the edges to look dry before you flip. Your spatula will thank you.
- Forgetting to Grease the Pan: Even if your pan claims to be non-stick, a little butter or oil ensures beautiful browning and, well, non-sticking.
Alternatives & Substitutions
Feeling a little adventurous, or just missing an ingredient? No worries, we’ve got you covered!
- Milk Swap: Any plant-based milk (almond, oat, soy) works wonderfully for a dairy-free version. Oat milk gives a lovely creamy texture, IMO.
- Flour Power: If you’re feeling a *tiny* bit healthy (shh, don’t tell anyone), you can swap up to half of the all-purpose flour for whole wheat flour. Gluten-free flour blends also work, just follow the package instructions for liquid adjustments if needed.
- Sugar Rush: Don’t have granulated sugar? A touch of maple syrup or agave nectar (about 1.5 tablespoons) can be used in the wet ingredients instead.
- Butter Substitute: Melted coconut oil or a neutral-flavored oil (like canola or vegetable) are perfect dairy-free alternatives for the butter in the batter and for greasing the pan.
- Vanilla Twist: Swap vanilla extract for almond extract for a slightly different, nutty flavor profile. Or skip it if you prefer a classic, unadulterated pancake.
FAQ (Frequently Asked Questions)
- Can I make this dairy-free? Absolutely! Swap out the milk for your favorite plant-based option (almond, oat, soy) and use melted coconut oil or a vegan butter substitute. Easy peasy!
- How do I keep pancakes warm if I’m cooking them one by one? Great question! Preheat your oven to its lowest setting (around 200°F or 90°C). Place cooked pancakes on a wire rack set on a baking sheet. This keeps them toasty without getting soggy.
- My pancakes aren’t fluffy! What went wrong? Hmm, two main culprits here: you either overmixed the batter (which develops gluten and makes them tough) or your baking powder is past its prime. Check that expiration date, friend!
- Can I add fruit *into* the batter? For sure! Blueberries, sliced bananas, or chocolate chips are fantastic additions. Drop them onto the wet batter *after* you’ve poured it into the pan, before flipping. This prevents them from sinking to the bottom.
- This recipe makes more than two, what do I do with the extra? Well, you could eat them all (no judgment here!), or if you *must* share, invite another friend over. They also freeze well and can be reheated in the toaster for a quick breakfast later!
- Why are my pancakes sticking to the pan? A couple of reasons! Either not enough fat in the pan, or the pan wasn’t hot enough when you poured the batter. Make sure your pan is properly preheated and lightly greased for best results.
Final Thoughts
See? Told you it was easy! Now you’re basically a pancake wizard, capable of conjuring up aesthetic stacks of deliciousness whenever the mood strikes. Go forth and conquer breakfast, brunch, or even brinner. You’ve earned those perfectly fluffy, golden-brown beauties. Snap a pic, tag your dog, and enjoy every single bite. You’re welcome!

