So, you’ve stared down that sad, pre-cooked rotisserie chicken at the grocery store one too many times, thinking, “I could totally do better”? You absolutely can! And guess what? Making your own paleo rotisserie chicken is way easier than deciding what to binge-watch next on a Friday night. Trust me, if I can do it without setting off the smoke detector, so can you.
Why This Recipe is Awesome
Forget bland, dry, suspiciously uniformed grocery store chicken. This bad boy is juicy, flavorful, and practically cooks itself. **Seriously, your rotisserie oven does most of the heavy lifting.** It’s paleo, so your cave-person ancestors would definitely approve (if they had fancy kitchen gadgets, obviously). Plus, your kitchen will smell like a five-star restaurant, without the five-star bill or the urgent need to put on actual pants. It’s truly idiot-proof, even I didn’t mess it up.
Ingredients You’ll Need
Gather ’round, my fellow food adventurers! Here’s your mission brief for flavor:
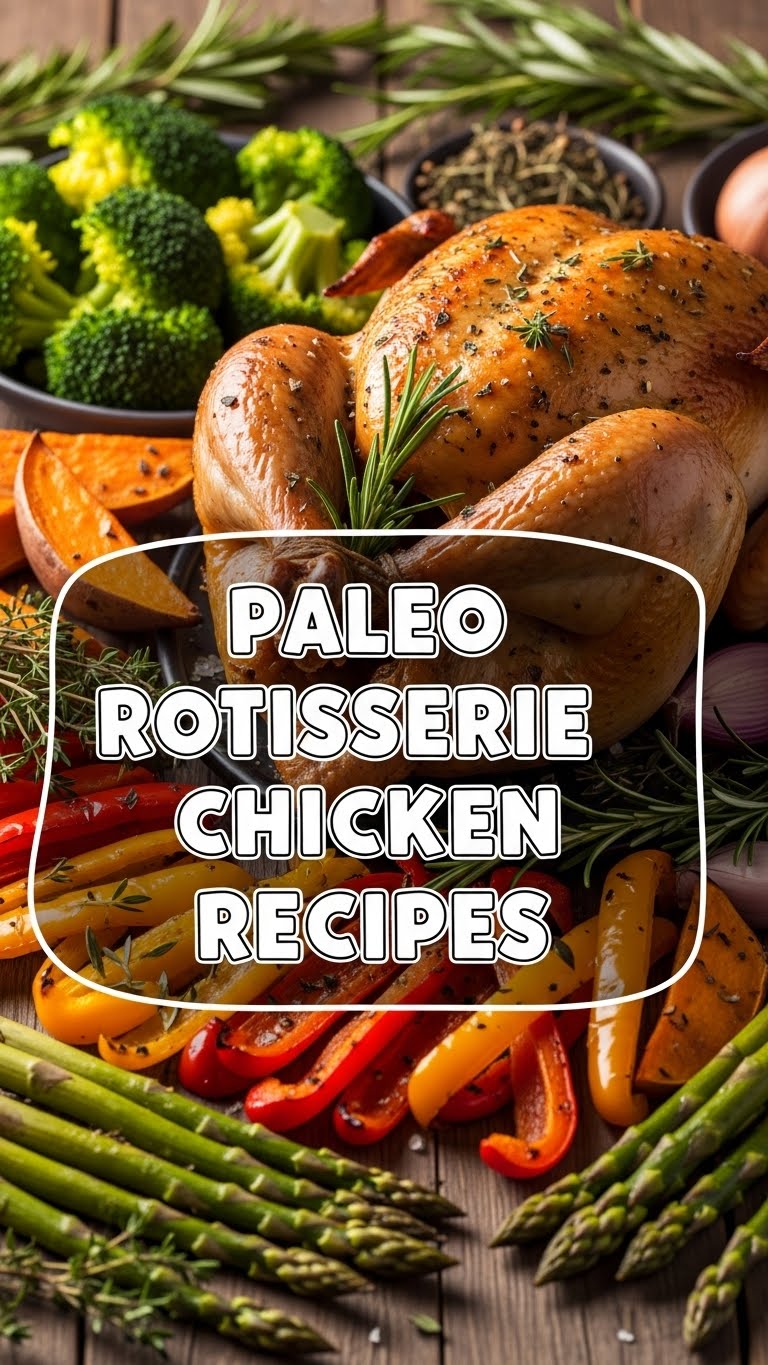
- **1 Whole Chicken** (about 3-4 lbs): The star of our show! Make sure it’s, you know, *whole*. And preferably pasture-raised if you’re feeling fancy.
- **2-3 tbsp Olive Oil** (or avocado oil): Our flavor glue. Don’t be shy; a good rub-down is key.
- **1 tbsp Smoked Paprika**: Because regular paprika is fine, but *smoked* paprika just brings the party.
- **1 tsp Garlic Powder**: Garlic makes everything better. End of story.
- **1 tsp Onion Powder**: The silent hero, adding depth without tears.
- **1 tsp Dried Oregano**: A little Mediterranean flair never hurt anyone.
- **1 tsp Sea Salt**: Not just for flavor, it helps crisp up that skin!
- **½ tsp Black Pepper**: Freshly ground, if you’re feeling extra.
- **Optional Add-ins**: A lemon, cut into quarters, and a few sprigs of fresh rosemary or thyme. Because we’re classy like that sometimes.
Step-by-Step Instructions
Alright, let’s get this bird spinning!
- **Prep Your Chicken:** First things first, unwrap your chicken and pat it super dry with paper towels. **This is crucial for crispy skin!** Remove any giblets from the cavity (unless you have grand plans for them, in which case, go nuts).
- **Mix Your Magic Rub:** In a small bowl, combine the smoked paprika, garlic powder, onion powder, oregano, sea salt, and black pepper. Stir it up until it’s a beautiful, fragrant blend.
- **Get Rubbin’:** Drizzle the olive oil all over the chicken, making sure it’s evenly coated. Then, generously sprinkle your spice rub over the entire bird. Don’t forget the nooks and crannies! Really get in there and massage that flavor in.
- **Optional Stuffing:** If you’re using them, stuff the lemon quarters and fresh herbs into the chicken’s cavity. It adds amazing aroma and subtle flavor.
- **Skewer It Up:** Now, carefully thread your chicken onto the rotisserie spit, making sure it’s centered and balanced. Secure it tightly with the rotisserie forks. **Balance is key here, or your chicken will wobble like it’s had too much coffee.** Tie the legs together with kitchen twine and tuck the wing tips under the body to prevent them from flapping around and burning.
- **Set and Forget (Mostly!):** Preheat your oven to 375°F (190°C) with the rotisserie function engaged. Once hot, carefully place the spit with the chicken into your oven. Make sure a drip pan is underneath to catch all those delicious juices.
- **Let It Spin:** Cook for about 1 hour and 30 minutes to 2 hours, or until the internal temperature reaches 165°F (74°C) in the thickest part of the thigh (without touching the bone). **A meat thermometer is your best friend here, don’t guess!**
- **The Sacred Rest:** Once cooked, carefully remove the chicken from the oven and the rotisserie spit. Place it on a cutting board, tent it loosely with foil, and let it rest for at least 10-15 minutes. **Don’t skip this part! It allows the juices to redistribute, keeping your chicken moist and tender.**
- **Carve and Devour:** Carve that glorious bird and prepare for a flavor explosion. Enjoy your masterpiece!
Common Mistakes to Avoid
We all make ’em, so let’s laugh at them together and learn!
- **Not Patting the Chicken Dry:** Rookie mistake! If your chicken isn’t super dry, you’re saying goodbye to that beautiful, crispy skin we all crave. It’ll steam, not crisp. Sad face.
- **Skipping the Rest Time:** Oh, the horror! Cutting into the chicken immediately after cooking is like opening a dam—all those precious juices will flee, leaving you with dry meat. Just be patient, friend.
- **Unevenly Spearing the Chicken:** If your chicken isn’t balanced on the spit, it’ll spin awkwardly, leading to uneven cooking and potential kitchen gymnastics. **Take your time securing it!**
- **Forgetting to Tie the Wings and Legs:** Trust me, flapping limbs are not a good look for a rotisserie chicken. They’ll burn, get tangled, and generally just make a mess. Tuck ’em in!
- **Eyeballing the Temperature:** Thinking you don’t need a meat thermometer? Brave, but potentially dangerous. Undercooked chicken is a no-go. **Invest in a good thermometer, it’s worth it.**
Alternatives & Substitutions
Feeling creative? Here are some simple swaps and twists:
- **Spice It Up (or Down):** Not a fan of oregano? Try dried thyme or rosemary. Want some heat? Add a pinch of cayenne pepper or chili powder to your rub. A little cumin can also add a nice earthy note. It’s your chicken, friend, experiment!
- **Oil Swaps:** If olive oil isn’t your jam, avocado oil works beautifully and has a higher smoke point. Melted ghee could also give it a lovely, buttery richness if you’re okay with a dairy-free fat.
- **No Rotisserie? No Problem!** Don’t have a rotisserie function? You can still make an amazing roast chicken! Simply place the seasoned bird on a wire rack set over a baking sheet. Roast at 400°F (200°C) for 15 minutes, then reduce to 375°F (190°C) and continue roasting, flipping it every 30-40 minutes, until it reaches the correct internal temperature. **It won’t be spinning, but it’ll still be delicious!**
- **Herb Power:** Instead of dried herbs, go all-out with fresh! Mince some fresh rosemary and thyme and mix it into your rub. The aroma alone is heavenly.
FAQ (Frequently Asked Questions)
- **”How do I know my chicken is truly cooked?”** Ah, the million-dollar question! **Your trusty meat thermometer is your best friend.** Insert it into the thickest part of the thigh, avoiding the bone. It should read 165°F (74°C). Anything less, keep spinning!
- **”Can I use chicken pieces instead of a whole chicken?”** Well, technically, for a *rotisserie* chicken, you need a whole chicken. But you could absolutely use this rub on chicken pieces (thighs, drumsticks) and roast them in the oven. Same delicious flavor, different presentation!
- **”My chicken is browning too fast on the outside but isn’t cooked inside, help!”** Don’t panic! This sometimes happens. Tent your chicken loosely with aluminum foil to prevent further browning while it finishes cooking through. You might also reduce the oven temp slightly.
- **”What’s the deal with paleo? Is it really better?”** IMO, it means using real, unprocessed ingredients, which usually translates to more flavor and fewer weird additives. Plus, it’s naturally gluten-free and dairy-free, so it’s friendly for many dietary needs. It’s about feeling good while eating good!
- **”What should I do with leftovers?”** Leftovers?! Is that even a thing with this chicken? IF you manage to have some, they’re fantastic for chicken salads, paleo wraps, tacos, or even a quick chicken soup. The possibilities are endless!
- **”Can I marinate the chicken instead of a dry rub?”** Absolutely! For an extra punch of flavor, you could create a wet marinade with olive oil, lemon juice, garlic, and herbs. Marinate the chicken in the fridge for 4-8 hours before patting dry and placing on the spit. **Just make sure to pat it dry before cooking!**
Final Thoughts
So there you have it, your ticket to a glorious, homemade paleo rotisserie chicken. It’s a game-changer for weeknight dinners, meal prep, or when you just want to feel like a culinary rockstar. **Go forth and conquer your cravings!** Your taste buds (and your family/friends, if you decide to share) will thank you. Now go impress someone—or just yourself—with your new culinary skills. You’ve totally earned it!


