So you’ve conquered the cinnamon roll, huh? Your kitchen probably smells like a slice of heaven, and now you’ve got a whole army of sticky, gooey goodness staring back at you, ready for their grand debut at the bake sale. But wait! Before you just toss ’em in a grocery bag (gasp!), let’s chat about getting those beauties sale-ready. Because presentation, my friend, is half the battle!
Why This Packaging Mission Is Awesome
Listen, anyone can bake a delicious cinnamon roll (okay, maybe not *anyone*, but you did it!). But to make them irresistible, to make people line up and practically throw money at you? That, my friend, is where packaging swoops in like a superhero. We’re not just selling cinnamon rolls; we’re selling an experience. An aesthetic. A promise of pure, unadulterated joy that starts the moment they lay eyes on your perfectly presented treats. Nobody wants a sad, smushed roll that looks like it lost a fight with the bottom of your bag. We’re aiming for “OMG, I NEED that!” vibes, not “what even *is* that?” This isn’t just a recipe; it’s your secret weapon for bake sale domination!
Ingredients (Err, Supplies) You’ll Need
Think of these as your tools for turning mere baked goods into coveted treasures. No actual baking involved here, just smart choices!
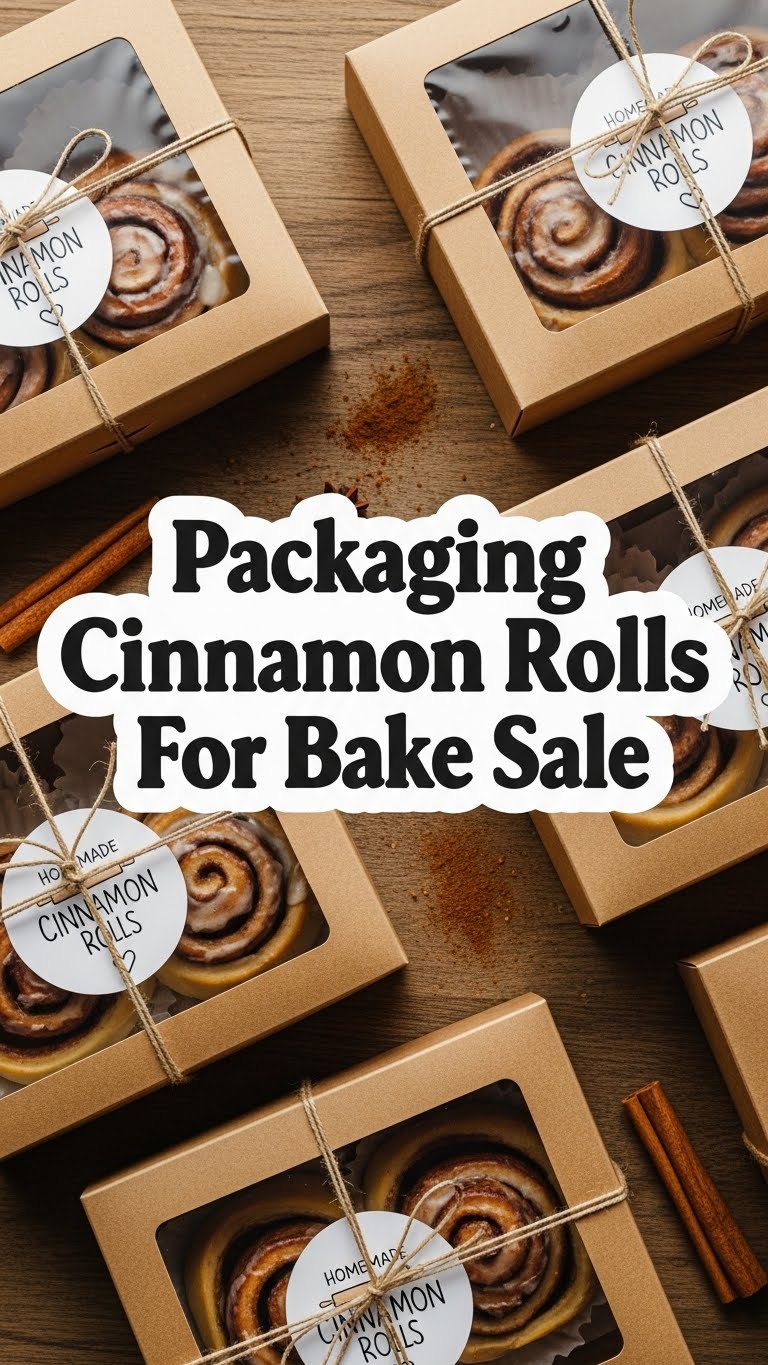
- Cute Bakery Boxes or Clamshell Containers: These are your rolls’ personal VIP suites. Choose sizes that fit 1-2 rolls snugly without squishing.
- Parchment Paper or Wax Paper Squares: The unsung hero! Prevents sticking, absorbs rogue frosting, and keeps things looking pristine.
- Pretty Labels or Stickers: Your rolls need names! And maybe a “Made with Love” shout-out. Bonus points for listing key ingredients for those with allergies.
- Ribbon, Twine, or Cute String: For that extra touch of fancy. It’s like a little present!
- Small Thank You Notes (Optional but Highly Recommended): A little handwritten “Enjoy!” goes a long way.
- Sharpie or Pen: For pricing, ingredients, or just doodling a happy face.
Step-by-Step Instructions: The Packaging Dance
- **Cool Those Rolls Completely:** This is non-negotiable, folks! Attempting to package warm rolls is a rookie mistake. Hot rolls = melted icing = soggy bottoms = a very sad bake sale experience. Let them cool on a wire rack until they’re room temperature.
- **Prep Your Pad:** Line your chosen box or container with a square of parchment or wax paper. This creates a non-stick barrier and makes clean-up a breeze. Think of it as putting down a tablecloth before a fancy dinner.
- **Gently Place Your Masterpiece:** Carefully transfer 1-2 cinnamon rolls into the lined container. Aim for minimal touching of the beautiful frosting. We want peak aesthetics!
- **Seal the Deal (Lightly!):** If using a box, gently fold down the flaps. For clamshells, snap them shut without mashing. The goal is to protect, not compress.
- **Label It Up:** Stick on your awesome label. Include the price, and if you’re feeling extra helpful, a little note about “consume within 2-3 days” or “reheat for ultimate gooeyness.”
- **Tie a Pretty Bow:** Now for the fun part! Wrap your box with a ribbon or twine. It’s like adding a cherry on top, but for packaging. This instantly elevates your rolls from “homemade” to “boutique bakery quality.”
Common Mistakes to Avoid (Unless You Like Disasters)
- **Packaging Hot Rolls:** I know, I said it before, but it’s worth repeating! This is the number one sin. You’ll end up with a sweaty, deflated mess. Don’t do it!
- **Over-Stuffing Containers:** More isn’t always more. If your rolls are crammed in, they’ll squish, stick, and look less appealing. Give them space!
- **Skipping the Liner:** Parchment paper is cheap. A sticky, frosting-covered box that makes your rolls hard to remove? Priceless (in a bad way).
- **Using Flimsy Packaging:** Those beautiful rolls deserve sturdy protection. Avoid thin paper plates or plastic wrap that offers zero structural integrity. Your hard work deserves better!
- **Forgetting Labels/Pricing:** Don’t make your customers guess! Clearly label what it is and how much it costs. It just makes life easier for everyone.
Alternatives & Substitutions (When You’re Short on Supplies)
Life happens, and sometimes you don’t have fancy bakery boxes lying around. No stress! Here are some quick fixes:
- **No Bakery Boxes? No Problem!** Sturdy paper plates (the coated kind!) nested together with plastic wrap can work in a pinch. Just make sure they’re stable. Or, if you’re going for a rustic vibe, brown paper bags tied with twine look surprisingly charming, especially if you stamp them with a cute design.
- **No Parchment Paper?** Wax paper is a solid alternative. Aluminum foil can work in a pinch, but beware of it sticking to the frosting if it’s too warm or soft.
- **No Ribbons?** Raffia, baker’s twine, or even a strip of decorative paper can add a nice touch. Sometimes simple is best, IMO!
- **Need to Transport a Lot?** Use large, shallow cardboard boxes (like those from a case of drinks) as a base, lining them with parchment, then arrange your individually packaged rolls inside. This keeps everything stable.
FAQ (Frequently Asked Questions)
Got questions? I’ve got (mostly sarcastic) answers!
- **Can I just use regular plastic wrap for individual rolls?** You could, but your rolls deserve better, don’t they? Plastic wrap tends to smush the frosting and look a bit… amateur. Think “presentation is everything!”
- **How far in advance can I package these?** Ideally, package them the day of the bake sale for peak freshness and visual appeal. If you must do it the night before, ensure they’re completely cool and sealed tightly to prevent drying out.
- **Should I refrigerate them after packaging?** If your rolls have a cream cheese-based frosting and it’s a hot day, a quick chill before transport isn’t a bad idea. Otherwise, room temperature is usually fine unless they’ll be sitting out for hours in extreme heat.
- **What if I don’t have fancy labels?** A neatly handwritten label on a small piece of cardstock tied with a string is utterly charming! Seriously, sometimes the handmade look is even better.
- **My rolls are super sticky. Any extra tips?** Make sure they are *really* cool. You can also lightly dust the bottom of your parchment paper with a tiny bit of flour (if it won’t affect taste/look) or use a thin layer of icing sugar before placing the roll, but usually, proper cooling is the key.
Final Thoughts
So there you have it, chief! You’re now equipped to turn those glorious cinnamon rolls into bake sale superstars. Remember, a little effort in packaging goes a long, delicious way. Go forth and sell those rolls, friend! Your bake sale table is about to be legendary. Now go impress someone—or yourself—with your new culinary *and* packaging skills. You’ve earned it!

