So you’re craving something tasty but too lazy to spend forever in the kitchen, huh? Same. High-five! We’re all about maximum flavor for minimum effort around here, and today’s culinary adventure ticks all those delicious boxes. Get ready to impress yourself (and maybe a lucky dinner guest or two) with the easiest, most ridiculously delicious Oven Roasted Chicken Quarters recipe.
Why This Recipe is Awesome
Listen, if you can turn on an oven, you can make this. Seriously. It’s so idiot-proof, even *I* didn’t mess it up, and my track record with anything more complex than toast is… questionable. This recipe is your new best friend because:
- It’s practically a one-pan wonder, meaning less clean-up (hallelujah!).
- The chicken turns out ridiculously juicy on the inside, with skin so crispy it’ll make you want to sing opera.
- It uses super basic ingredients you probably already have lurking in your pantry.
- It’s versatile! You can jazz it up or keep it simple. Your call, chef.
- It smells amazing while it’s cooking, making your whole house feel extra cozy and delicious. Win-win!
Ingredients You’ll Need
Gather ’round, my fellow food enthusiasts! Here’s your shopping list – mostly common suspects, nothing too wild.
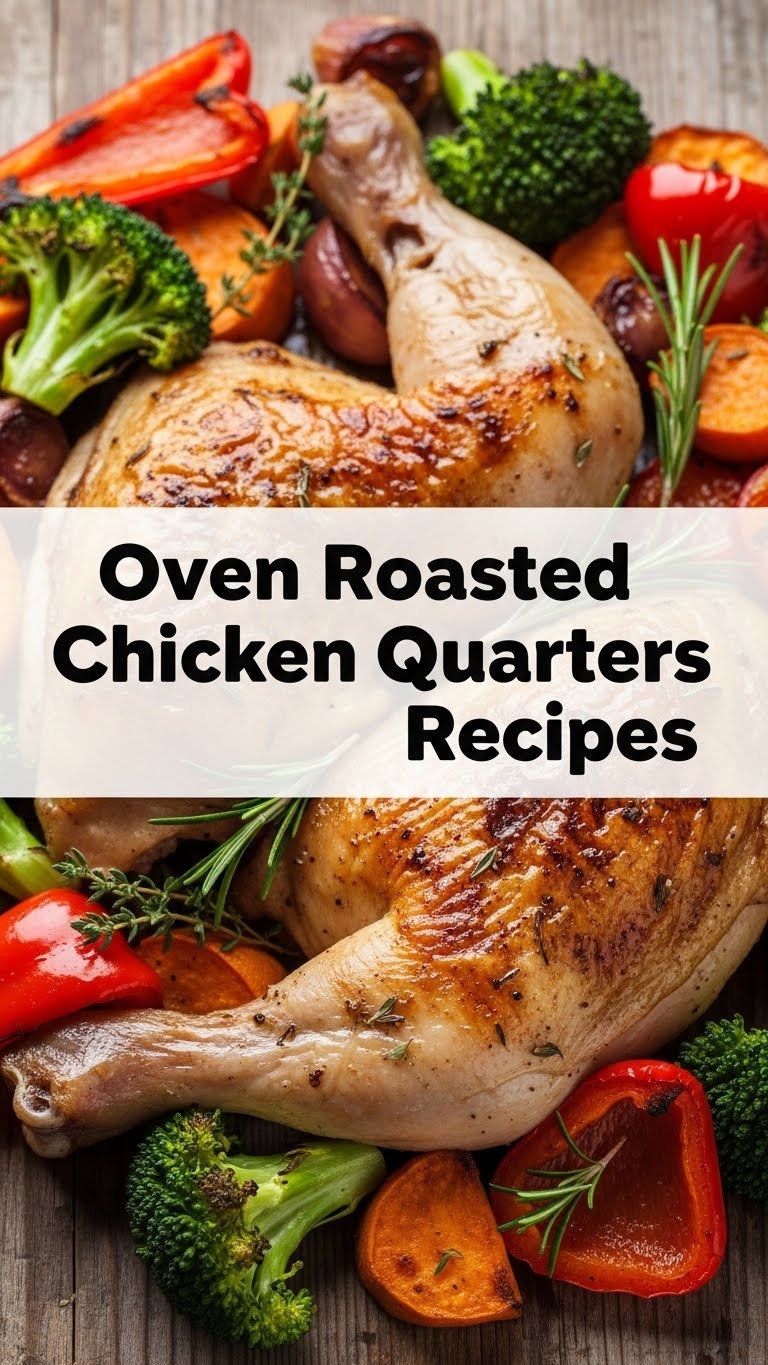
- Chicken Quarters: 4-6 pieces, skin-on, bone-in. This is the main event, folks. Don’t skimp on the skin, that’s where the magic happens!
- Olive Oil: About 2 tablespoons. Your trusty friend for crispy skin and even browning.
- Salt: 1-1.5 teaspoons. Don’t be shy; chicken loves salt!
- Black Pepper: 1/2 teaspoon, freshly ground if you’re feeling fancy.
- Garlic Powder: 1 teaspoon. Because garlic makes everything better, duh.
- Onion Powder: 1 teaspoon. Another secret weapon for depth of flavor.
- Smoked Paprika: 1 teaspoon. For that gorgeous color and a hint of smoky goodness. (Regular paprika works too if you’re out of smoked, but the smoked version is **chef’s kiss**).
- Dried Herbs (Optional): 1/2 teaspoon total of dried thyme, rosemary, or oregano. If you want to elevate your chicken from “delicious” to “OMG, what is this?!”
- Optional Veggies: Potatoes (cut into chunks), carrots (chopped), or bell peppers (sliced) – because why make a separate side dish when you can roast them with the chicken?
Step-by-Step Instructions
Alright, apron on, imaginary chef hat donned, let’s do this! These steps are so easy, you could probably do them blindfolded (but please don’t).
Preheat & Prep Your Chicken: crank your oven to a glorious 400°F (200°C). While it’s getting toasty, pat those chicken quarters DRY with paper towels. This is a non-negotiable step for crispy skin, my friend. Seriously, the drier the skin, the crispier it gets. No one wants soggy chicken skin.
Seasoning Party Time: In a small bowl, mix together the olive oil, salt, pepper, garlic powder, onion powder, smoked paprika, and any dried herbs you’re using. You’re creating a flavor bomb, FYI.
Massage that Chicken: Place your dry chicken quarters in a large bowl or directly on a baking sheet. Pour the oil and spice mixture over them and use your hands (yes, get in there!) to rub it all over, making sure every nook and cranny is coated. This ensures maximum flavor distribution. If you’re adding veggies, toss them with a little extra oil, salt, and pepper on the same baking sheet.
Roast Away! Arrange the chicken quarters skin-side up on a baking sheet, making sure they’re in a single layer and not too crowded. If you’re adding veggies, scatter them around the chicken. Pop that baking sheet into your preheated oven and roast for 35-45 minutes.
You’ll know it’s done when the skin is beautifully golden-brown and crispy, and a meat thermometer inserted into the thickest part (avoiding the bone) reads 165°F (74°C). This is crucial for food safety, so don’t skip it!
Rest, Don’t Rush: Once it’s out of the oven, transfer the chicken to a cutting board or platter and let it rest for 5-10 minutes. This gives the juices a chance to redistribute, keeping your chicken incredibly moist. Skipping this step is a rookie mistake that leads to dry chicken!
Common Mistakes to Avoid
We all make mistakes, especially in the kitchen. But with these hilarious tips, you’ll avoid the most common pitfalls and emerge a roasting champion!
- Not Preheating the Oven: Thinking you don’t need to preheat? Rookie mistake! You need that initial blast of heat to crisp up the skin and start the cooking process right. Otherwise, your chicken will just sit there, sadly warming up.
- Overcrowding the Pan: Trying to squeeze too many chicken pieces onto one sheet? You’re creating steam, not crispiness! Give your chicken some breathing room, or use two baking sheets.
- Forgetting to Pat it Dry: As mentioned, moisture is the enemy of crispy skin. Embrace the paper towel!
- Not Resting the Chicken: You waited 40-ish minutes, what’s another 5-10? Letting the chicken rest is vital for juicy results. Impatience will lead to dry, sad chicken.
- Eyeballing Doneness: Unless you have superhuman x-ray vision, get a meat thermometer. Guessing means either raw chicken (ew) or dry, overcooked chicken (also ew).
Alternatives & Substitutions
Feeling adventurous? Or just missing an ingredient? No stress, here are some ideas to mix things up:
- Spice Blends: Don’t have paprika? Try chili powder for a kick, or an Italian seasoning blend for a different vibe. Heck, even just salt, pepper, and garlic powder will make a stellar chicken.
- Fresh Herbs: If you’ve got fresh rosemary or thyme, chop ’em up and add them in with the oil. Use about a tablespoon of fresh herbs for the same impact as 1/2 teaspoon dried. They smell divine!
- Different Oils: Avocado oil or even melted butter can stand in for olive oil. Butter will give you an extra rich flavor, IMO.
- Veggies Galore: Beyond potatoes and carrots, try roasting broccoli florets, asparagus spears, or even sliced bell peppers alongside your chicken. Everything tastes better coated in chicken drippings!
- A Touch of Citrus: Squeeze a little lemon juice over the chicken before roasting, or tuck some lemon slices under the skin for a zesty kick.
FAQ (Frequently Asked Questions)
Got questions? I’ve got (casual and humorous) answers!
Can I use boneless, skinless chicken thighs instead? Well, technically yes, but why deprive yourself of that glorious crispy skin and bone-in flavor? If you must, shorten the cooking time to about 25-30 minutes, keeping an eye on that internal temp!
How do I get SUPER crispy skin? Pat it dry, use a little extra oil, don’t overcrowd the pan, and make sure your oven is good and hot. Some folks even blast it under the broiler for a minute or two at the end (watch it like a hawk!).
My chicken is burning on the outside but not cooked through! Help! Sounds like your oven might be running a bit hot, or your chicken pieces are extra thick. Try reducing the temperature by 25°F (15°C) after the first 15-20 minutes, or tenting the chicken loosely with foil if it’s browning too quickly.
Can I make a gravy from the pan drippings? Absolutely! Pour off most of the fat, then deglaze the pan with a splash of broth or white wine, whisk in a little flour or cornstarch slurry, and simmer until thickened. Instant sauce boss!
What if I don’t have all the spices listed? No worries! The core players are salt, pepper, and some form of garlic/onion powder. The paprika and herbs add extra oomph, but it’ll still be tasty without them. Use what you have!
Can I freeze the leftovers? You bet! Once cooled, store cooked chicken in an airtight container in the freezer for up to 3 months. Thaw in the fridge and reheat gently in the oven or microwave.
Final Thoughts
And there you have it! You’ve just mastered a ridiculously simple yet incredibly flavorful dish that will make you feel like a culinary genius. Go ahead, bask in the glory! Now go impress someone—or yourself—with your new culinary skills. You’ve earned it! Seriously, go make this, and then tell me how amazing it was. Happy roasting!


