So, you’ve got that classic chocolate craving hitting you hard, but you also want to feel a little bit fancy, without, you know, actually *being* fancy? You want something that tastes like a warm hug from your Swiss grandma (even if you don’t have one)? Friend, you’ve come to the right place. We’re diving into an Old Fashioned Swiss Chocolate Cake that’s so good, you’ll want to marry it. And honestly, it’s easier than finding a decent parking spot on a Saturday.
Why This Recipe is Awesome
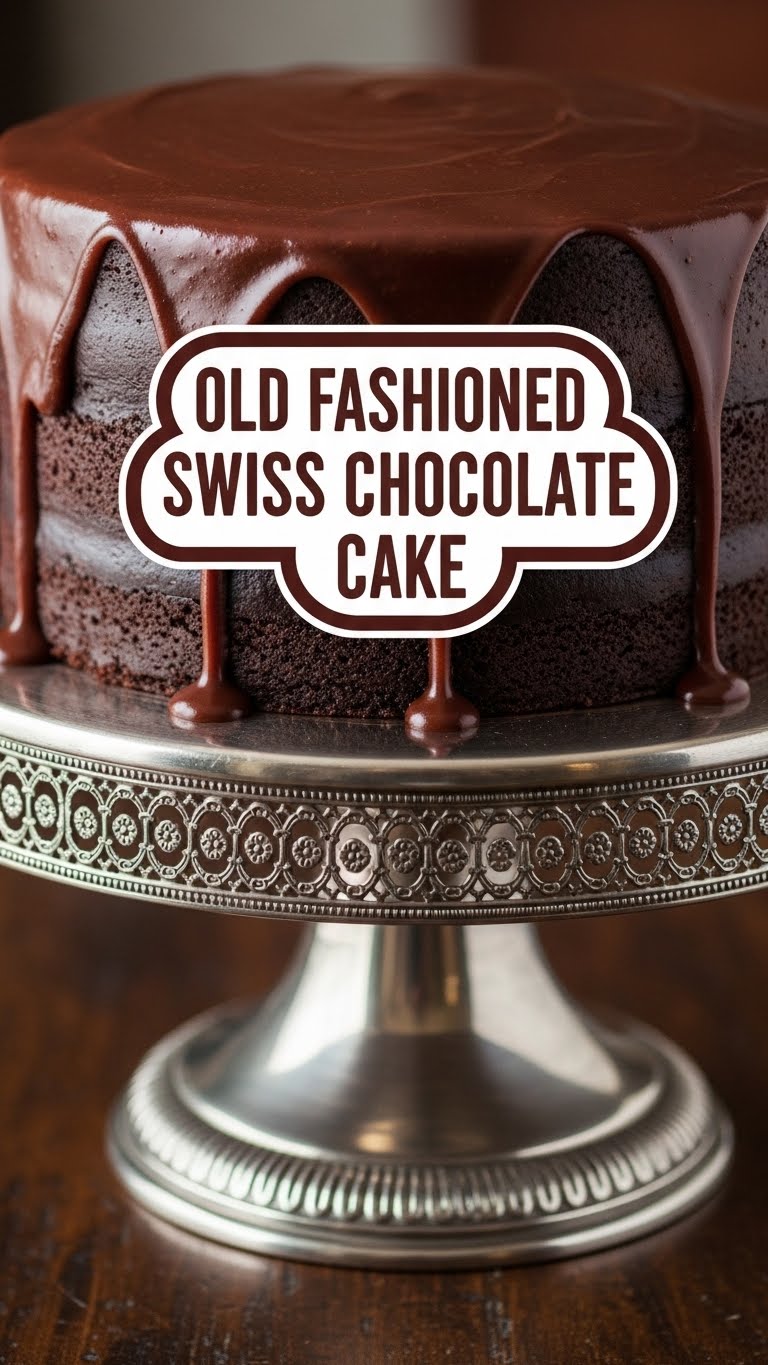
Okay, let’s be real. There are a million chocolate cake recipes out there. But this one? This is the one you pull out when you want to impress without breaking a sweat or needing a culinary degree. It’s rich, moist, deeply chocolatey, and has that comforting, old-school vibe that just makes everything better. Plus, it’s practically **idiot-proof**. Seriously, if I can bake it without causing a kitchen fire, you can too. It’s perfect for birthdays, a Tuesday afternoon, or just because you deserve a damn good slice of cake. No overly complicated steps, no obscure ingredients, just pure chocolate bliss.
Ingredients You’ll Need
Get ready to gather your delicious arsenal. Nothing too wild here, just the good stuff.
- 1 ¾ cups All-Purpose Flour: The humble backbone of our cake. Sift it if you’re feeling extra, but honestly, I rarely do and it turns out fine.
- 2 cups Granulated Sugar: Because sweetness is happiness. Don’t skimp!
- ¾ cup Unsweetened Cocoa Powder: This is where the magic happens. **Use good quality cocoa** – it makes all the difference, trust me.
- 1 ½ teaspoons Baking Soda: Our lift-off expert.
- 1 teaspoon Salt: Just a pinch to make all those chocolatey flavors pop.
- 1 cup Milk: Whole milk works best for richness, but whatever you have on hand will probably do.
- ½ cup Vegetable Oil: Keeps our cake super moist. Don’t be scared of it!
- 2 large Eggs: Room temp if you can remember, but it’s not the end of the world if you forget.
- 2 teaspoons Vanilla Extract: A good splash for that warm, comforting aroma.
- 1 cup Boiling Water (or hot coffee for extra depth!): This is the secret weapon for ultimate moistness and activating that cocoa.
Step-by-Step Instructions
- Preheat & Prep: First things first, **preheat your oven to 350°F (175°C)**. Grease and flour a 9×13 inch baking pan (or two 8-inch round pans) like your life depends on it. Nobody likes a stuck cake.
- Dry Mix Magic: In a large bowl, whisk together your flour, sugar, cocoa powder, baking soda, and salt. Make sure there are no lumpy bits of cocoa trying to hide.
- Wet Wonders: In a separate bowl (or a giant measuring cup), combine the milk, vegetable oil, eggs, and vanilla extract. Whisk them until they’re all friends.
- Combine & Conquer: Pour the wet ingredients into the dry ingredients. Mix on low speed (or by hand with a whisk) until *just* combined. **Don’t overmix!** Overmixing is the enemy of tender cake.
- The Hot Stuff: Now, carefully pour in that boiling water (or hot coffee). The batter will be thin, and that’s okay! Whisk it in until smooth. This step always makes me feel like a mad scientist.
- Bake It Baby: Pour your glorious, runny batter into your prepared pan(s). Pop it in the preheated oven for 30-35 minutes for a 9×13, or 30-40 minutes for round pans. **A toothpick inserted into the center should come out with moist crumbs, not wet batter.**
- Cool Down: Let the cake cool in the pan on a wire rack for about 10-15 minutes. Then, if you’re feeling brave, invert it onto the rack to cool completely. **Patience is a virtue here!** Don’t try to frost a warm cake unless you want a chocolatey avalanche.
Common Mistakes to Avoid
- Not Preheating the Oven: Rookie mistake. Your oven needs to be at temp to get that perfect rise.
- Overmixing the Batter: This is like telling your cake to be tough. Mix until just combined, then stop. Walk away from the mixer.
- Opening the Oven Door Too Soon: I know it’s tempting, but peekers get sad, sunken cakes. Resist the urge for at least 25 minutes.
- Forgetting to Grease/Flour the Pan: Unless you enjoy scraping cake off a pan, **do not skip this step.** It’s crucial, IMO.
- Not Letting it Cool Completely: Frosting a warm cake is a one-way ticket to a messy, melty disaster. Just chill, literally.
Alternatives & Substitutions
Feeling adventurous or just out of one ingredient? No worries, I’ve got your back!
- Coffee for Water: I already hinted at this, but swapping the boiling water for hot brewed coffee will seriously intensify the chocolate flavor without making it taste like coffee. **Highly recommended!**
- Dairy-Free Milk: Almond, soy, or oat milk can work just fine if you’re avoiding dairy. The texture might be *slightly* different, but still delicious.
- Add-ins: Want more chocolate? Throw in a cup of chocolate chips with your dry ingredients. Feeling nutty? Add chopped walnuts or pecans. YOLO!
- Frosting: This cake is amazing with a simple chocolate buttercream, a cream cheese frosting, or even just a dusting of powdered sugar if you’re feeling minimalist (or lazy, no judgment).
FAQ (Frequently Asked Questions)
- “Can I use margarine instead of butter?” Well, technically yes, you *could*. But why hurt your soul like that? This recipe uses oil for moisture, so real butter isn’t in the cake itself, but if you’re using it for frosting, **stick to butter for flavor and texture!**
- “My cake sank in the middle, what happened?” Oh no! This often means your oven wasn’t hot enough, you opened the door too early, or you used old baking soda/powder. **Check your oven temp and resist peeking!**
- “How long does this cake keep?” Covered tightly at room temperature, it’s usually good for 3-4 days. In the fridge, maybe a day or two longer. But let’s be honest, it probably won’t last that long.
- “Can I make cupcakes instead?” Absolutely! Just fill cupcake liners about two-thirds full and bake for 18-22 minutes. Keep an eye on them!
- “Is it really ‘Swiss’ chocolate cake?” That’s a great question! While it doesn’t necessarily feature specific Swiss chocolate brands, the “Swiss” often refers to its deeply rich, smooth chocolate flavor and a certain refined simplicity, much like Swiss chocolate itself. It’s less about a specific technique and more about the vibe, you know?
Final Thoughts
There you have it, folks! Your new go-to recipe for a ridiculously good Old Fashioned Swiss Chocolate Cake. It’s rich, it’s comforting, and it’s surprisingly simple to pull off. So go ahead, whip up a batch, make your kitchen smell divine, and treat yourself (and maybe some lucky friends) to a slice of pure happiness. You’ve totally earned it, and I bet it’s going to be amazing. Now go impress someone—or yourself—with your new culinary skills. Happy baking!


