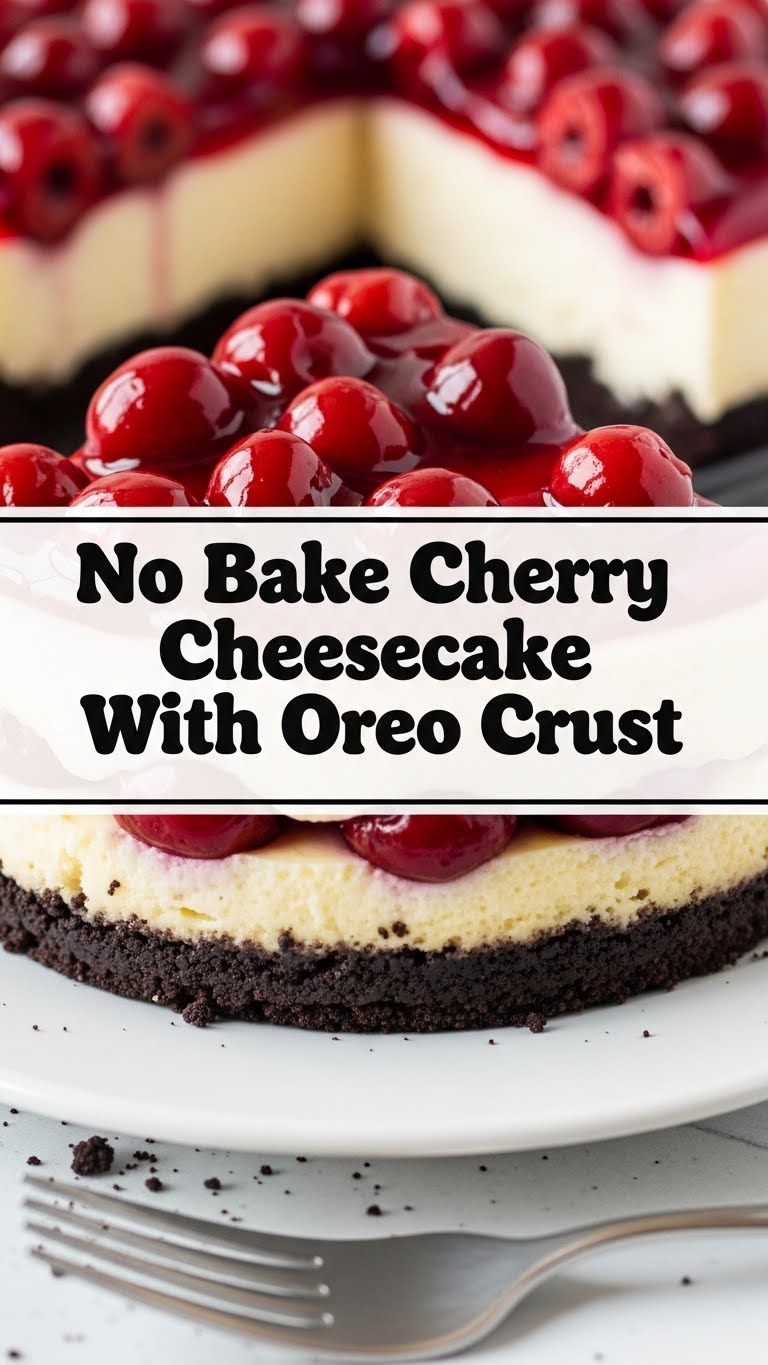
So you’re craving something ridiculously delicious, but the mere thought of turning on your oven makes you want to curl up in a ball and cry? Been there, bought the T-shirt. My friend, prepare to have your mind (and taste buds) blown because we’re diving headfirst into the glorious world of No-Bake Cherry Cheesecake with an Oreo Crust. Get ready to impress everyone, including yourself, with minimal effort and maximum deliciousness.
Why This Recipe is Awesome
Let’s be real, life is complicated enough. Your dessert doesn’t need to be. This no-bake masterpiece is basically the culinary equivalent of a warm hug on a bad day. It’s **idiot-proof**, I swear. Even I, a person who once set off the smoke detector making toast (don’t ask), can nail this. There’s no baking involved (duh, it’s in the name!), which means no wrestling with a hot oven, no fear of soggy crusts, and absolutely zero risk of burnt edges. Just pure, creamy, cherry-topped bliss.
Ingredients You’ll Need
Gather your troops, folks! These are your essential weapons in the war against bland desserts:
- For the Oreo Crust:
- 1 (14.3 oz) package Oreo cookies: Yes, the whole package. Don’t skimp. We’re not health gurus today.
- 6 tablespoons unsalted butter, melted: Because everything’s better with butter, IMO.
- For the Cheesecake Filling:
- 2 (8 oz) packages cream cheese, softened: Take them out of the fridge early! This is crucial for a smooth filling.
- 1 cup powdered sugar (confectioners’ sugar): Keeps it super smooth, no gritty sugar crystals allowed.
- 1 teaspoon vanilla extract: The soul of most desserts. Don’t skip it!
- 1 (8 oz) container frozen whipped topping (like Cool Whip), thawed: The secret weapon for fluffy, light cheesecake.
- For the Cherry Topping:
- 1 (21 oz) can cherry pie filling: The easier, the better. We’re not making pie from scratch, remember?
Step-by-Step Instructions
Alright, apron on (or not, we’re chill), let’s get this show on the road!
- Crush those Oreos: Grab your Oreos and either toss them into a food processor until they’re fine crumbs, or get aggressive with a Ziploc bag and a rolling pin. Seriously, get out some frustration.
- Butter up the crumbs: Pour the melted butter over your crushed Oreos. Mix ’em up until all the crumbs are deliciously moistened.
- Press that crust: Press the buttery Oreo mixture firmly into the bottom of a 9-inch pie plate or springform pan. Use the back of a spoon or your clean hands. Then, pop it in the fridge for at least 15-20 minutes to chill and firm up.
- Whip the cream cheese: In a large bowl, beat the softened cream cheese with an electric mixer until it’s super smooth and fluffy. No lumps, please!
- Add the sweet stuff: Gradually beat in the powdered sugar and vanilla extract until everything is perfectly combined and ridiculously creamy.
- Fold in the fluff: Gently fold in the thawed whipped topping until the mixture is light and airy. Be gentle; we don’t want to deflate all that wonderful fluffiness.
- Fill ‘er up: Spoon your glorious cheesecake filling into the chilled Oreo crust. Smooth the top with a spatula.
- Chill out: This is arguably the hardest step: patience! Cover the cheesecake loosely and refrigerate for **at least 4 hours**, but ideally overnight. This allows it to set properly and become sliceable.
- Top it off: Just before serving, spoon that vibrant cherry pie filling all over the top.
- Devour: Slice, serve, and accept all the compliments that are about to come your way. You’ve earned ’em!
Common Mistakes to Avoid
Listen up, buttercup! Don’t let these rookie errors ruin your masterpiece:
- Cold Cream Cheese Calamity: Thinking you can skip softening the cream cheese? Ha! You’ll end up with lumpy filling, and no one wants that. **Always let your cream cheese soften to room temp.**
- Impatience is NOT a Virtue: Pulling it out of the fridge after only an hour? Oh, sweet summer child. That cheesecake needs its beauty sleep to firm up. **Don’t skimp on the chill time!** You want clean slices, not a sad, gooey mess.
- Over-mixing the Whipped Topping: Once you add the whipped topping, gently fold it in. Beat it too much, and you’ll lose all that lovely airy texture.
- Forgetting the Liner (Springform Pan only): If you’re using a springform pan, cutting a parchment paper circle for the bottom is a smart move. It makes serving much easier. Not doing it? Good luck with that!
Alternatives & Substitutions
Feeling a little rebellious? Here are some ways to shake things up:
- Crust Swap: Not an Oreo fan? (Gasp! But okay, I guess.) You could totally use graham cracker crumbs or even vanilla wafer crumbs. Just follow the same butter-to-crumb ratio.
- Fruit Fantasia: Instead of cherry pie filling, try blueberry, strawberry, or even a mix of fresh berries. Peach pie filling? Divine. Get creative!
- Chocolate Lover’s Dream: Drizzle some chocolate syrup over the top along with the cherries. Or mix a tablespoon of cocoa powder into the cream cheese for a chocolate cheesecake base. YOLO.
- Spice it Up: A pinch of cinnamon in the Oreo crust? Trust me. It’s subtle but adds a nice warmth.
FAQ (Frequently Asked Questions)
- Can I use light cream cheese? Well, technically yes, you *can*. But why hurt your soul (and your cheesecake’s texture) like that? For maximum deliciousness, stick to the full-fat stuff. We’re indulging today!
- How long does it last in the fridge? It’s best eaten within 3-4 days. But honestly, it rarely lasts that long in my house!
- Can I freeze it? You bet! Freeze the cheesecake (without the cherry topping) for up to 1 month. Thaw in the fridge overnight before serving and adding the topping.
- My crust won’t stay together! What went wrong? You probably didn’t press it firmly enough, or you needed a tiny bit more butter. **Really pack it down** next time.
- Do I have to use Cool Whip, or can I use real whipped cream? You absolutely *can* use real whipped cream! Just whip about 2 cups of heavy cream with 1/2 cup powdered sugar until stiff peaks form, then gently fold it into the cream cheese mixture. It’s a bit richer but equally amazing.
- Can I make individual cheesecakes? Oh, you fancy! Yes, line a muffin tin with paper liners, press the crust into each, and then fill. Chill, top, and serve mini cheesecakes!
Final Thoughts
There you have it, folks! Your new go-to dessert that requires minimal effort but delivers maximum “OMG, you made this?!” reactions. Go forth and conquer your cravings, my friend. Now go impress someone—or just yourself, because you’ve earned it—with your new no-bake wizardry. Happy no-baking!


