Short, Catchy Intro
Alright, buckle up buttercup, because we’re about to embark on a culinary adventure that requires precisely zero oven time and maximum deliciousness. You want cheesecake but can’t be bothered with water baths, cracked tops, or the general existential dread of baking? My friend, you’ve come to the right place. We’re talking no-bake cheesecake bars, and trust me, they’re so easy, it almost feels like cheating. (Spoiler: It is, and we love it!)
Why This Recipe is Awesome
Let’s be real, who needs the stress of a traditional cheesecake? Not us! This recipe is the ultimate kitchen hack for when you want to impress without the mess. Why is it so awesome, you ask? Well, for starters:
- No oven required! Your kitchen stays cool, and your sanity remains intact.
- It’s ridiculously quick to prep. We’re talking minutes, not hours.
- The flavor? Oh my goodness, the flavor is all the creamy, dreamy cheesecake goodness you crave, but in a convenient, sliceable bar.
- It’s practically **idiot-proof**. Seriously, if I can make it look good, anyone can.
- Perfect for impromptu gatherings or just a Tuesday night when you deserve something spectacular with minimal effort.
Ingredients You’ll Need
Gather your troops! These are the heroes of our no-bake epic.
- **1 ½ cups Graham Cracker Crumbs:** Or your favorite digestive biscuit crumbs, crushed Oreos – whatever floats your crust boat.
- **½ cup (1 stick) Unsalted Butter, melted:** The glue that holds our crunchy dreams together.
- **2 blocks (16 oz total) Full-Fat Cream Cheese, softened:** And I mean *softened*, people. Let it hang out on the counter for a bit. This is not the time for cold, grumpy cream cheese.
- **1 cup Powdered Sugar (Confectioners’ Sugar):** For that silky smooth sweetness.
- **1 tsp Vanilla Extract:** The MVP of desserts. Don’t skimp!
- **1 ½ cups Cold Heavy Cream (or Whipping Cream):** Crucial for that light, airy texture. Keep it chilled until showtime.
- **Optional: 1 tbsp Lemon Juice or a pinch of Lemon Zest:** For a little zing that brightens everything up.
Step-by-Step Instructions
Okay, pay attention, this is where the magic happens (and by magic, I mean really simple steps).
- **Crush & Combine:** In a medium bowl, mix your graham cracker crumbs with the melted butter. Make sure every crumb gets a buttery hug.
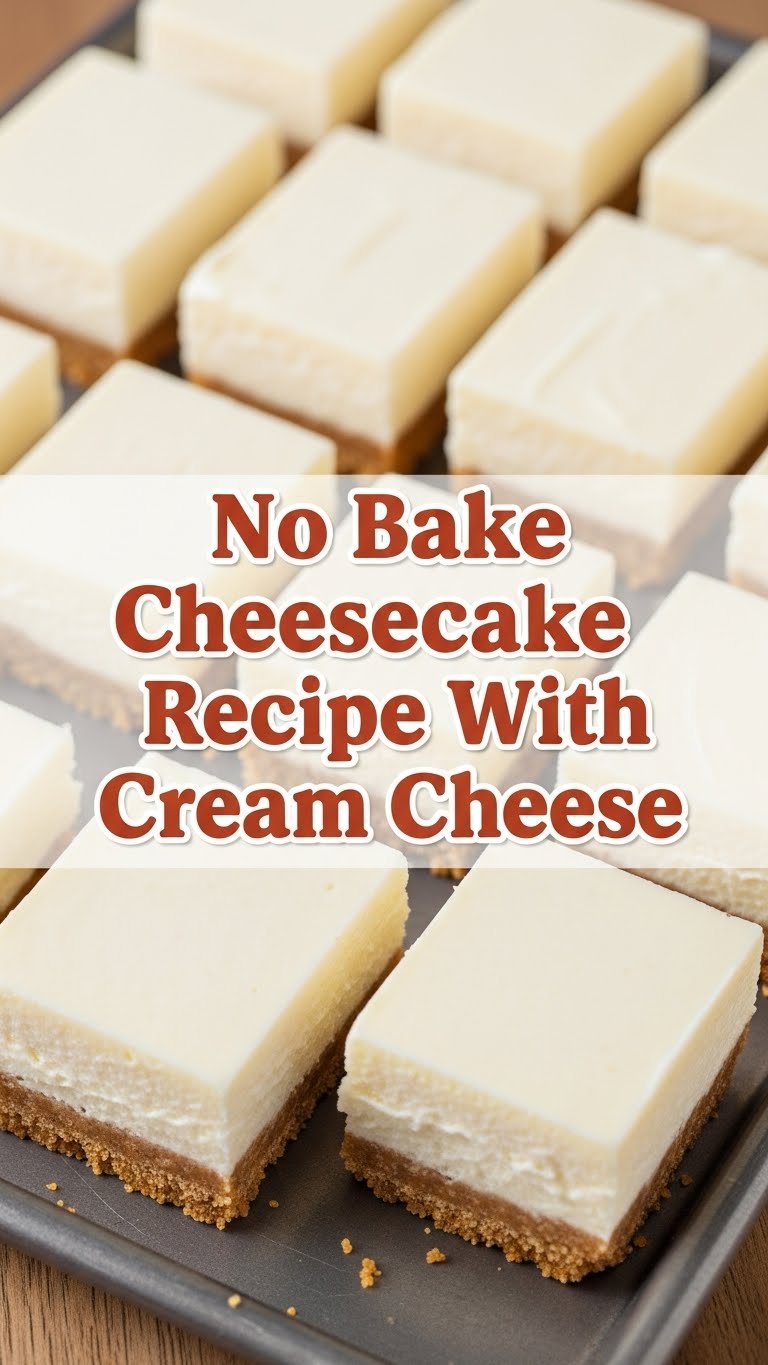
- **Press the Crust:** Firmly press this mixture into the bottom of a 9×13 inch pan (or an 8×8 for thicker bars), lined with parchment paper with an overhang for easy lifting. Pop it in the fridge for at least 15 minutes to chill and firm up. This is a **key step** for a solid foundation.
- **Whip the Dream Team (Cream Cheese Mix):** In a large bowl, beat the softened cream cheese, powdered sugar, and vanilla extract until it’s super smooth and fluffy. If using, add the lemon juice/zest here. Don’t overmix, though, or it might get sad and watery.
- **Whip the Heavy Cream:** In a separate, clean bowl (and with clean beaters!), whip the cold heavy cream until you get beautiful, stiff peaks. This is what gives our cheesecake its light, airy texture.
- **Fold Gently:** Now, gently fold the whipped cream into your cream cheese mixture. Be delicate! We want to keep all that glorious air in there.
- **Spread the Love:** Spoon the fluffy filling over your chilled crust and spread it evenly. Get it nice and smooth.
- **Chill Out:** Cover the pan and refrigerate for at least 4-6 hours, or even better, overnight. **Patience is a virtue here**, trust me.
- **Slice & Serve:** Once completely set, use the parchment paper overhang to lift the whole cheesecake out of the pan. Slice into bars, serve, and bask in the glory!
Common Mistakes to Avoid
Even though it’s “idiot-proof,” there are still a few rookie errors that can thwart your cheesecake dreams.
- **Not softening your cream cheese:** This is probably the number one offender. You’ll end up with lumps, and nobody wants a lumpy cheesecake, IMO.
- **Not chilling the crust enough:** If your crust is too warm or not set, it’ll just crumble apart when you try to spread the filling. Sad times.
- **Over-mixing the cream cheese mixture:** Whipping too aggressively for too long can sometimes thin out the mixture, making your bars less firm.
- **Under-whipping the heavy cream:** If your heavy cream isn’t whipped to stiff peaks, your cheesecake filling won’t be as light and stable. It’ll be more like a pudding, which, while delicious, isn’t what we’re going for.
- **Not chilling the *final* product long enough:** I know, I know, it’s hard to wait. But if you try to cut it too soon, it’ll be a glorious, delicious mess. Chill it, folks!
Alternatives & Substitutions
Feeling adventurous? Here are a few ways to mix things up!
- **Crust Creativity:** Instead of graham crackers, try crushed Oreo cookies (for an Oreo cheesecake!), Biscoff cookies, vanilla wafers, or even gingersnaps for a spiced twist.
- **Flavor Frenzy:** Swirl in some melted chocolate, a spoonful of espresso powder, a dollop of fruit preserves, or a different extract (almond, coconut) into the cream cheese mixture.
- **Topping it Off:** The world is your oyster! Fresh berries, chocolate sauce, caramel drizzle, a sprinkle of cocoa powder, mini chocolate chips, or even a fruit compote. FYI, toasted coconut flakes are amazing!
- **Make it Mini:** Press the crust into muffin liners for individual no-bake cheesecake cups!
FAQ (Frequently Asked Questions)
Got questions? I’ve got (casual) answers!
- **”Can I use low-fat cream cheese?”** Technically, yes. But why would you? You’re making cheesecake! Go for the full-fat goodness; it makes a huge difference in texture and flavor. Don’t cheat yourself of pure bliss.
- **”How long do these bars last?”** If they last more than a day in your house, you have more willpower than I do! Seriously though, they’ll keep well covered in the fridge for 3-4 days.
- **”Can I freeze them?”** Absolutely! Wrap individual bars tightly in plastic wrap, then foil, and they’ll be good in the freezer for up to a month. Thaw in the fridge before serving.
- **”Why is my cheesecake runny?”** Ah, likely culprits are not chilling long enough, over-mixing the cream cheese (which can sometimes break it down), or not whipping your heavy cream to stiff peaks. Refer back to the “Common Mistakes” section!
- **”Do I need a specific type of pan?”** A 9×13-inch pan (or 8×8 for thicker bars) is ideal. Make sure to use parchment paper with an overhang – it’s your secret weapon for easy removal!
- **”Can I make this ahead of time for a party?”** Yes, please do! In fact, it’s better when it has ample time to chill and set. An overnight chill is always a good idea.
Final Thoughts
So there you have it, your new go-to recipe for when you need something utterly delicious, easy, and impressive without breaking a sweat (or preheating an oven). These No-Bake Cheesecake Bars are pure joy in dessert form. Now go forth, conquer your cravings, and perhaps share a bar or two… or not. You’ve earned it! Enjoy!


