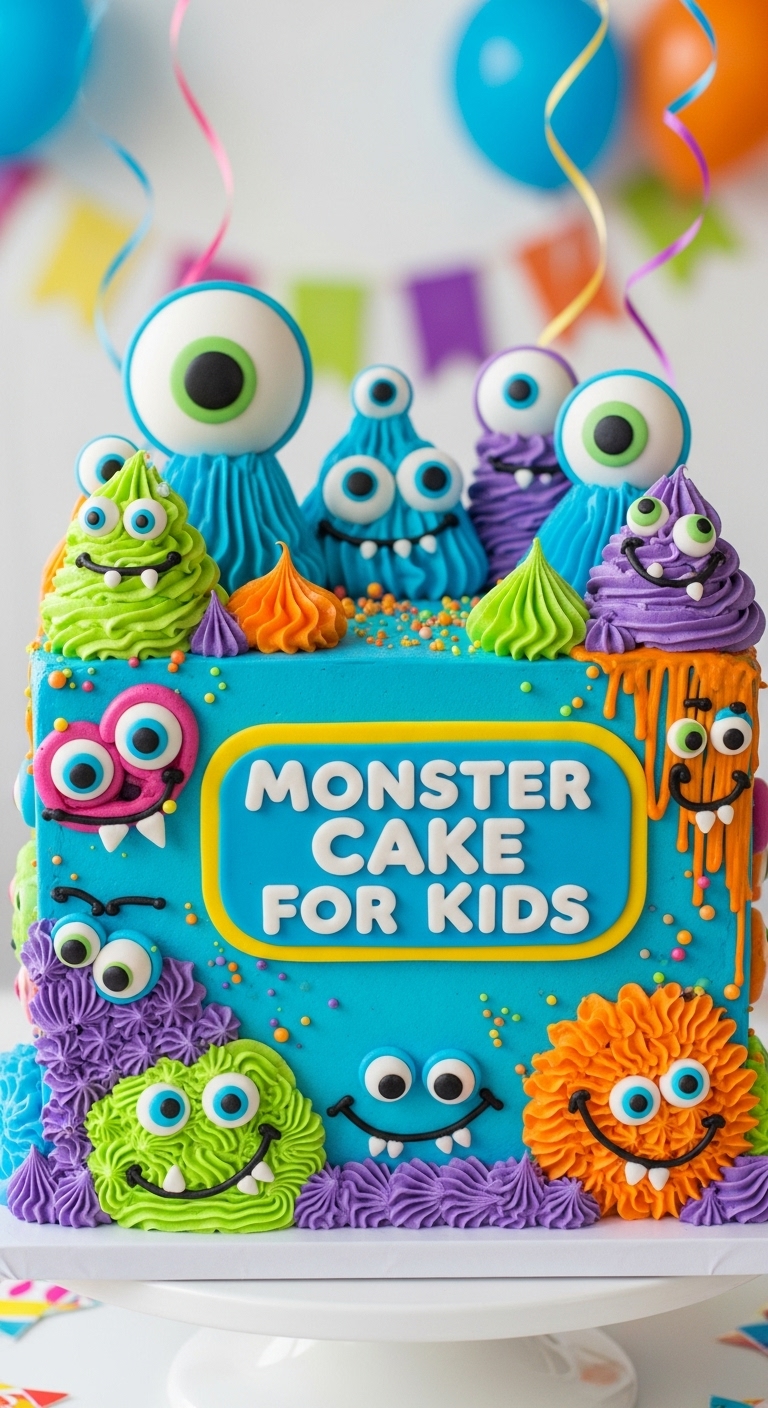
So, you’re craving something ridiculously fun to bake, but also something that screams “I tried… but not *too* hard,” right? And let’s be real, anything that involves kids usually ends up looking like a glorious, delicious mess anyway. Why fight it? Let’s lean into the chaos, embrace the goofs, and create a masterpiece that’s *supposed* to look a little wild. Friends, gather ’round, because we’re making a **Monster Cake For Kids!** It’s less “Pinterest perfect” and more “OMG, look at that thing!” – in the best way possible.
Why This Recipe is Awesome
Okay, so you want to be the undisputed hero of the next birthday party, playdate, or just a Tuesday afternoon, without actually *sweating* in the kitchen? This is your golden ticket. This Monster Cake recipe is so **idiot-proof**, I swear, even my cat could probably frost this, given enough catnip and encouragement. There are no perfectly piped rosettes here, no delicate tempering of chocolate. Just pure, unadulterated, delicious fun. Plus, kids go absolutely bonkers for it, which means instant hero status for you. **Winning!** It’s quick, it’s vibrant, and it’s virtually impossible to mess up because, well, it’s a monster! A little lopsided? Adds character! Frosting smear? That’s just part of its charm. Trust me on this one.
Ingredients You’ll Need
Get ready for a super chill shopping list. We’re keeping it simple because who needs extra stress? Not us!
- **Boxed Cake Mix:** (1 standard box, any flavor, but chocolate or vanilla are classic. Don’t judge, we’re going for *fun*, not a Michelin star, okay?)
- **Ingredients for the cake mix:** (Usually eggs, oil, water. Read the box, I’m not your mom.)
- **Store-Bought Frosting:** (2 tubs, vanilla or cream cheese flavor. Seriously, save yourself the hassle. Unless you secretly love making buttercream, then go for it, champ.)
- **Food Coloring:** (Gel food coloring is best for vibrant colors, but liquid works too! Think bright green, electric blue, monster purple!)
- **Candy Eyes:** (A small pack. These are NON-NEGOTIABLE. They bring the monster to life!)
- **Sprinkles:** (The wilder, the better! Jimmies, nonpareils, confetti – mix ’em up!)
- **Optional Fun Stuff:** (Crushed Oreos for “dirt,” gummy worms, mini chocolate chips, pretzel sticks for horns, etc. Get creative!)
Step-by-Step Instructions
Time to unleash your inner mad scientist (the fun kind, with sprinkles!).
- **Cake Time!** Preheat your oven to whatever temperature the cake mix box commands. Seriously, don’t skip this. While it’s heating up, grease and flour a couple of 8 or 9-inch round cake pans (or whatever size the box suggests). Mix up your chosen cake batter according to the box directions. You got this, it’s basically foolproof.
- **Bake it ’til golden (or just done).** Pour the batter into your prepared pans and pop them in the oven. Bake for the recommended time, or until a toothpick inserted into the center comes out clean. Let them cool in the pans for about 10-15 minutes, then transfer to a wire rack to **cool completely**. This part is crucial, unless you like melted frosting (which, no).
- **Monster Makeover Prep!** While your cakes are cooling, divide your store-bought frosting into separate bowls. Add a few drops of your chosen food coloring to each bowl and stir until you get those super vibrant monster hues. Want a striped monster? Use multiple colors. A single-colored beast? One bowl it is!
- **Stack & Spread!** Once your cakes are totally cool (and I mean *totally*), place one layer on your serving platter. Spread a generous layer of one color of frosting on top. Gently place the second cake layer on top. Now, get ready to unleash the monster!
- **Frost Your Beast!** Use a spatula or knife to slather the remaining frosting all over the top and sides of the cake. Don’t worry about perfection; uneven, bumpy frosting adds to the monster charm. In fact, **the messier, the better** for this bad boy.
- **Bring It To Life!** This is where the magic happens! Stick your candy eyes right onto the front of the cake. Position them however you like – close together for a bewildered look, far apart for a goofy one. Sprinkle those sprinkles all over the top and sides, like a confetti explosion. Add any other fun decorations you’ve got. Pretzel horns? Gummy worm hair? Go wild!
Common Mistakes to Avoid
Look, we all make mistakes. But some are more… monster-ish than others. Let’s avoid these:
- **Applying frosting to a warm cake:** Unless you’re going for a *soup* consistency, let that cake cool down. Seriously. **Patience, grasshopper.**
- **Thinking you need to be a professional baker:** This isn’t a competition. This is a celebration of fun and deliciousness. Lower your expectations for perfection, and elevate them for joy!
- **Forgetting the candy eyes:** I mean, is it even a monster without those googly peepers? No. The answer is no. Don’t disappoint the monster gods.
- **Being shy with the sprinkles:** This is no time for restraint. Go wild! More sprinkles, more fun!
Alternatives & Substitutions
Feeling creative or missing an ingredient? No stress, we got options!
- **Homemade vs. Box:** Look, if you’re feeling fancy or have time to kill (bless your heart), go ahead and whip up your favorite scratch cake and buttercream. But for the sake of sanity and time, a box mix and store-bought frosting are **totally acceptable** and deliver all the fun. No judgment here, **FYI**.
- **Different Colors:** Don’t limit yourself to green and blue! Pink, orange, black, rainbow stripes – any color combo can be monster-fied.
- **Decorator’s Choice:** Don’t have candy eyes? No problem! Use mini chocolate chips for eyes, or even just blobs of white frosting with a dot of black. Gummy worms, licorice whips for hair, M&Ms for polka dots… get creative! The messier, the better, IMO.
- **Cupcakes:** If a whole cake feels like too much, make monster cupcakes! Frost each one individually and add eyes and sprinkles. Instant monster army!
FAQ (Frequently Asked Questions)
Got questions? I’ve got answers (and maybe a joke or two).
- **Can I make this dairy-free or gluten-free?** You bet! Many box cake mixes and store-bought frostings have dairy-free or gluten-free alternatives. Just check the labels!
- **How far in advance can I make this beast?** You can bake the cakes a day ahead and store them tightly wrapped at room temp. Frost it the day you plan to serve for maximum freshness and monster glory.
- **Do I need any fancy equipment?** Nah, a couple of bowls, a whisk (or mixer if you’re feeling lazy), and some spatulas are really all you need. No piping bags required unless you *want* to get fancy (but again, why?).
- **Can I use any food coloring?** Yep, gel, liquid, whatever you’ve got! Gel colors give you more vibrant results with less product, but liquid works too. Just don’t chug it.
- **What if I don’t like food coloring?** You could always make a white “ghost” monster cake, or use natural colorings like beet powder for pink, spirulina for green (though the taste can be tricky), or turmeric for yellow. Or, just skip the color and go for a classic vanilla beast!
- **My frosting is too stiff/too runny! Help!** Too stiff? Add a tiny splash of milk (or water) and stir. Too runny? Pop it in the fridge for 15-20 minutes to firm up a bit. Crisis averted!
Final Thoughts
Alright, champ, you’ve officially conquered the Monster Cake! See? Not so scary after all, right? This isn’t just a dessert; it’s an experience. It’s a testament to the fact that baking can be ridiculously fun, totally forgiving, and incredibly rewarding without an ounce of stress. Go forth and share your wild, wacky, wonderful creation with delighted little (or big) monsters. You’ve totally earned those bragging rights (and maybe an extra slice… or two).


