Alright, listen up, buttercup! Ever have one of those days where your sweet tooth screams for something ridiculously light, fluffy, and *moist* (yes, I said it!) but the thought of a complicated recipe makes you wanna just eat raw cookie dough? Same, my friend, same. That’s where this glorious yellow chiffon cake waltzes in like a buttery, cloud-like dream. Forget the kitchen fuss; we’re making magic here, and honestly, it’s probably easier than parallel parking.
Why This Recipe is Awesome
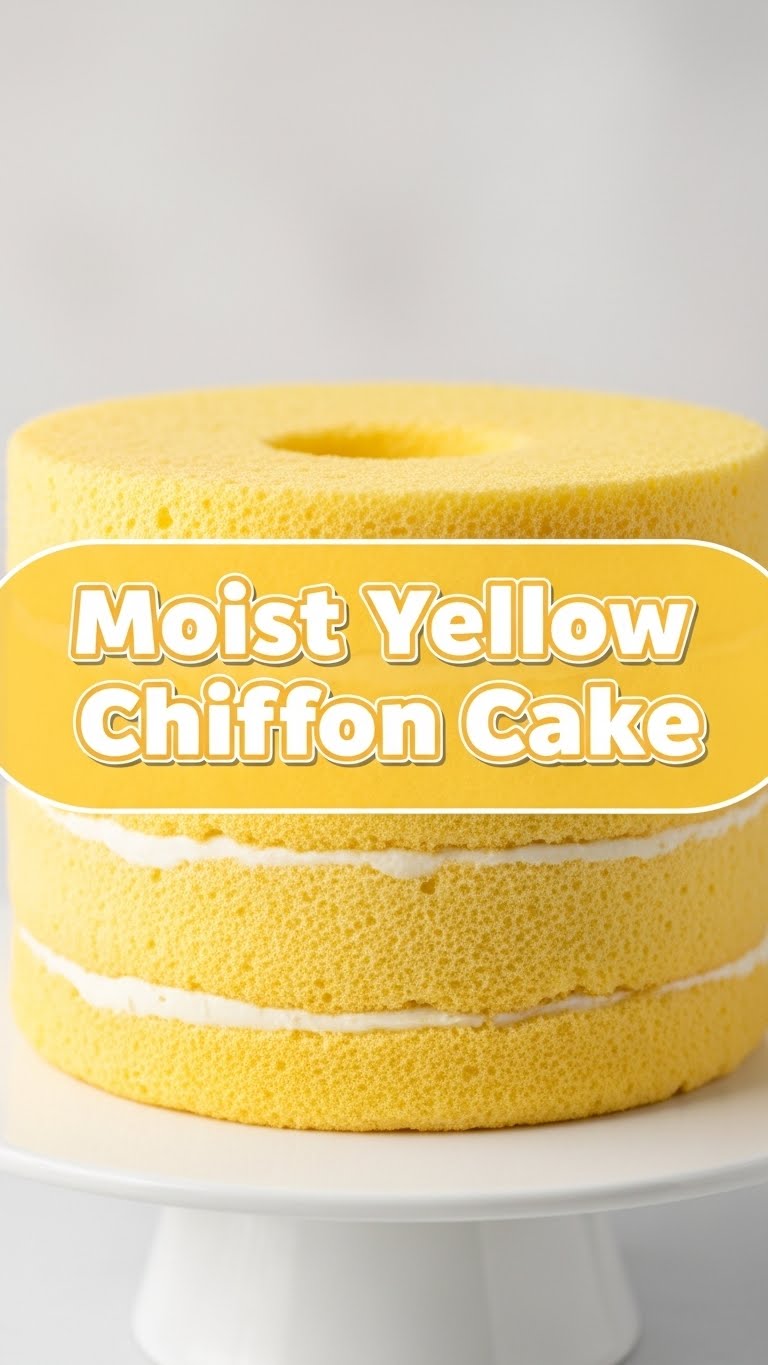
Okay, so why bother with *this* chiffon cake when there are a gazillion others out there? Simple. This isn’t just any chiffon; it’s THE chiffon. It’s so moist it practically apologizes for being so delicious. It’s light enough that you can totally justify a second (or third) slice. Plus, it looks super fancy, but shhh, don’t tell anyone it’s actually **surprisingly easy to make**. Seriously, if I, the queen of kitchen catastrophes, can whip this up, you’re golden. It’s an absolute showstopper that requires minimal drama and maximum yum factor. Consider it your new culinary secret weapon. You’re welcome.
Ingredients You’ll Need
- **All-purpose flour:** About 1 ½ cups. The backbone of our cakey dreams.
- **Granulated sugar:** 1 cup, divided. We’re going to be a little strategic with this sweetness.
- **Baking powder:** 1 ½ teaspoons. For that epic lift, because nobody likes a flat cake.
- **Salt:** ½ teaspoon. Just a pinch to make everything else sing.
- **Large egg yolks:** 5 of ’em. The yellow-gold goodness that makes this cake so rich and… well, yellow!
- **Vegetable oil:** ½ cup. For that amazing moisture without the buttery heaviness. Don’t skimp!
- **Cold water:** ¾ cup. Yep, plain old water. Don’t overthink it.
- **Vanilla extract:** 2 teaspoons. Essential. Make sure it’s good stuff!
- **Large egg whites:** 5 of ’em (from those yolks you just separated!). These are our magic fluff-makers.
- **Cream of tartar:** ¼ teaspoon. Your secret weapon for stable, lofty egg white peaks. Don’t skip it unless you like sad, deflated meringues.
Step-by-Step Instructions
- **Preheat Power:** First things first, get your oven to **325°F (160°C)**. No greasing a 9 or 10-inch tube pan (the one with the removable bottom and little feet) – chiffon needs to climb!
- **Dry Mix Magic:** In a large bowl, whisk together your flour, ¾ cup of the sugar, baking powder, and salt. Give it a good whisk to get rid of any lumps.
- **Wet Wonders:** In another bowl, whisk those beautiful egg yolks. Then, slowly whisk in the oil, cold water, and vanilla extract until everything is smooth and happy.
- **Combine & Conquer:** Pour the wet ingredients into the dry ingredients. Mix until *just* combined. **Don’t overmix!** A few lumps are totally fine here.
- **Egg White Extravaganza:** In a super clean, grease-free bowl (seriously, any grease will kill your meringue dreams), beat your egg whites with an electric mixer until they’re foamy.
- **Cream of Tartar Time:** Add the cream of tartar and continue beating until soft peaks form.
- **Sugar Shower:** Gradually add the remaining ¼ cup of sugar, a tablespoon at a time, while beating on high. Keep going until you have **stiff, glossy peaks**. They should stand up proudly.
- **Fold It In:** Gently, oh so gently, fold about a third of your stiff egg whites into the yolk mixture. Then, carefully fold in the rest of the egg whites. **Be gentle!** We want to keep all that beautiful air.
- **Bake Off!** Pour the batter into your *ungreased* tube pan. Smooth the top.
- **Oven O’Clock:** Bake for about 55-65 minutes, or until a wooden skewer inserted into the center comes out clean.
- **Hang Time:** Immediately after taking it out, **invert the pan onto its little feet** (or over a bottle if your pan doesn’t have feet). Let it cool completely upside down for at least an hour, or until truly cold. This prevents it from collapsing.
- **Release & Enjoy:** Once cool, use a thin knife to carefully loosen the cake from the pan edges and center. Serve plain, with berries, or a light dusting of powdered sugar. Dive in!
Common Mistakes to Avoid
- **Greasing the pan:** Big no-no! Chiffon needs to cling to the sides of the pan to climb. If you grease it, it’ll slide right down and be sad and flat. Don’t be that person.
- **Overmixing the batter:** Once you add the wet to the dry, mix *just* until combined. Overmixing develops gluten, making your cake tough. We want tender and ethereal, not chewy!
- **Greasy egg white bowl:** Seriously, a single speck of grease (even from your hands!) will prevent your egg whites from whipping up properly. **Clean bowl, clean beaters, no yolk contamination!**
- **Not beating egg whites enough (or too much):** You want stiff, glossy peaks. Under-beaten equals a flat cake; over-beaten equals dry, crumbly whites that are hard to fold in. It’s a sweet spot, find it!
- **Not cooling upside down:** Rookie mistake! If you don’t invert it, your beautiful, airy cake will deflate faster than my enthusiasm on a Monday morning. **Upside down, every time.**
Alternatives & Substitutions
Okay, so you’re feeling a little rebellious, huh? I get it. Here are a few tweaks you *can* make, but remember, the original is a classic for a reason!
- **Flour Power:** While all-purpose is standard, you *could* try cake flour for an even finer crumb. Just be aware it might be a tad more delicate.
- **Oil Change:** Vegetable oil is ideal for its neutral flavor and moisture, but canola oil works just as well. Skip the olive oil unless you want a *very* interesting flavor profile (read: probably not good for cake).
- **Vanilla Swap:** Love almond? Swap out half or all the vanilla for almond extract for a different vibe. Or lemon zest! A little zest folded into the batter adds a lovely brightness. IMO, this is where you can really play.
- **Sugar Blues:** While not recommended for the structure, if you *must* reduce sugar, only cut back slightly on the sugar mixed with the yolks. Don’t mess with the egg white sugar, as it’s crucial for stability.
FAQ (Frequently Asked Questions)
- Can I use regular round cake pans instead of a tube pan?
- Well, technically yes, but why make things harder? Chiffon cakes need to climb, and a tube pan’s ungreased sides and center core are perfect for that. Plus, cooling it upside down is way easier with a tube pan’s little feet!
- My cake sank in the middle! What happened?
- Oh no! Common culprits are opening the oven door too early, under-baked cake, or not cooling it upside down immediately. Make sure it’s fully baked and *always* invert it to cool. Practice makes perfect!
- Why are my egg whites not whipping up?
- Ah, the classic meringue mystery! Usually, it’s because your bowl or beaters had a tiny bit of grease on them, or a speck of egg yolk sneaked in. **Cleanliness is next to godliness when it comes to egg whites!**
- Can I make this ahead of time?
- Absolutely! Chiffon cake actually tastes even better the next day once the flavors meld. Store it covered at room temperature for up to 2-3 days, or in the fridge for a bit longer. Just make sure it’s airtight so it doesn’t dry out.
- What’s the best way to serve this?
- Plain is perfect, honestly. But if you want to jazz it up, a dusting of powdered sugar, fresh berries, or a light dollop of whipped cream would be divine. Keep it light; the cake is the star!
- Do I really need cream of tartar?
- While you can sometimes get by without it (especially with fresh eggs), cream of tartar is your best friend for **stable, voluminous egg white peaks**. It helps prevent them from collapsing. For best results, use it!
Final Thoughts
Phew! You made it! See? That wasn’t so scary, was it? This moist yellow chiffon cake is truly a thing of beauty, a cloud in cake form, and now *you* know how to make it. Go forth and conquer those cravings, my friend. Bake it for a special occasion, or just for a Tuesday afternoon pick-me-up (my personal favorite). Now go impress someone—or yourself—with your new culinary skills. You’ve earned it!


