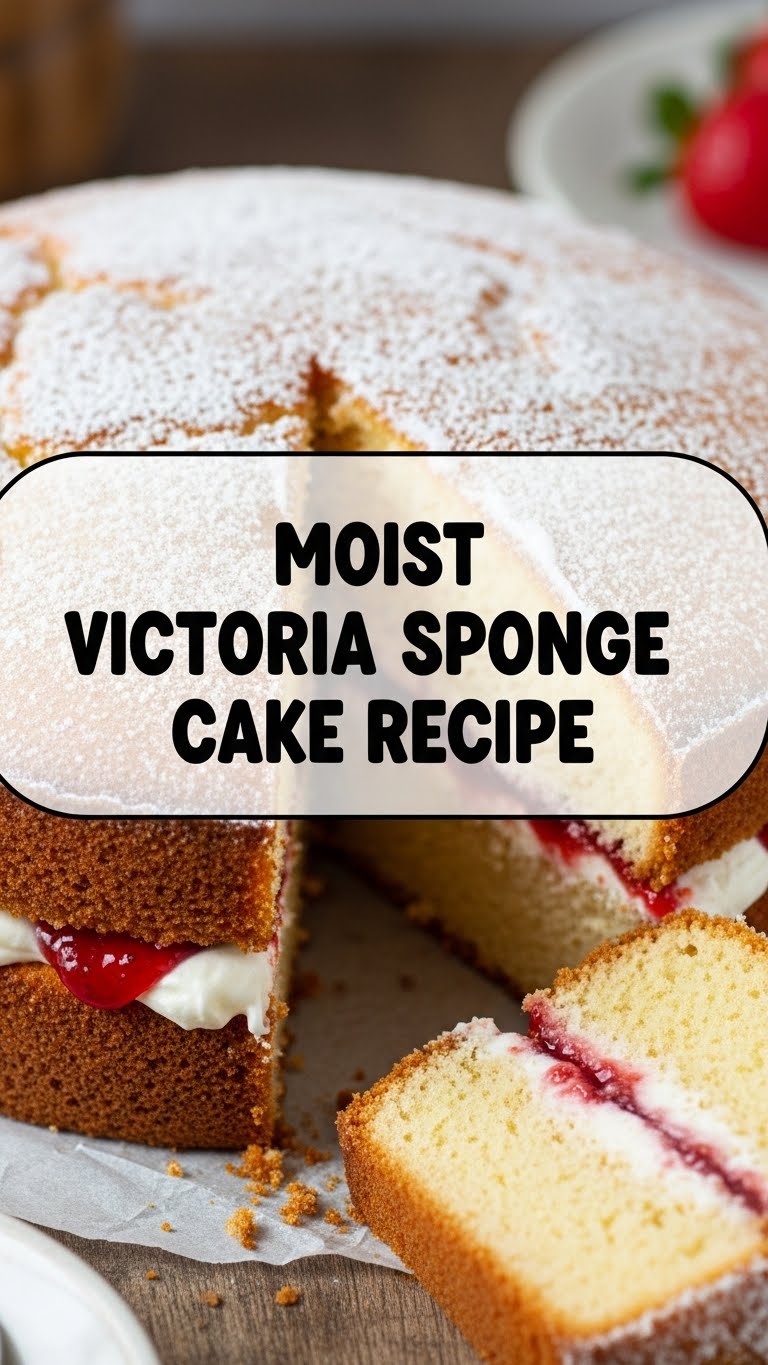
So, you’re craving something tasty but too lazy to spend forever in the kitchen, huh? Same. And honestly, sometimes you just need that comforting hug only a truly **moist Victoria Sponge** can give. Forget dry, crumbly imposters – we’re going for the real deal, the kind that makes you close your eyes and sigh with pure, unadulterated bliss. Think classic British charm, but make it *effortless* and *deliciously damp* (in the best way, obviously!).
Why This Recipe is Awesome
Let’s be real, Victoria Sponge often gets a bad rap for being “basic.” But basic can be brilliant, especially when it’s this good! This isn’t just *a* recipe; it’s **THE recipe** for a Victoria Sponge that’s consistently light, fluffy, and unbelievably moist. Seriously, it’s pretty much idiot-proof. Even I, on my most chaotic baking days, didn’t manage to mess this one up. It’s perfect for impressing friends, pretending you’re a domestic goddess (or god!), or just devouring solo with a cup of tea while binge-watching your favorite show. Plus, it’s quick enough that you won’t lose the will to live halfway through.
Ingredients You’ll Need
Gather your troops! Make sure they’re all at room temperature – this is **non-negotiable** for a perfectly light cake, FYI!
- 200g Unsalted Butter: Softened. We want control over our salt, thank you very much.
- 200g Caster Sugar: The finer sugar helps with that light texture. Granulated works too if you’re not feeling fancy.
- 4 Large Eggs: Beaten lightly. Happy, room-temp eggs are key for emulsification.
- 200g Self-Raising Flour: Sifted. Because who needs separate baking powder when the flour does it for you?
- 1-2 tbsp Milk: Just a splash to keep things extra moist. Whole milk is best.
- 1 tsp Vanilla Extract: Use the good stuff, please! Not that artificial stuff that smells like a candle.
- For the Filling:
- Raspberry Jam: Or your favorite jam. Classic is raspberry, though!
- 200ml Double Cream: Whipped until soft peaks form. No sad, runny cream here!
- Icing Sugar: For dusting, because presentation matters (even if it’s just for you).
Step-by-Step Instructions
- Get Prepped! Preheat your oven to 180°C (160°C fan/Gas Mark 4). Lightly grease and line two 8-inch (20cm) round sandwich tins with baking parchment. Trust me, you don’t want your beautiful cake to stick!
- Cream Dream Team: In a large bowl, cream together the softened butter and caster sugar until the mixture is pale, light, and wonderfully fluffy. This step is crucial for incorporating air, so **don’t rush it!**
- Egg-cellent Addition: Gradually add the beaten eggs, a little at a time, mixing well after each addition. If it looks like it’s curdling, add a spoonful of your flour to help bring it back together.
- Fold It In, Fold It In! Gently fold in the sifted self-raising flour. Do it in two batches until just combined. Be careful not to overmix; we want a light cake, not a dense brick! Stir in the milk and vanilla extract until everything is smoothly incorporated.
- Divide and Conquer: Divide the glorious batter evenly between your two prepared tins. Smooth the tops with a spatula.
- Bake That Cake! Pop them in the preheated oven for 20-25 minutes, or until golden brown, springy to the touch, and a skewer inserted into the center comes out clean.
- Cool Down: Let the sponges cool in their tins for 5-10 minutes before turning them out onto a wire rack to cool completely. **Patience is a virtue here!** Assembling warm cakes leads to melted cream disaster.
- Assemble Your Masterpiece: Once completely cool, spread jam generously over one sponge. Whip your double cream until it holds soft peaks, then spread it over the other sponge. Gently place the cream-covered sponge on top of the jammy one.
- Dust and Devour: Lightly dust the top with icing sugar. Slice, serve, and prepare for compliments (or just hoard it all for yourself, we won’t judge).
Common Mistakes to Avoid
Even the best of us slip up, but here are some rookie mistakes you can totally sidestep:
- Cold Ingredients: Seriously, this is a biggie. Cold butter, eggs, and milk don’t emulsify properly, leading to a denser cake. **Room temperature is your friend!**
- Overmixing the Batter: Once the flour is in, mix just enough until combined. Overmixing develops the gluten, making your cake tough instead of tender.
- Opening the Oven Door Too Soon: Curiosity killed the cake! Opening the oven before your sponges are set can cause them to sink in the middle. Resist the urge, my friend!
- Not Lining Your Tins: Trying to pry a stuck cake from a tin is a special kind of hell. Just line them; future you will thank present you.
- Assembling Warm Cakes: Unless you enjoy jam-and-cream soup, let those sponges cool completely. I repeat, **completely!**
Alternatives & Substitutions
Feeling a bit adventurous, or just missing an ingredient? No stress, here are some ideas:
- Butter Swaps: You can technically use baking margarine, but honestly, butter gives it that superior flavor and texture, IMO. Why compromise on deliciousness?
- Sugar Choices: While caster sugar is ideal, regular granulated sugar will work just fine. Your cake might be ever-so-slightly less fine-textured, but still tasty!
- Jamming Around: Raspberry is traditional, but feel free to switch it up! Strawberry jam, blackcurrant, or even lemon curd (for a zingy twist) are all fantastic.
- Cream Dreams: Instead of whipped cream, you could go for a classic buttercream filling. Or even a cream cheese frosting if you’re feeling extra decadent!
- Gluten-Free: Many self-raising gluten-free flour blends work wonderfully in this recipe. Just make sure it’s a good quality one.
FAQ (Frequently Asked Questions)
Got questions? I’ve got answers (mostly humorous ones).
- Can I use margarine instead of butter? Well, technically yes, but why hurt your soul like that? Butter just gives it that incomparable richness and flavor. It’s an indulgence worth making!
- My cake sank in the middle! What happened? Oh, the horror! This usually means your oven wasn’t hot enough, you opened the oven door too early, or your self-raising flour lost its rising power (check the expiry date!). Don’t worry, even pros have bad cake days!
- How do I know when it’s cooked perfectly? It’ll be golden brown, springy to the touch, and a skewer inserted into the center will come out clean. When in doubt, give it another minute or two!
- Can I make the sponges ahead of time? Absolutely! You can bake the sponges a day in advance and store them in an airtight container at room temperature. Assemble with cream and jam right before serving for maximum freshness (and non-soggy cream!).
- Why do all my ingredients need to be at room temperature? Ah, the science bit! Room temperature butter creams better with sugar, trapping more air. Room temperature eggs combine more smoothly with the butter mixture, creating a stable emulsion. All this leads to a lighter, fluffier cake. Science, baby!
- Can I add cocoa powder to make it chocolate? You totally can! Swap out 2 tablespoons of the self-raising flour for 2 tablespoons of good quality cocoa powder. You might need to add an extra splash of milk to maintain the consistency. Chocolate Victoria Sponge? Yes, please!
Final Thoughts
And there you have it, folks! You’ve just mastered the art of the perfect, **moist Victoria Sponge cake**. See? I told you it was easy! Now go impress someone – or just yourself – with your new culinary skills. You’ve earned that glorious slice (or three). Seriously, you deserve it. Go forth and conquer the cake world!


