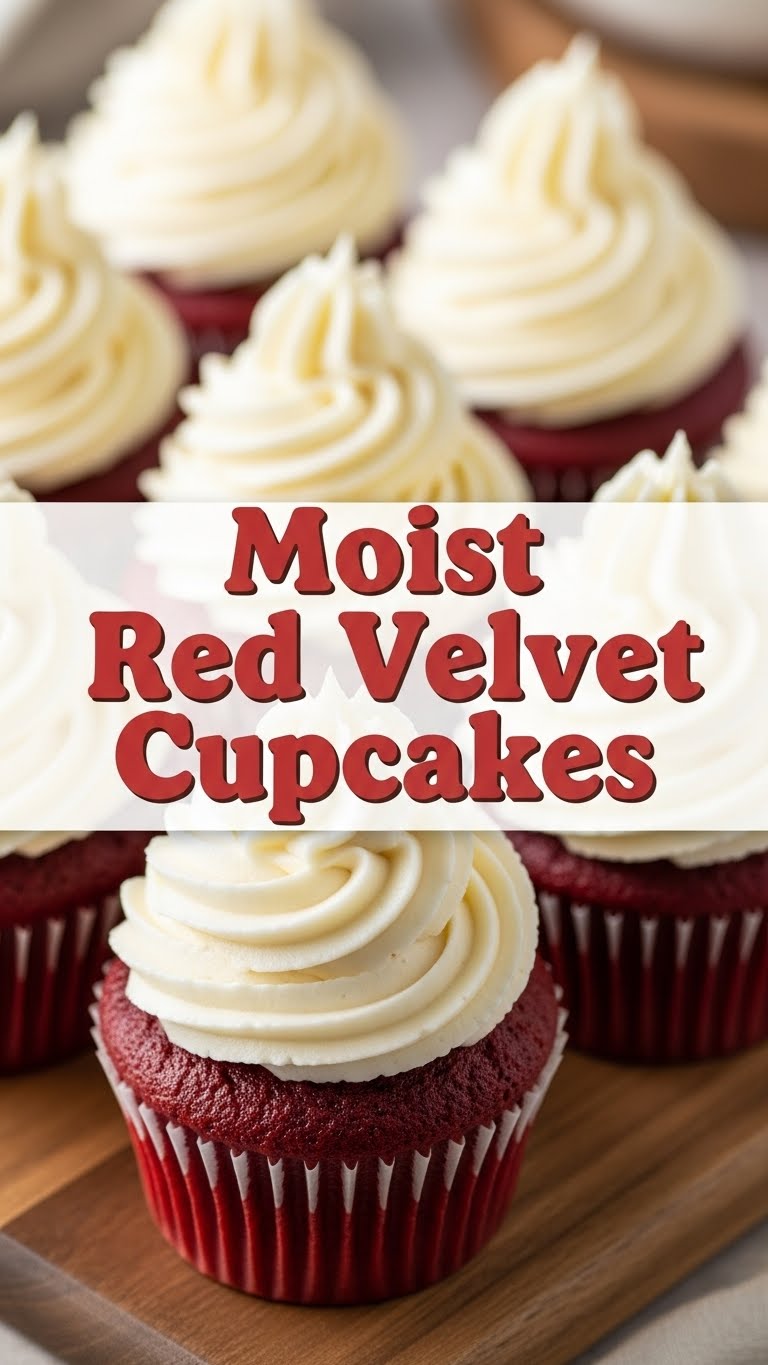
So, you’ve scrolled past one too many drool-worthy Red Velvet pics on Instagram and now you *need* them, like, yesterday? Same, friend, same. But who has time for a whole fancy cake? Not us! We’re doing cupcakes – because tiny cakes mean tiny commitments, right? And these aren’t just any Red Velvet. These are the moist, “OMG, did you *make* these?!” kind. Let’s get baking!
Why This Recipe is Awesome
Alright, let’s be real. This isn’t just a recipe; it’s a social weapon. Want to impress your in-laws? Bring these. Need to win over that cute neighbor? Cupcakes. Feeling a bit down? Make ’em for yourself, because you deserve joy. This recipe is **stupid-easy**, honestly. If I can whip these up without setting off the smoke detector, you can too. They’re consistently moist (no dry crumb cakes here, thank you very much!) and the color is vibrant without looking like a science experiment gone wrong. Plus, tiny cakes are just cuter, IMO.
Ingredients You’ll Need
Gather ’round, my fellow kitchen adventurers! Here’s your shopping list. Don’t worry, nothing too exotic, unless you consider a tiny bottle of red food coloring ‘exotic’. (Spoiler: you’ll need a *good* one for that signature hue!)
- All-Purpose Flour: Just your basic flour, nothing fancy. Don’t overthink it.
- Granulated Sugar: Sweetness, darling, sweetness.
- Unsweetened Cocoa Powder: The *chocolate* part of red velvet. Use a good quality one for flavor!
- Baking Soda: Our little rising agent. Don’t skip this, unless you like flat cupcakes.
- Salt: Balances everything out. Crucial!
- Unsalted Butter (room temp): Makes everything better. Seriously, **room temp is key here.**
- Vegetable Oil: For extra moistness! Because we’re not messing around with dryness.
- Large Eggs (room temp): Binds it all together. Again, room temp for a smooth batter.
- Buttermilk: The secret sauce for that tangy, moist crumb. If you don’t have it, don’t panic, I’ll tell you how to fake it later!
- Red Liquid/Gel Food Coloring: This is where the magic happens. Go for a good quality gel for intense color. **Seriously, gel food coloring is your friend here.**
- Vanilla Extract: Always. Just… always.
- White Vinegar: Reacts with the baking soda and buttermilk. It’s science!
For the Cream Cheese Frosting (because what’s red velvet without it?):
- Cream Cheese (full fat, softened): Don’t even *think* about low-fat. We’re here for a good time, not a diet.
- Unsalted Butter (softened): Frosting’s best friend.
- Powdered Sugar (aka confectioners’ sugar): Sift it if you hate lumps. (You do.)
- Vanilla Extract: More vanilla!
Step-by-Step Instructions
Okay, apron on? Let’s get baking! This is where the fun (and the potential mess) begins. Follow along, you got this!
- Preheat & Prep: Crank your oven to 350°F (175°C) and line a 12-cup muffin tin with paper liners. Do it now, your future self will thank you.
- Dry Mix: In a medium bowl, whisk together the flour, cocoa powder, baking soda, and salt. Give it a good whisk to get rid of any lumps. Set aside.
- Wet Base: In a large bowl (or stand mixer if you’re fancy), cream together the softened butter, vegetable oil, and granulated sugar until it’s light and fluffy. This takes a few minutes, so be patient!
- Eggs & Color: Beat in the eggs one at a time, mixing well after each addition. Stir in the vanilla extract and that glorious red food coloring. Mix until the color is evenly distributed and vibrantly red. **Don’t be shy with the red!**
- Alternating Act: Now, add your dry ingredients to the wet ingredients in three additions, alternating with the buttermilk in two additions. Start and end with the dry ingredients. Mix on low speed until *just combined* after each addition. **Don’t overmix, or you’ll get tough cupcakes!**
- Vinegar Boost: Gently fold in the white vinegar at the very end. This gives the cupcakes their signature tang and helps with the rise.
- Fill ’em Up: Divide the batter evenly among your prepared cupcake liners, filling each about two-thirds full.
- Bake Time! Pop them into your preheated oven and bake for 18-22 minutes, or until a toothpick inserted into the center comes out clean.
- Cool Down: Let the cupcakes cool in the muffin tin for about 5-10 minutes before transferring them to a wire rack to cool completely. **Cool completely before frosting, seriously!**
- Frosting Fun (while they cool): In another large bowl, beat the softened cream cheese and butter until smooth and creamy. Gradually add the powdered sugar, mixing until well combined and fluffy. Stir in the vanilla extract. If it’s too thick, add a tiny splash of milk or cream. If too thin, add more powdered sugar.
- Decorate & Devour: Once the cupcakes are completely cool, frost them generously. You can use a piping bag or just slather it on with a knife – no judgment here!
Common Mistakes to Avoid
Look, we all make mistakes. It’s part of the journey. But here are a few classic blunders you can totally sidestep, making you look like a pro (even if you’re just winging it).
- Preheating is NOT Optional: Thinking you don’t need to preheat your oven? **Rookie mistake!** Your oven needs to be at the correct temperature from the get-go for even baking.
- The Overmix Menace: Mixing your batter until your arm aches is a no-go. **Overmixing develops the gluten in the flour, leading to tough, chewy cupcakes.** Mix until just combined; a few lumps are totally fine.
- Cold Hard Ingredients: Trying to cream cold butter and sugar is like trying to convince a cat to take a bath. **Always use room temperature butter, eggs, and cream cheese.** It makes for a smoother, more emulsified batter and frosting.
- The Warm Cupcake Trap: Frosting warm cupcakes? Prepare for a soupy, melted mess. **Patience, grasshopper! Let those beauties cool completely** before even thinking about frosting them.
- Skimping on the Red: If your red velvet looks more like “lightly reddish brown,” you probably didn’t use enough food coloring, or used liquid instead of gel. **Go bold, or go home!**
Alternatives & Substitutions
Life happens, ingredients run out, or maybe you just want to shake things up. Here are some quick fixes and tweaks.
- No Buttermilk? No Problem! Don’t have buttermilk on hand? Mix 1 cup of regular milk with 1 tablespoon of white vinegar or lemon juice. Let it sit for 5-10 minutes until it looks slightly curdled. Voila! Instant buttermilk. **It’s a lifesaver, trust me.**
- Butter vs. Oil: This recipe uses both for ultimate moistness. If you’re really in a pinch, you *could* use all butter or all oil, but you might lose some of that signature texture. IMO, stick to the combo for the best results.
- Gluten-Free Flour: You can totally use a 1:1 gluten-free baking blend for this recipe. Just make sure it contains xanthan gum. The texture might be slightly different, but still delicious!
- Less Sugar? You can slightly reduce the sugar in the cupcake batter (maybe by 1/4 cup), but I wouldn’t go too crazy, as it affects the texture and moistness. For the frosting, reducing sugar can make it less stable, so proceed with caution.
FAQ (Frequently Asked Questions)
Got questions? I’ve got (mostly sarcastic) answers!
- Gel vs. liquid food coloring – does it really matter? Oh, honey, it absolutely does! **Gel food coloring gives you that deep, vibrant red without adding too much liquid to your batter.** Liquid food coloring often gives a duller color and can mess with your batter consistency. Spend the extra buck on gel, your eyes (and taste buds) will thank you.
- Can I make these ahead of time? Absolutely! Cupcakes stay fresh for 2-3 days at room temperature (if sealed) or up to 5 days in the fridge. Unfrosted cupcakes can even be frozen for up to 3 months. Just thaw and frost when you’re ready to serve. **Future you will be thrilled.**
- How do I store them so they stay moist? Keep them in an airtight container at room temperature for a couple of days. If it’s warm, or you want them to last longer, pop them in the fridge. Just let them come to room temp for about 30 minutes before serving for optimal deliciousness.
- Can I turn this into a full cake? You betcha! This recipe makes about 24 cupcakes, so you could probably divide it between two 8-inch or 9-inch round cake pans. Just adjust the baking time (it’ll be longer, maybe 25-30 minutes, but keep an eye on it!).
- My red velvet isn’t very red, what went wrong? Probably didn’t use enough gel food coloring, or you used liquid. See above! Also, a high-quality cocoa powder can sometimes mute the red, but that’s a flavor trade-off worth making.
- My cream cheese frosting is too thin/thick. Help! If it’s too thin, add more powdered sugar, a tablespoon at a time, until it reaches your desired consistency. If it’s too thick, add a tiny splash of milk or cream. **Remember, start small, you can always add more!**
- Can I use margarine instead of butter? Well, technically yes, but why hurt your soul like that? Butter just tastes better and gives a superior texture. For frosting especially, **butter is non-negotiable for that creamy, rich flavor.** Don’t cheap out on the good stuff here!
Final Thoughts
Phew! You made it! Now go forth, my friend, and conquer the world with your perfectly moist, divinely red, and utterly irresistible Red Velvet Cupcakes. Seriously, take a bow. You just baked something awesome. Now go impress someone—or yourself—with your new culinary skills. You’ve earned it! Don’t forget to snap a pic and tag me, okay? Happy baking!

