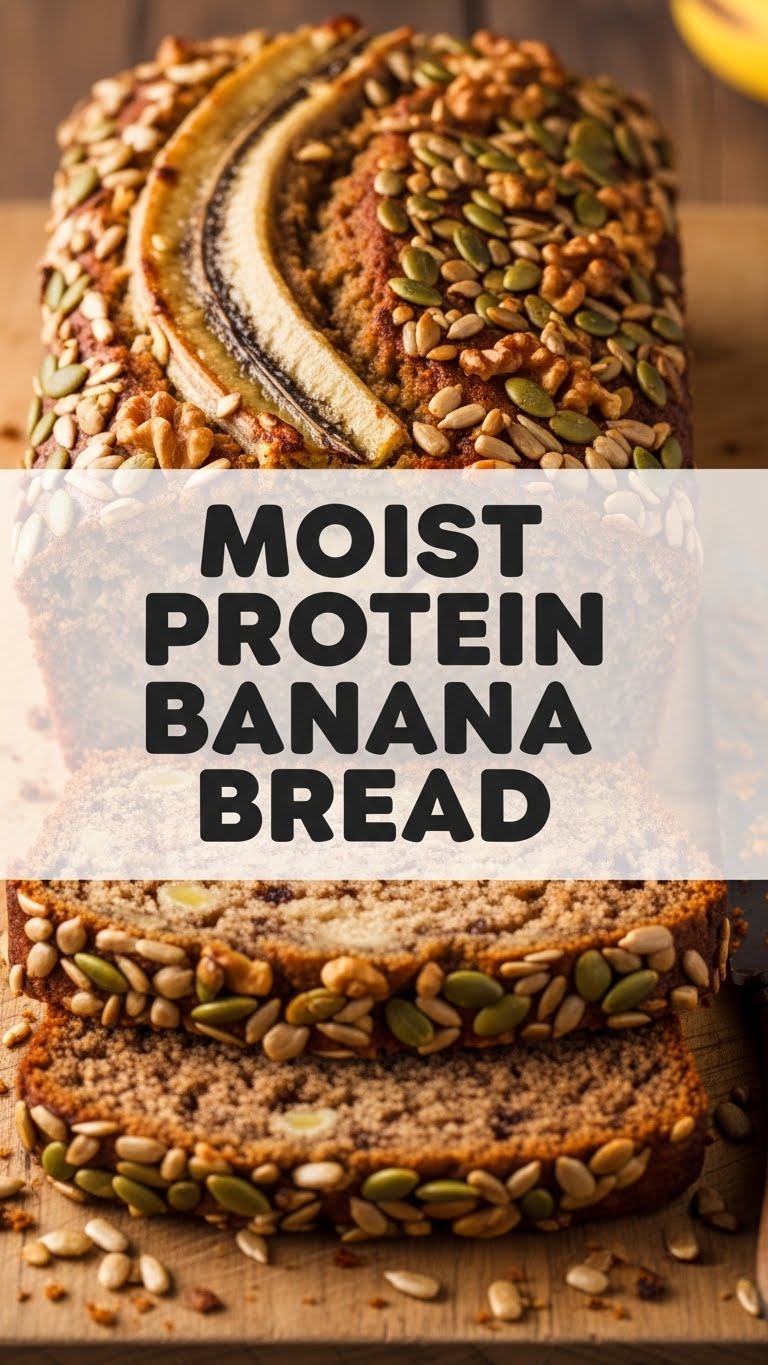
So you’re craving something tasty but too lazy to spend forever in the kitchen, huh? Same, friend, same. My oven and I have a very “it’s complicated” relationship, usually involving me wanting maximum deliciousness for minimum effort. And let’s be real, sometimes that effort includes putting on actual pants. Which is why we’re about to make the most glorious, **Moist Protein Banana Bread** you’ve ever had the pleasure of not messing up. Get ready to have your taste buds AND your macros happy!
Why This Recipe is Awesome
Look, I get it. “Protein Banana Bread” sounds like something your gym bro would force on you before an early morning squat session. But hear me out! This isn’t one of those dry, chalky, “healthy” fakes. This is actual, legitimate, can’t-stop-eating-it, ridiculously moist banana bread that just *happens* to pack a protein punch. It’s so good, you might even forget it’s good for you. It’s also pretty much **idiot-proof**; even I, a serial kitchen destroyer, managed to pull this off without setting off the smoke alarm. Plus, it’s quick! You’ll be inhaling warm, deliciousness before you can say “where did all the bananas go?”
Ingredients You’ll Need
Gather ’round, my sweet-toothed friends. Here’s what you’ll need to make this magic happen:
- 3 Ripe Bananas: And I mean RIPE. Like, “did someone forget these existed for a week?” Ripe. The more brown spots, the better. They’re your secret moisture and sweetness weapon.
- 2 Large Eggs: Room temp, if you’re feeling fancy. If not, whatever, they’ll be fine.
- 1/2 Cup Sweetener: Maple syrup, honey, or even brown sugar if you’re feeling old school. Pick your poison!
- 1/4 Cup Melted Butter or Oil: I usually go for unsalted butter because, well, butter. But coconut oil or vegetable oil works too.
- 1 Teaspoon Vanilla Extract: Because everything is better with vanilla. It’s science.
- 1 Cup All-Purpose Flour: Or whole wheat if you’re trying to be extra virtuous.
- 1/2 Cup Protein Powder: Vanilla or unflavored works best. Whey, casein, plant-based – whatever your preferred scoop. This is where the magic (and gains) happen!
- 1 Teaspoon Baking Soda: For that lovely lift. Don’t skip it!
- 1/2 Teaspoon Salt: Balances everything out. Trust me.
- 1/2 Teaspoon Cinnamon (Optional): Adds a cozy hug to your bread. Highly recommended.
- 1/2 Cup Chocolate Chips or Chopped Nuts (Optional, but highly encouraged): Because life’s too short for plain banana bread.
Step-by-Step Instructions
Alright, apron on (or not, I won’t judge), let’s get baking!
- **Preheat Power-Up:** First things first, **preheat your oven to 350°F (175°C)**. While it’s warming up, grease and flour a standard loaf pan (or line with parchment paper for easy removal, you genius).
- **Banana Blitz:** Grab those wonderfully spotty bananas and mash them up in a large bowl. A fork works perfectly. Leave a few small lumps for texture if you’re feeling wild!
- **Wet Mix Wonders:** To the mashed bananas, add the eggs, sweetener, melted butter/oil, and vanilla extract. Whisk them all together until everything is just combined. Don’t overthink it.
- **Dry Mix Magic:** In a separate, medium-sized bowl, whisk together your flour, protein powder, baking soda, salt, and cinnamon (if using). Make sure there are no lumpy bits of protein powder hiding!
- **Combine & Conquer:** Pour your dry ingredients into your wet ingredients. Mix gently with a spatula until *just* combined. **DO NOT OVERMIX.** A few streaks of flour are totally fine. Overmixing leads to tough bread, and nobody wants that.
- **Add-In Awesome:** If you’re using chocolate chips or nuts, now’s the time to fold them in. Give ’em a quick stir to distribute evenly.
- **Bake It Baby:** Pour your glorious batter into your prepared loaf pan. Pop it into the preheated oven and **bake for 45-60 minutes**. You’ll know it’s done when a toothpick inserted into the center comes out clean (or with just a few moist crumbs, not wet batter).
- **Cool Down:** Let your banana bread cool in the pan for about 10-15 minutes before transferring it to a wire rack to cool completely. Or, if you’re like me, slice into it while it’s still warm and slightly gooey. YOLO!
Common Mistakes to Avoid
We all make mistakes, darling. But with this recipe, let’s try to minimize the oopsies, shall we?
- **Under-ripe Bananas:** This is a big one. Green bananas = sad, bland, less moist bread. **Always use super ripe, spotty bananas.** They’re the real MVPs here.
- **Overmixing the Batter:** Seriously, I can’t stress this enough. Mix until just combined. Overmixing develops gluten too much, resulting in a dense, chewy, and tough loaf. Don’t be a tough loaf!
- **Not Greasing the Pan Properly:** Thinking you can just eyeball it? Nope. Your beautiful bread will stubbornly cling to the pan. **Grease and flour (or parchment!) thoroughly.**
- **Opening the Oven Door Too Early:** Resist the urge! Opening the door too soon can cause your bread to sink in the middle. Give it at least 35-40 minutes before peeking.
- **Forgetting to Preheat the Oven:** Rookie mistake! Baking in a cold oven means uneven baking and a longer bake time. **Preheat your oven for at least 15-20 minutes** before the loaf goes in.
Alternatives & Substitutions
Feeling creative? Or just missing an ingredient? No worries, we can usually make it work!
- **Flour Power:** Instead of all-purpose, try whole wheat flour for extra fiber, or a 1:1 gluten-free flour blend if you’re avoiding gluten. Results might vary slightly, but it’ll still be tasty!
- **Sweetener Swap:** Brown sugar, coconut sugar, or even a sugar-free alternative like erythritol can stand in for maple syrup or honey. Adjust to your sweetness preference.
- **Protein Powder:** Any flavor works, but vanilla, unflavored, or even a subtle chocolate protein powder are top-tier choices. Just be mindful of super strong flavors.
- **Fats:** Melted butter is my jam, but coconut oil or any neutral-flavored vegetable oil (like canola or grapeseed) will do the trick. For a lower-fat option, try unsweetened applesauce (about 1/4 cup), but be prepared for a slightly different texture.
- **Mix-Ins Galore:** Beyond chocolate chips and nuts, think dried cranberries, raisins, shredded coconut, or even a sprinkle of nutmeg for extra warmth. Get wild!
FAQ (Frequently Asked Questions)
Got questions? I’ve got answers (mostly humorous ones).
- **Can I use frozen bananas?** Absolutely! Just make sure to thaw them first and drain any excess liquid. They’ll be super soft and easy to mash.
- **What if my bananas aren’t ripe enough?** Oh, the horror! You can bake them unpeeled on a baking sheet at 300°F (150°C) for 15-20 minutes until they’re black. Or, honestly, just wait. **Patience is a virtue (especially for banana bread).**
- **Can I make this gluten-free?** Yep! Just swap out the all-purpose flour for a good quality 1:1 gluten-free baking blend. FYI, some blends work better than others, so don’t blame me if it’s not *exactly* the same.
- **How long does this protein banana bread last?** On your counter, probably 2-3 days (if it lasts that long, you’re a stronger person than me). In the fridge, up to a week. You can also slice it and **freeze individual portions** for a quick grab-and-go breakfast.
- **Can I use margarine instead of butter?** Well, technically yes, but why hurt your soul like that? Butter just tastes better, IMO. But hey, you do you.
- **My bread is dry, what happened?** Chances are, it was overbaked. Keep a close eye on it during the last 10-15 minutes of baking, and remember the toothpick test! Not enough ripe banana or fat can also contribute to dryness.
- **Can I make muffins instead of a loaf?** You betcha! Just divide the batter into a greased muffin tin (makes about 12-14 muffins) and bake for 20-25 minutes, or until a toothpick comes out clean.
Final Thoughts
So there you have it, champ! A ridiculously delicious, guilt-free(ish), and surprisingly easy protein banana bread recipe that’s going to make your kitchen smell divine and your belly happy. It’s the perfect way to use up those overripe bananas and sneak in some extra protein without even trying. Now go impress someone—or yourself—with your new culinary skills. You’ve earned it!

