So you’re craving something tasty but too lazy to spend forever in the kitchen, huh? Same. And let’s be real, sometimes you just need that warm, gooey, peanut butter-chocolate hug in a cookie. Forget complicated baking, because today we’re tackling the legend: Moist Peanut Butter Blossom Cookies. Get ready to impress yourself (and anyone else lucky enough to be nearby).
Why This Recipe is Awesome
Okay, let’s break it down. Why bother with this recipe when the internet is overflowing with cookie contenders? Simple:
- It’s practically **idiot-proof**. Seriously, even if your culinary skills peak at instant ramen, you got this.
- It’s lightning fast. We’re talking minimal prep, maximum cookie gratification.
- It delivers on the “moist” promise. No dry, crumbly sadness here, just soft, chewy perfection.
- It’s a peanut butter and chocolate symphony. Name a better duo, I’ll wait. (Spoiler: you can’t.)
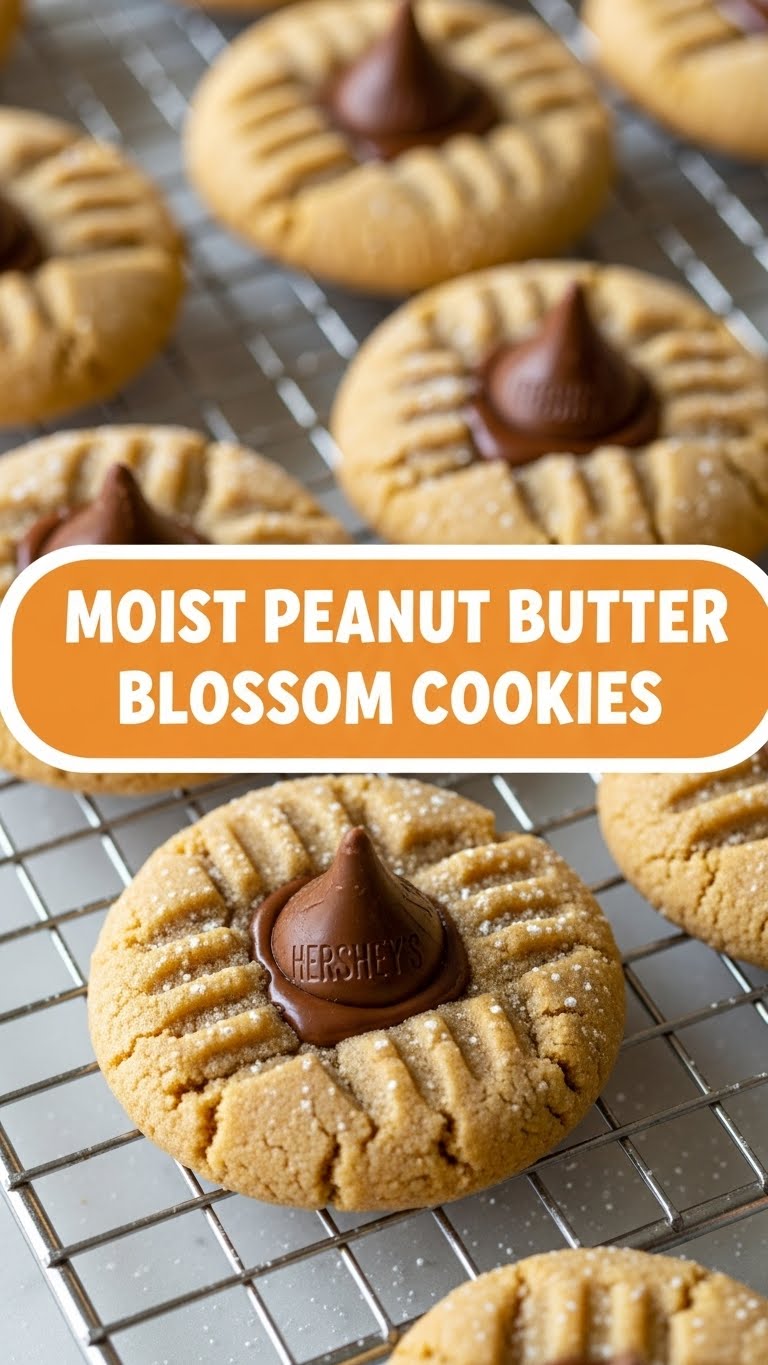
- And the best part? That glorious Hershey’s Kiss just melts in your mouth. Pure bliss, **IMO**.
Ingredients You’ll Need
Gather your troops, fellow snack enthusiast! Most of these are probably already lurking in your pantry, waiting for their moment to shine.
- 1/2 cup (1 stick) unsalted butter, softened: Real butter, people! Don’t even think about margarine unless you want sad, flavor-deprived cookies.
- 1/2 cup granulated sugar: The sparkly stuff for sweetness and that signature outer crunch.
- 1/2 cup packed light brown sugar: This is key for that moist, chewy texture. Don’t skip it!
- 1 large egg: Our trusty binder, holding all that deliciousness together.
- 1 teaspoon vanilla extract: A little extra love for flavor depth. It’s like the secret sauce for everything good.
- 1/2 cup creamy peanut butter: The star of the show! Make sure it’s the regular kind (like Jif or Skippy), not the natural, oily stuff, unless you enjoy an adventure in cookie consistency.
- 1 3/4 cups all-purpose flour: The backbone of our cookie.
- 1 teaspoon baking soda: For a little lift and tenderness.
- 1/2 teaspoon salt: Crucial for balancing the sweetness and making all the flavors pop!
- ~24 Hershey’s Kisses, unwrapped: The grand finale! Get them ready for their starring role.
Step-by-Step Instructions
Alright, apron on (optional, but highly encouraged for dramatic effect), let’s get baking!
- First things first: Preheat your oven to 375°F (190°C). Line a baking sheet with parchment paper or a silicone mat. This step is crucial for non-stick success!
- In a large bowl, cream together the softened butter, granulated sugar, and brown sugar until it’s light and fluffy. This usually takes about 2-3 minutes with an electric mixer. **Don’t skimp on this step!**
- Beat in the egg and vanilla extract until just combined. Then, add the creamy peanut butter and mix until everything is smoothly incorporated. It should look delicious already, but resist the urge to eat it all now.
- In a separate, medium bowl, whisk together the flour, baking soda, and salt. Make sure there are no lumps—we want an even distribution of yumminess.
- Gradually add the dry ingredients to the wet ingredients, mixing on low speed until just combined. **Do not overmix!** As soon as you can’t see dry streaks of flour, stop. Overmixing leads to tough cookies, and we’re aiming for tender.
- Scoop out rounded tablespoons of dough and roll them into pretty little balls. Place the remaining granulated sugar (about 1/4 cup) into a shallow bowl, and roll each dough ball in the sugar to coat it evenly.
- Arrange your sugar-coated dough balls about 2 inches apart on your prepared baking sheet.
- Bake for 8-10 minutes, or until the edges are lightly golden and the centers look set but still soft. They might look slightly underdone, but trust the process!
- Immediately after taking the cookies out of the oven, press a Hershey’s Kiss into the center of each warm cookie. The chocolate will soften and melt slightly, creating that iconic blossom look.
- Let the cookies cool on the baking sheet for about 5 minutes before transferring them to a wire rack to cool completely. This helps them firm up and prevents them from falling apart.
Common Mistakes to Avoid
Baking is fun, but a few pitfalls can ruin the party. Here’s how to sidestep them with a grin:
- Overmixing the dough: Seriously, I warned you! Just mix until no dry streaks remain. Going overboard develops too much gluten, making your cookies tough instead of tender. Think gentle caress, not aggressive beatdown.
- Overbaking: If the edges are dark brown and crispy, you’ve gone too far. These cookies should be soft and chewy, so pull them out when the edges are just barely golden. A slightly underbaked center is your friend here.
- Using cold butter: Trying to cream rock-hard butter is a fool’s errand. Softened butter (room temp, easily indented with a finger) is key for a light, fluffy dough. Planning ahead saves your biceps!
- Adding Kisses too soon (or too late): Too soon and they’ll melt into a sad, flat puddle. Too late and they won’t stick or get that lovely, slightly melted texture. The sweet spot is immediately after they come out of the oven, while still piping hot.
- Not unwrapping the Kisses beforehand: Rookie mistake! You’ll be frantically tearing foil while your cookies cool. Have them ready to go, **FYI**.
Alternatives & Substitutions
Feeling adventurous? Or just working with what you’ve got? Here are some simple tweaks:
- Nut Butters: Not a peanut butter fan (gasp!) or have an allergy? Almond butter, cashew butter, or even sunflower seed butter (SunButter) can work. Just be aware that the flavor and texture might be slightly different. Almond butter makes a surprisingly delicious twist!
- Chocolate Kisses: While classic Kisses are iconic, feel free to switch it up! Try Reese’s Peanut Butter Cups Minis, Rolos, or even mini chocolate bars cut into squares. M&Ms pressed into the top before baking would also be super fun!
- Sugar Coating: Want to skip the extra sugar roll? You totally can, but that sparkly crunch adds a lot to the experience. For a different look, roll them in finely chopped nuts instead!
- No Vanilla? If you’re truly out, you can omit it. But vanilla really enhances the peanut butter flavor, so it’s worth including if you have it.
FAQ (Frequently Asked Questions)
Got questions? I’ve got (casual) answers!
- Can I use natural peanut butter for this recipe? Hmm, I’d advise against it for this particular recipe. Natural peanut butter tends to be oilier and can mess with the cookie’s texture, leading to flatter, greasier cookies. Stick to the processed, creamy kind for best results.
- How long do these cookies stay fresh? If they last more than 2-3 days without disappearing, you have stronger willpower than I do! Store them in an airtight container at room temperature. They tend to firm up a bit after the first day but are still delicious.
- My cookies are spreading too much! What happened? This could be a few things: your butter might have been too soft (or melted), your oven wasn’t hot enough, or you might have overmixed the dough. Make sure your butter is just softened, not greasy.
- Can I freeze the cookie dough? Absolutely! Roll the dough into balls, then freeze them on a baking sheet. Once solid, transfer to a freezer-safe bag. You can bake them from frozen (add a minute or two to the baking time), or let them thaw slightly first. Future you will thank past you for this brilliant idea!
- Do I *have* to use Hershey’s Kisses? Legally, no. Morally, yes. It’s the classic! But as mentioned in “Alternatives,” if you’re feeling rebellious or have another chocolate craving, go for it! Just make sure it’s a piece of chocolate that will melt nicely on top.
- Why are my cookies dry? You probably overbaked them. Keep a close eye on the clock and the cookie edges. Pull them out when they’re just set. A minute or two can make all the difference between moist and Sahara Desert-dry.
Final Thoughts
So there you have it, folks! Your new favorite (and super easy) cookie recipe. Go forth and conquer that cookie craving, whether you’re baking for a party, a quiet night in, or just because Tuesday deserves a treat. These Peanut Butter Blossoms are guaranteed to bring smiles, warmth, and a whole lot of deliciousness. You’ve totally earned this moment of pure, unadulterated cookie joy!


