So, you’re dreaming of sunshine, white sand, and a little slice of heaven, but your vacation fund is looking a bit… sad? Same, friend, *same*. But what if I told you we could bring a piece of that Key West magic right to your kitchen, without needing a passport or even changing out of your PJs? We’re talking about a moist, zesty, utterly divine Key Lime Cake made from scratch that’s so good, you’ll want to marry it. And honestly, it’s easier than trying to book a decent flight these days.
Why This Recipe is Awesome
Okay, let’s be real. There are a million cake recipes out there. But this one? This is *the* one. Why? Because it’s ridiculously moist – like, “melt-in-your-mouth” moist – packed with that tangy key lime punch we all crave, and frankly, it looks super impressive without actually being difficult. Seriously, if I, a person who once accidentally set off a smoke detector trying to make toast, can nail this, you absolutely can. It’s practically idiot-proof. Plus, the smell alone will make your entire house feel like a tropical resort. You’re welcome.
Ingredients You’ll Need
Get ready to gather your culinary squad! You don’t need anything fancy, just the good stuff. (And maybe a small umbrella for decoration later, just kidding… mostly.)
- For the Cake:
- 2 ½ cups all-purpose flour (the basic stuff, no need to get snooty)
- 2 teaspoons baking powder (our little lift-off secret)
- ½ teaspoon baking soda (for extra fluff, because who wants dense cake?)
- ½ teaspoon salt (don’t skip this, it makes everything taste better)
- 1 cup (2 sticks) unsalted butter, softened (real butter, no funny business)
- 1 ¾ cups granulated sugar (sweetness personified)
- 3 large eggs (at room temp, please, it makes a difference!)
- 1 cup whole milk (also room temp, for smooth sailing)
- ½ cup Key lime juice (freshly squeezed if you’re feeling ambitious, bottled if you’re me on a Tuesday)
- 2 tablespoons Key lime zest (this is where the real magic happens, don’t skimp!)
- 1 teaspoon vanilla extract (because vanilla just makes everything happy)
- For the Key Lime Cream Cheese Frosting:
- 8 ounces cream cheese, softened (full fat, please, we’re not messing around)
- ½ cup (1 stick) unsalted butter, softened
- 4 cups powdered sugar (sifted, if you want a super smooth, clump-free dream)
- 3 tablespoons Key lime juice
- 1 tablespoon Key lime zest (more zing!)
Step-by-Step Instructions
Alright, apron on, good vibes only! Let’s bake some happiness.
- Prep Like a Pro: Preheat your oven to 350°F (175°C). Grease and flour two 9-inch round cake pans. Or, even easier, line them with parchment paper circles. This step is non-negotiable, unless you like your cake glued to the pan.
- Dry Mix Madness: In a medium bowl, whisk together the flour, baking powder, baking soda, and salt. Set aside.
- Wet Wonders: In a large bowl, cream together the softened butter and granulated sugar until it’s light and fluffy. This should take about 3-5 minutes with an electric mixer. Seriously, don’t rush this part.
- Egg-cellent Addition: Beat in the eggs one at a time, making sure each is fully incorporated before adding the next. Then stir in the vanilla extract.
- Alternate & Conquer: Now for the fun part! Slowly add the dry ingredients to the wet ingredients, alternating with the milk and Key lime juice. Start and end with the dry ingredients. **Be careful not to overmix!** Mix until just combined. Lumps are okay!
- Zest it Up: Gently fold in the Key lime zest. This infuses every bite with that bright, citrusy flavor.
- Bake, Baby, Bake: Divide the batter evenly between your two prepared cake pans. Bake for 25-30 minutes, or until a wooden skewer inserted into the center comes out clean.
- Cool Down: Let the cakes cool in the pans for about 10-15 minutes before inverting them onto a wire rack to cool completely. **This is crucial! Don’t even *think* about frosting warm cake.**
- Frosting Frenzy: While the cakes are chilling (literally), make your frosting. In a large bowl, beat the softened cream cheese and butter together until smooth and creamy. Gradually add the sifted powdered sugar, beating until fluffy. Stir in the Key lime juice and zest. Beat until light and spreadable.
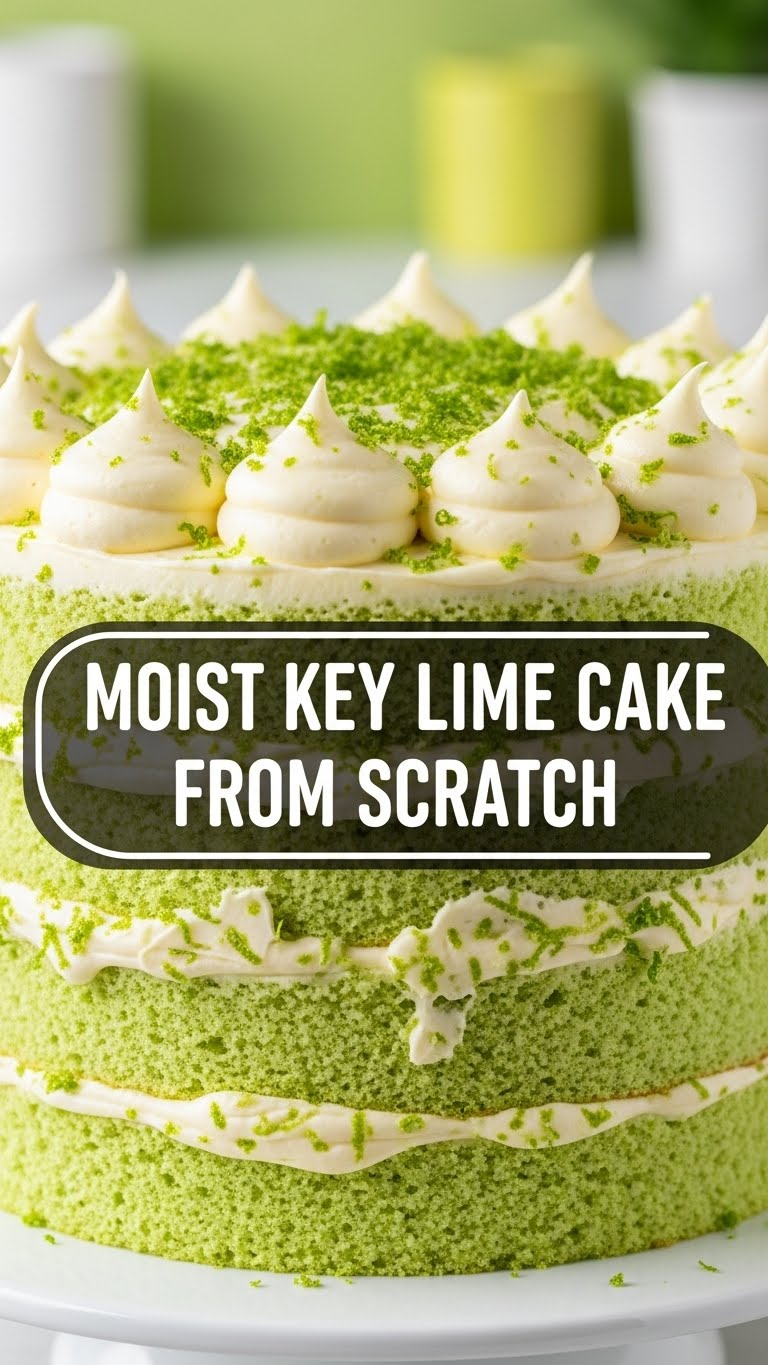
- Assemble Your Masterpiece: Once the cakes are completely cool, place one layer on your serving plate. Spread a generous amount of frosting on top. Place the second cake layer on top, and then frost the top and sides of the entire cake. Garnish with a little extra Key lime zest if you’re feeling fancy.
Common Mistakes to Avoid
We’ve all been there, trust me. Learn from my past kitchen mishaps!
- Not Preheating the Oven: Rookie mistake! Your oven needs to be at the correct temperature from the start for an even bake. Don’t be that person.
- Overmixing the Batter: This is a cardinal sin in cake baking. Overmixing develops the gluten too much, leading to a tough, dense cake. Mix until *just* combined. A few lumps are fine, honestly.
- Frosting a Warm Cake: Unless you want a puddle of frosting and a sad, naked cake, let those layers cool completely. I’m talking room temperature, people!
- Using Regular Limes (for the “Key” part): While delicious, regular limes are more tart and less aromatic than Key limes. For that authentic Key lime flavor, try to find the small, yellow-green ones. If you absolutely can’t, use regular lime juice, but just know it won’t be *quite* the same.
- Eyeballing Ingredients: Baking is a science, not an art (mostly). Measure properly!
Alternatives & Substitutions
Life’s about options, right? Here are a few tweaks you can make:
- Key Limes vs. Regular Limes: As mentioned, Key limes are ideal. But if you’re in a pinch, regular lime juice and zest will work. It’ll still be delicious, just a slightly different flavor profile.
- Buttermilk Boost: For an even moister cake (is that even possible?), swap the whole milk for buttermilk. The acidity in buttermilk reacts with the baking soda for an extra tender crumb. Don’t have buttermilk? Add 1 tablespoon of lemon juice or white vinegar to your 1 cup of whole milk and let it sit for 5 minutes. Voila! Instant buttermilk.
- Coconut Kick: Want to lean into the tropical vibe? Add ½ cup shredded coconut to your cake batter and/or sprinkle some on top of the frosting.
- Simple Glaze Instead of Frosting: If you’re feeling less ambitious or just want a lighter touch, skip the cream cheese frosting and make a simple Key lime glaze (powdered sugar, Key lime juice, and a tiny bit of zest). Drizzle it generously!
FAQ (Frequently Asked Questions)
Got questions? I’ve got answers (and maybe a sarcastic comment or two).
- Can I use margarine instead of butter? Well, technically yes, but why hurt your soul like that? Butter just tastes better, IMO, and contributes to the texture in a way margarine can’t quite replicate. Treat yourself!
- Can I make this cake gluten-free? Absolutely! Swap out the all-purpose flour for a good quality 1:1 gluten-free baking flour blend. Just be mindful not to overmix, as GF flours can sometimes behave differently.
- How far in advance can I make this cake? You can bake the cake layers a day in advance and store them, wrapped tightly, at room temperature. The frosting can be made a day ahead and stored in the fridge. Assemble and frost on the day you plan to serve for best results.
- Does it need to be refrigerated? Yes, because of the cream cheese frosting, this cake should be stored in the refrigerator. Bring it to room temperature for about 30 minutes before serving for optimal flavor and texture.
- Can I freeze the cake? You bet! You can freeze unfrosted cake layers, wrapped tightly in plastic wrap and then foil, for up to 2 months. Thaw in the fridge before frosting. You can also freeze slices of frosted cake, but wrap them individually for best results.
- My cake is dry! What went wrong? Most likely, it was overbaked. Ovens can vary, so keep a close eye on it after the 20-minute mark. Also, ensuring all your wet ingredients are at room temp helps with moisture retention.
Final Thoughts
And there you have it! A moist, zesty, utterly delectable Key Lime Cake that proves you don’t need a fancy pastry degree to bake something truly spectacular. You just created a little slice of tropical paradise right in your own home. Now go impress someone—or yourself—with your new culinary skills. You’ve earned it! (Maybe treat yourself to a second slice, I won’t tell.)


