So you’re craving something that hits all the right chocolate notes but you’re not trying to audition for Bake-Off? Honey, I feel you. We’re about to make the fudgiest, most ridiculously moist brownies ever, and trust me, it’s easier than deciding what to watch on Netflix. Get ready to have your taste buds blown away with minimal effort. You’re welcome.
Why This Recipe is Awesome
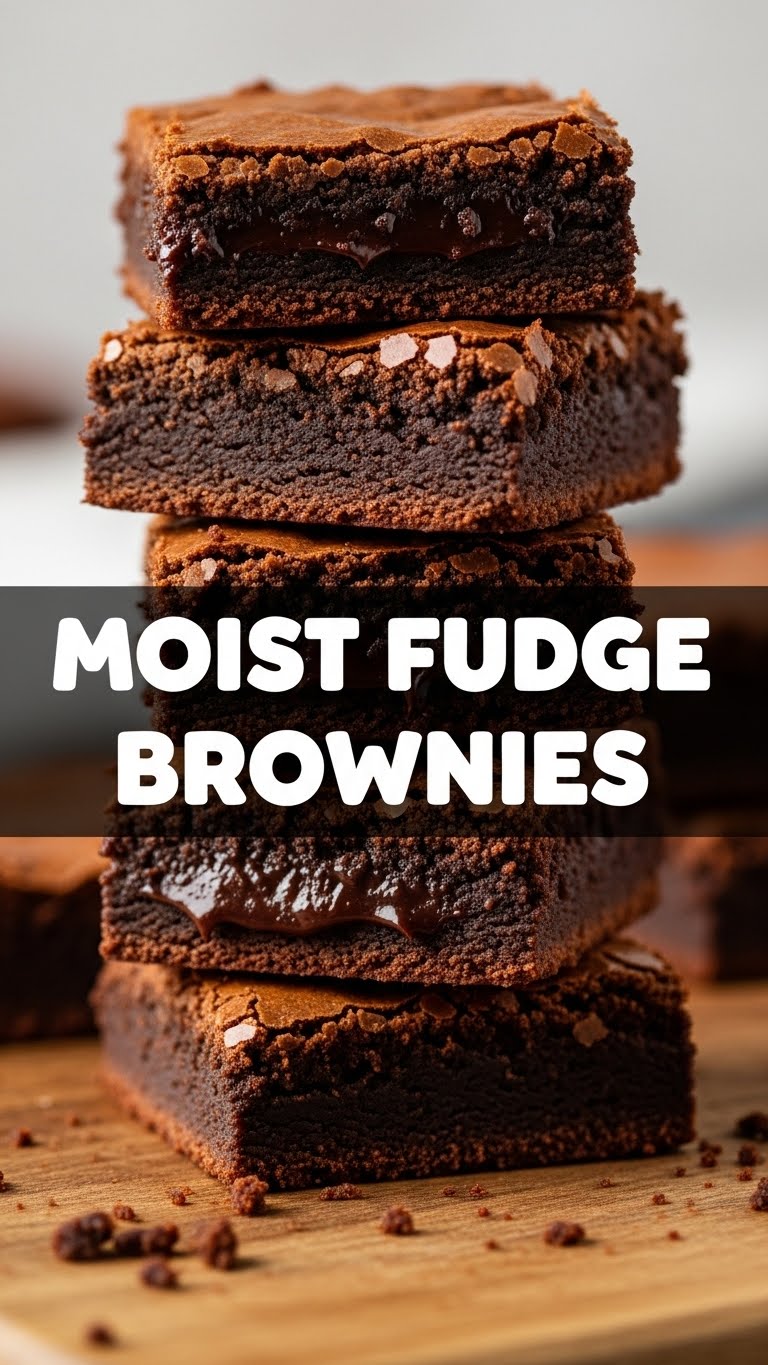
Okay, first off, these aren’t just brownies. These are the brownies. They’re that perfect combo of chewy edges and gooey, fudgy center that makes you question all your life choices before this moment. Plus, it’s pretty much **idiot-proof**. Seriously, if I can make these without setting off the smoke alarm, you’re golden. No fancy equipment, no bizarre techniques, just pure chocolate bliss waiting to happen. You don’t even need a stand mixer!
Ingredients You’ll Need
- Unsalted Butter (1/2 cup / 113g): The good stuff. Don’t skimp. Butter is flavor, friend.
- Granulated Sugar (1 cup / 200g): Your standard sweet stuff. It’s what makes the magic happen.
- Large Eggs (2): Room temp, if you’re feeling fancy (and want extra fudgy results). If not, don’t sweat it too much.
- Vanilla Extract (1 teaspoon): Not the imitation stuff, please. Your brownies deserve better. It deepens the chocolate flavor surprisingly well.
- All-Purpose Flour (1/2 cup / 60g): Just a little, we’re going for fudge, not cake. This ain’t no fluffy cake brownie.
- Unsweetened Cocoa Powder (1/2 cup / 45g): The darker, the dreamier. Dutch-processed is great here for a rich, dark color and less bitterness.
- Salt (1/4 teaspoon): Don’t forget this! It makes the chocolate sing and balances all that sweetness. Trust me.
- Chocolate Chips (1/2 cup / 85g, optional, but highly recommended): For that extra gooey burst of melty chocolate. Semi-sweet or dark are my faves.
Step-by-Step Instructions
- Prep Time! Preheat your oven to 350°F (175°C). Grab an 8×8 inch baking pan and line it with parchment paper, leaving an overhang on the sides. This makes lifting them out super easy. Spray lightly with cooking spray – trust me, it helps.
- Melt It Down. In a medium microwave-safe bowl (or a saucepan over low heat), melt the butter. Once melted, stir in the granulated sugar until fully combined and smooth. Give it a good whisk to dissolve some of that sugar.
- Egg-cellent Addition. Let the butter-sugar mixture cool for a minute or two – you don’t want to scramble the eggs! Then, whisk in the eggs one at a time until fully incorporated. Stir in the vanilla extract until everything looks smooth and glossy.
- Dry Mix Fun. In a separate bowl, whisk together the flour, cocoa powder, and salt. Make sure there are no lumps of cocoa powder lurking. A quick whisk ensures everything is evenly distributed.
- Combine Forces. Gradually add the dry ingredients to the wet ingredients. Mix until *just* combined. **Do not overmix!** Overmixing develops gluten, and we want fudgy, not tough, brownies. Fold in those chocolate chips now, if you’re using them, for an extra chocolatey punch.
- Bake It Up. Pour the batter into your prepared pan and spread evenly. Bake for 25-30 minutes. The edges should look set, but the center should still be a little jiggly. A toothpick inserted *into the center* should come out with moist crumbs, not wet batter.
- Patience, Grasshopper. This is the hardest part, IMO. Let those beauties cool completely in the pan on a wire rack before cutting. Seriously, **let them cool** for at least an hour (or even longer if you can manage). Warm brownies are delicious but fall apart into a glorious mess.
Common Mistakes to Avoid
- Overbaking: This is the #1 brownie killer! You want fudgy, not dry. **Pull them out when they still look slightly underdone in the middle.** They continue to cook from residual heat. Seriously, pull them out.
- Overmixing the Batter: We talked about this. Gently fold. Think of it as a soft hug, not a wrestling match with your spatula. Too much mixing equals cakey, not fudgy.
- Cutting Them Hot: Rookie mistake! You’ll end up with a delicious crumbly mess instead of neat squares. Chill out, literally. If you’re really impatient, pop them in the fridge for 20-30 minutes once they’re mostly cooled.
- Forgetting the Salt: It might seem counter-intuitive in a sweet dessert, but salt balances the sweetness and deepens the chocolate flavor. Don’t skip it! It’s like the secret ingredient you never knew you needed.
Alternatives & Substitutions
- Chocolate Chips: Not feeling them? You can skip them entirely! Or, swap for white chocolate chips, chopped nuts (walnuts or pecans are fab), or even a swirl of peanut butter added to the top of the batter before baking.
- Butter: You *could* use a good quality plant-based butter for a dairy-free version, but honestly, butter is king here. As for margarine? Well, technically yes, but why hurt your soul like that?
- Cocoa Powder: Dutch-processed cocoa powder will give you a darker, less bitter brownie. Regular unsweetened cocoa works too, just a slightly different flavor profile. Use what you have!
- Pan Size: An 8×8 gives thick, glorious brownies. A 9×13 will give you thinner ones, so adjust baking time (less time!) and keep an eye on them.
FAQ (Frequently Asked Questions)
- My brownies are too cakey, what gives? Probably overmixed the batter, used too much flour, or overbaked them. Remember: gentle mixing, don’t pack the flour, and pull them out early!
- Can I double the recipe? Absolutely! Use a 9×13 inch pan and add a few extra minutes to the baking time, checking for doneness.
- How do I know they’re done without a thermometer? The edges should be set, but the center should still look a little moist and might jiggle slightly. A toothpick inserted a couple of inches from the edge should come out clean, but one in the *very center* should have moist crumbs attached. **No wet batter!**
- How do I store them? Keep ’em in an airtight container at room temp for up to 3-4 days. You can also refrigerate them for longer, and honestly, cold brownies hit different sometimes.
- Can I freeze them? Yes! Wrap individual brownies tightly in plastic wrap, then foil, and store in a freezer-safe bag for up to 3 months. Thaw at room temperature when the craving strikes.
Final Thoughts
See? That wasn’t so scary, was it? You just whipped up a batch of glorious, moist fudge brownies that are going to make everyone (including yourself) incredibly happy. Go ahead, have two. You earned it. Now go impress someone—or yourself—with your new culinary skills. Happy baking, friend!


