So, you’re staring into the abyss of your pantry, craving something decadent, chocolatey, and with a little *oomph*, but you’re also eyeing that couch like it’s your soulmate, right? Been there, done that, bought the stretchy pants. Well, buckle up, buttercup, because we’re about to make some **Moist Chocolate Espresso Muffins** that are so good, you’ll think you secretly hired a tiny, very efficient pastry chef. And the best part? They’re ridiculously easy. Seriously.
Why This Recipe is Awesome
Let’s be real, life’s too short for dry, crumbly muffins that taste like cardboard’s sadder cousin. This recipe? It’s the MVP of muffin-dom. We’re talking melt-in-your-mouth moistness, a deep, dark chocolate flavor that hugs your soul, and that little espresso kick that just *elevates* everything without making it taste like you’re sipping a coffee. It’s basically a hug in muffin form, but a really, really cool hug.
Plus, it’s pretty much **idiot-proof**. I mean, if *I* can make these without summoning a kitchen disaster, you absolutely can. No fancy techniques, no standing mixer required (unless you’re feeling extra bougie), just a couple of bowls and some stirring. Perfect for those “I need chocolate NOW” emergencies or when you want to impress someone without actually, you know, trying too hard.
Ingredients You’ll Need
Gather ’round, my fellow lazy gourmands! Here’s the hit list for muffin glory:
- All-Purpose Flour: The backbone of our operation. Don’t overthink it.
- Granulated Sugar: For that sweet, sweet bliss.
- Unsweetened Cocoa Powder: The darker, the better. This is where the magic starts.
- Baking Soda & Baking Powder: Our dynamic duo for lift. Don’t skip these, unless you want chocolate rocks.
- Salt: A pinch, because it makes everything taste more like itself (and less like blandness).
- Espresso Powder: This is the secret sauce! Don’t worry, it won’t make them taste like coffee, just amplifies the chocolate like a boss.
- Large Egg: Room temperature, if you’re feeling fancy.
- Buttermilk: The VIP of moistness. If you don’t have it, don’t panic – check the substitutions section.
- Vegetable Oil (or melted coconut oil): For ultimate tenderness. Butter works too, but oil really nails that moist texture.
- Vanilla Extract: A splash for good measure.
- Chocolate Chips (semi-sweet or dark): Because is it *really* a chocolate muffin without more chocolate? No, no it is not.
Step-by-Step Instructions
Alright, let’s get baking! This is so easy, you could probably do it with one hand tied behind your back (though I don’t recommend it, for safety reasons).
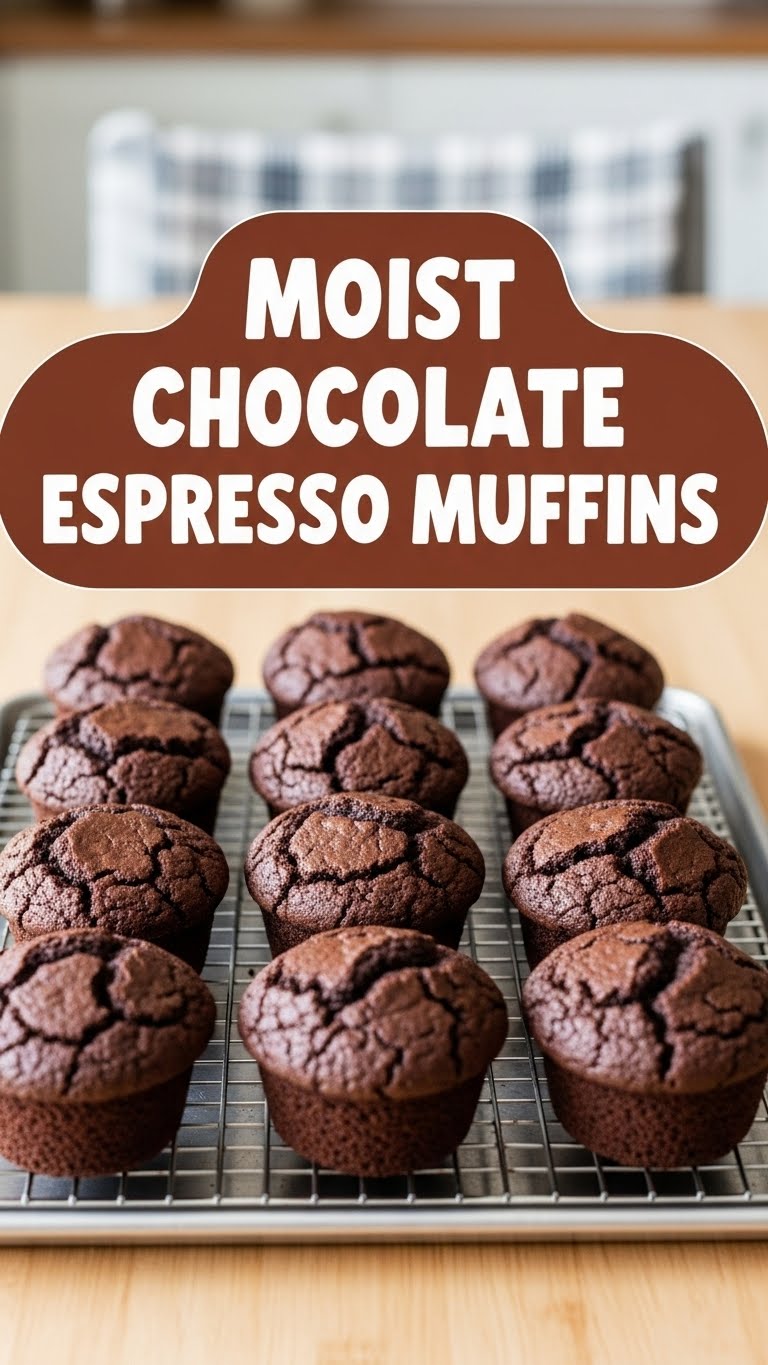
- Preheat & Prep: First things first, crank up that oven to 400°F (200°C). Line a 12-cup muffin tin with paper liners. **Seriously, preheating is not optional!** It gives you that glorious muffin top.
- Dry Mix Madness: In a large bowl, whisk together your flour, sugar, cocoa powder, baking soda, baking powder, salt, and espresso powder. Get it all nicely combined. No lumps, please.
- Wet Mix Wonders: In a separate, medium-sized bowl, lightly beat the egg. Then stir in the buttermilk, vegetable oil, and vanilla extract. Give it a good swish until everything’s happy together.
- Combine Forces (Gently!): Pour the wet ingredients into the dry ingredients. Grab a spatula and mix just until *barely* combined. **A few lumps are totally fine here – overmixing is the enemy of moistness!** You want to see some streaks of flour still.
- Fold in the Fun: Gently fold in your chocolate chips. Try not to eat them all while you’re doing this. I know, it’s hard.
- Fill ‘Em Up: Divide the batter evenly among your 12 muffin cups. They should be pretty full, almost to the top. Don’t be shy; we want those generous domes!
- Bake Time! Pop the tray into your preheated oven. Bake for 5 minutes at 400°F (200°C), then **reduce the oven temperature to 375°F (190°C)** (without opening the door, if possible!) and continue baking for another 13-17 minutes, or until a toothpick inserted into the center comes out with moist crumbs, not wet batter.
- Cool Down: Let the muffins cool in the tin for a few minutes before transferring them to a wire rack to cool completely (or, you know, eat one warm because life’s short).
Common Mistakes to Avoid
We all make mistakes, but let’s try to avoid the rookie ones, shall we? Your muffins will thank you.
- Forgetting to Preheat the Oven: I know, it sounds obvious, but you’d be surprised. That initial blast of high heat is crucial for a tall, domed muffin top. Don’t make your muffins sad and flat!
- Overmixing the Batter: This is the absolute cardinal sin of muffin making. Overmixed batter leads to tough, chewy muffins. Mix until *just* combined, even if there are a few flour streaks. Embrace the lumps!
- Using Cold Ingredients: Especially the egg and buttermilk. Room temperature ingredients combine more easily and create a smoother, more uniform batter, leading to a better texture.
- Opening the Oven Door Too Early/Often: Resist the urge to peek! Every time you open the door, you let out heat and mess with the muffins’ rise.
- Underfilling Muffin Cups: Don’t be stingy! Fill them almost to the top for those bakery-style domed tops.
Alternatives & Substitutions
Life’s all about options, and so are these muffins! Here are some tweaks if you’re feeling adventurous or just missing an ingredient.
- No Buttermilk? No Problem! You can make your own! Just add 1 tablespoon of lemon juice or white vinegar to a measuring cup, then fill the rest with regular milk (dairy or non-dairy) to make 1 cup. Let it sit for 5-10 minutes until it curdles slightly. Boom, instant buttermilk.
- No Espresso Powder? You *can* omit it, but the chocolate flavor won’t be as deep and mysterious. If you have instant coffee, you could use that, but espresso powder is truly superior here.
- Different Chocolate Chips: Milk chocolate? White chocolate? Chopped chocolate bars? Go wild! Just make sure it’s good quality. IMHO, dark or semi-sweet provides the best contrast to the sweet muffin.
- Add-ins Galore: Want more fun? Toss in a handful of chopped nuts (walnuts, pecans), dried cranberries, or even a swirl of peanut butter before baking.
- Dairy-Free? Use a plant-based milk (almond, oat) with the lemon/vinegar trick for buttermilk, and a neutral-flavored oil.
FAQ (Frequently Asked Questions)
Got questions? I’ve got (mostly sarcastic) answers!
- Can I use regular coffee instead of espresso powder? Technically yes, but why dilute your beautiful chocolate with all that extra liquid? Espresso powder is concentrated magic. If you must, use a tiny amount of very strong brewed coffee, reducing the buttermilk slightly.
- How do I store these beauties? In an airtight container at room temp for 2-3 days. If you’re planning for longer, pop them in the fridge for up to a week. Beyond that, they might stage a rebellion.
- Can I freeze them? Absolutely! Once completely cooled, wrap individual muffins tightly in plastic wrap, then pop them into a freezer-safe bag for up to 2-3 months. Thaw at room temp or give them a quick zap in the microwave. They’ll be like fresh-baked dreams!
- My muffins didn’t get big domes! What went wrong? You likely overmixed the batter or didn’t get that initial high-heat blast in the oven. Remember, gentle mixing and proper preheating are your dome-making besties.
- Do these *really* taste like coffee? I’m not a huge coffee fan. Nope! The espresso powder is there to enhance and deepen the chocolate flavor, not to make them taste like your morning brew. It’s a subtle background player, like a really good bass player in a band.
- Can I make these gluten-free? You bet! Swap out the all-purpose flour for a good quality 1:1 gluten-free baking blend that contains xanthan gum. The rest of the recipe should work just fine.
Final Thoughts
So there you have it, folks! A recipe for **Moist Chocolate Espresso Muffins** that’s practically guaranteed to make you feel like a kitchen wizard without actually having to cast any spells (unless you count “making deliciousness appear” as a spell, which I totally do). These are perfect for breakfast, a midday treat, or sneaking one at midnight. Don’t judge; we’ve all been there.
Now go forth and bake! You’ve got this. And when you pull these out of the oven, take a deep breath, pat yourself on the back, and know you’ve just created something truly wonderful. Enjoy!


