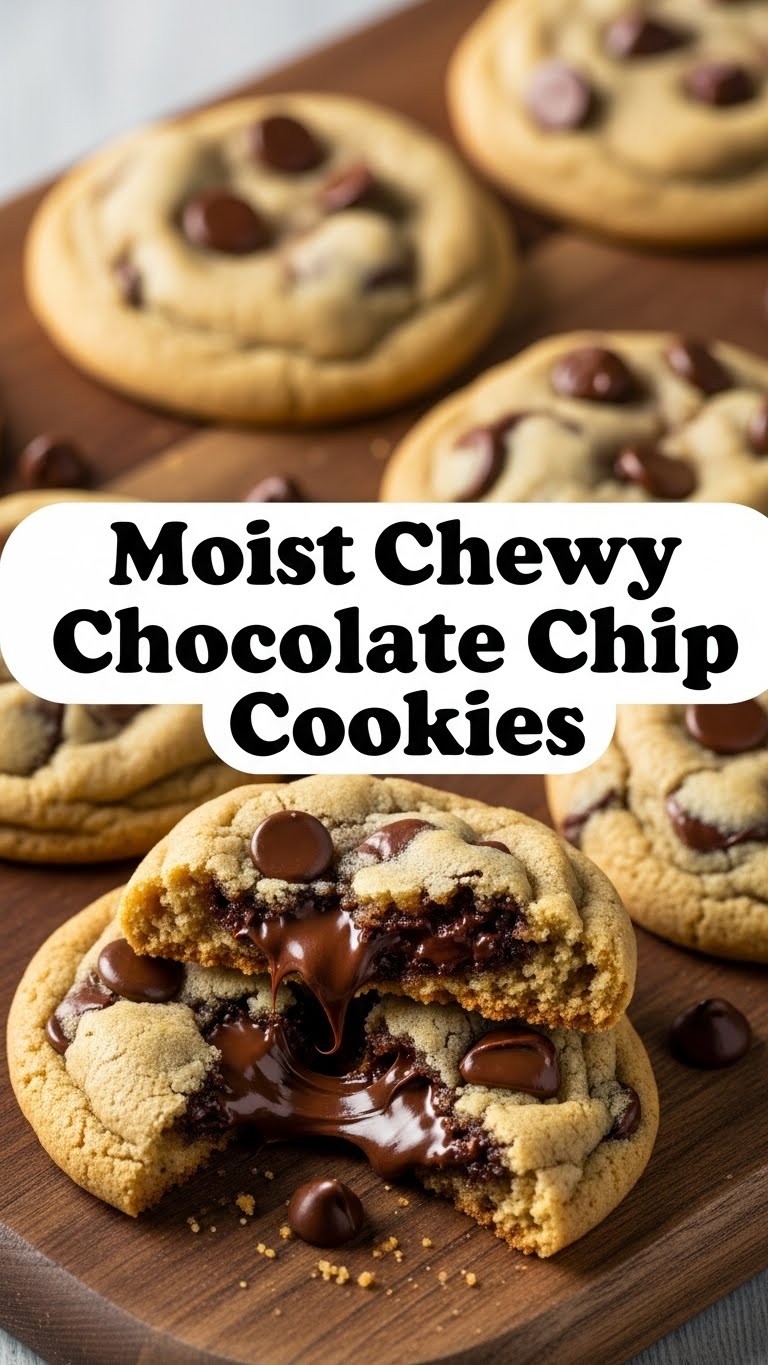
So you’re craving something warm, gooey, and utterly divine but also want to keep the “kitchen disaster” level to an absolute minimum? You, my friend, are speaking my language. We’re talking about those legendary **Moist Chewy Chocolate Chip Cookies** – the kind that make you question every life decision that didn’t involve baking them sooner. Forget the fancy stuff; today, we’re making magic with butter, sugar, and a whole lotta chocolate. And trust me, it’s easier than deciding what to binge-watch next.
Why This Recipe is Awesome
Let’s be real. There are a gazillion chocolate chip cookie recipes out there. So why *this* one? Because this recipe is like that one friend who always brings the good snacks – reliable, always a hit, and never, ever disappoints. It’s practically **idiot-proof** (and coming from someone who once set off the smoke alarm making toast, that’s high praise). We’re talking golden edges, a soft, chewy center, and chocolate in every single bite. Plus, it uses ingredients you probably already have, so no weird trips to that obscure specialty store. Win-win, if you ask me!
Ingredients You’ll Need
Get your grocery game face on, though you might not even need to leave the house. Here’s the lineup for your soon-to-be-famous cookies:
- **1 cup (2 sticks) unsalted butter**, softened. This is where the magic happens, folks. Don’t skimp on the good stuff!
- **¾ cup granulated sugar**. For that crisp edge and a bit of sweetness.
- **¾ cup packed light brown sugar**. The secret weapon for chewiness and that lovely molasses flavor.
- **2 large eggs**. Room temperature, if you can remember to take them out. It helps them emulsify better, science-y stuff.
- **2 teaspoons vanilla extract**. Use the real deal; your taste buds will thank you.
- **2 ¼ cups all-purpose flour**. Our foundational hero.
- **1 teaspoon baking soda**. Gives our cookies that perfect lift.
- **½ teaspoon salt**. Don’t skip this! It balances the sweetness and makes the chocolate pop.
- **1 ½ cups chocolate chips**. Use a mix of semi-sweet and milk chocolate for ultimate bliss, or whatever makes your heart sing.
Step-by-Step Instructions
Alright, apron on (or not, we don’t judge). Let’s get baking!
- **Preheat Power**: First things first, **preheat your oven to 375°F (190°C)**. Line two baking sheets with parchment paper or silicone mats. This prevents sticking and makes cleanup a breeze.
- **Butter Up**: In a large bowl (or stand mixer), **cream together the softened butter, granulated sugar, and brown sugar** until the mixture is light and fluffy. This usually takes about 2-3 minutes.
- **Egg-cellent Addition**: Beat in the eggs one at a time, making sure each is fully incorporated before adding the next. Then, stir in the vanilla extract. Scrape down the sides of the bowl to ensure everything gets mixed in properly.
- **Dry Team Assemble**: In a separate medium bowl, **whisk together the flour, baking soda, and salt**. Whisking ensures everything is evenly distributed.
- **Combine Forces**: Gradually add the dry ingredients to the wet ingredients, mixing on low speed (or by hand) **just until combined**. **Don’t overmix!** Overmixing develops the gluten too much, leading to tough cookies.
- **Chocolate Time**: Gently fold in the chocolate chips. Use a spatula for this to avoid crushing them. We want chunks, not dust!
- **Scoop & Bake**: Drop rounded tablespoons of dough onto your prepared baking sheets, leaving about 2 inches between each cookie. These beauties need their space!
- **Oven Lovin’**: Bake for 9-12 minutes, or until the edges are golden brown and the centers are still soft. **Pro Tip: Don’t overbake!** A slightly underbaked cookie is a chewy cookie.
- **Cool Down**: Let the cookies cool on the baking sheets for 5 minutes before transferring them to a wire rack to cool completely (if they last that long, which, let’s be honest, they won’t).
Common Mistakes to Avoid
We’ve all been there, staring at a tray of flat, crispy hockey pucks instead of glorious cookies. Learn from my mistakes (and maybe yours too!):
- **Overmixing the Dough**: Seriously, stop. Once the flour is incorporated, step away from the mixer. **Overmixing leads to tough, dry cookies.**
- **Not Chilling the Dough**: While not strictly mandatory for *this* recipe, chilling the dough for at least 30 minutes can significantly improve flavor and texture, preventing spreading. If you have the patience, do it!
- **Using Melted Butter**: Softened, yes. Melted, no. Melted butter will make your cookies spread too much and become flat.
- **Not Preheating Your Oven**: Thinking you don’t need to preheat the oven? Rookie mistake! A hot oven ensures even baking from the start.
- **Eyeballing Ingredients**: Baking is a science, friends. Use proper measuring cups and spoons for best results, especially with flour.
Alternatives & Substitutions
Feeling adventurous? Or just out of a specific ingredient? Here are some ideas:
- **Chocolate Choices**: Not a fan of semi-sweet? Go all milk chocolate, or dark chocolate for a richer flavor. You could even chop up a chocolate bar for varied chocolate chunks. White chocolate macadamia nut cookies, anyone?
- **Add-ins Galore**: Throw in a handful of chopped walnuts or pecans for some nutty crunch. Sprinkles? Absolutely! Pretzel bits? If you’re feeling wild with that sweet and salty combo.
- **Gluten-Free**: For my GF friends, you can usually swap the all-purpose flour for a 1:1 gluten-free baking blend. Just make sure it contains xanthan gum.
- **Dairy-Free**: If you *must*, you can use a good quality dairy-free butter alternative. The texture might be slightly different, but it’ll still be delicious.
FAQ (Frequently Asked Questions)
Got questions? I’ve got answers (and opinions, naturally!).
Q: Do I really need room temperature butter and eggs?
A: Well, technically you *can* use cold ingredients, but why hurt your soul (and your cookies’ texture) like that? Room temp ingredients emulsify better, creating a smoother dough and a better end product. It’s worth the wait, I promise!
Q: My cookies came out flat! What happened?
A: This is a common one! It could be overmixed dough, butter that was too soft/melted, not enough flour, or an oven that wasn’t hot enough. Review those common mistakes!
Q: Can I use margarine instead of butter?
A: You *can*, but for that rich, buttery flavor and chewy texture, I wholeheartedly recommend real butter. Margarine has a higher water content and often leads to a different result. But hey, you do you!
Q: How long do these delicious cookies last?
A: In an airtight container at room temperature, they’re typically good for 3-5 days. But let’s be honest, they rarely last past day 1, do they?
Q: Can I freeze the cookie dough?
A: Absolutely! Scoop the dough balls onto a baking sheet, freeze until solid, then transfer them to a freezer-safe bag. Bake from frozen, adding a few extra minutes to the baking time. Freshly baked cookies on demand? Yes, please!
Final Thoughts
And there you have it! Your guide to creating the kind of moist, chewy chocolate chip cookies that make people wonder if you secretly opened a bakery. This recipe is your new best friend, your go-to for comfort, and your secret weapon for impressing pretty much anyone. So go forth, bake up a storm, and don’t forget to enjoy every single warm, chocolatey bite. You’ve earned it!


