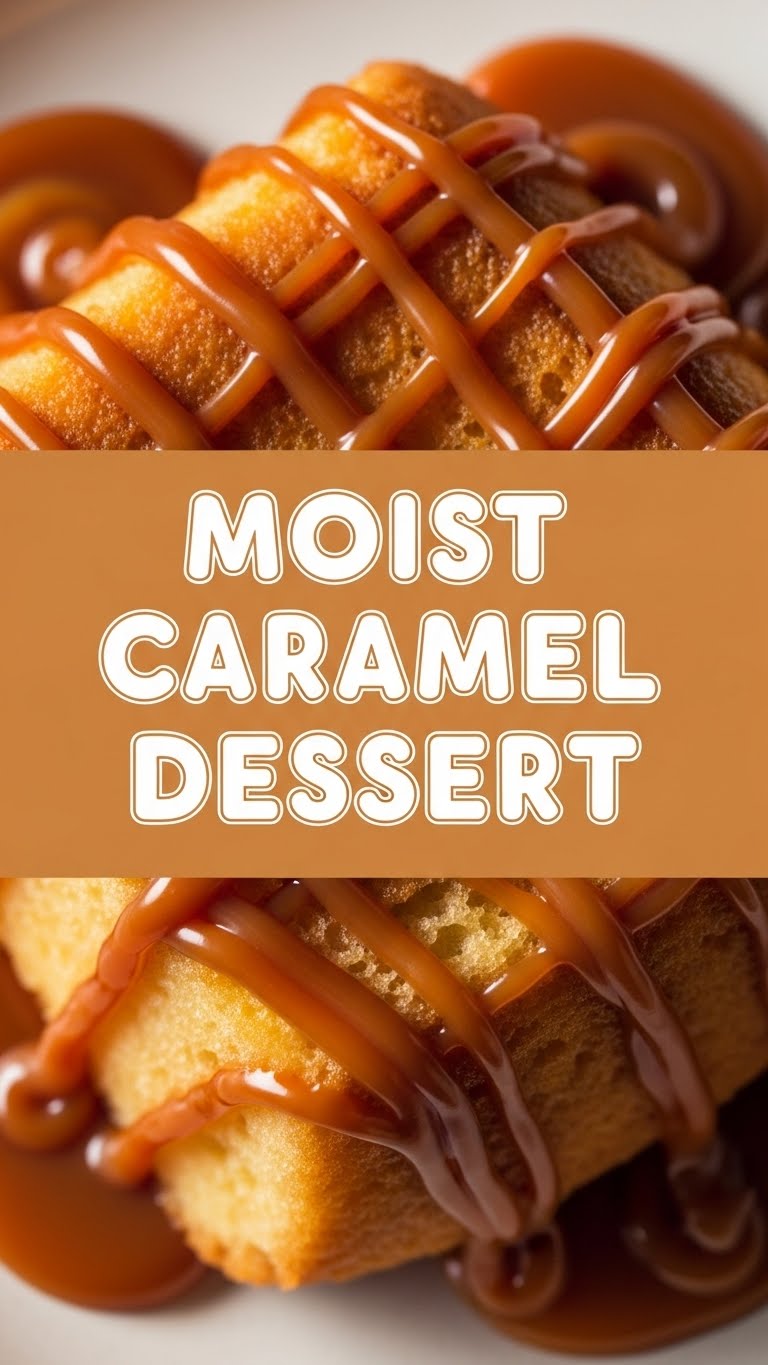
So, you’ve got that pesky sweet tooth acting up again, and your brain is screaming for caramel, but your energy levels are whispering ‘nah, too much effort,’ right? I feel you. That’s exactly where this magical, moist caramel dessert swoops in to save your day (and your sanity)! Forget complicated baking; we’re going for maximum deliciousness with minimum fuss here. Let’s get to it!
Why This Recipe is Awesome
Okay, first off, it’s ridiculously easy. Like, “my cat could probably make this if she had thumbs” easy. Seriously, if you can stir things and press a button on an oven, you’ve got this in the bag. Plus, it’s super moist – no dry, sad cake here, my friend. We’re talking melt-in-your-mouth, “where has this been all my life?” kind of moist.
And the caramel? Oh, honey, it just *happens*. No fussy candy thermometers, no sticky disasters. It practically caramelizes itself right in the oven. **It’s basically an adult pacifier in dessert form, offering comfort with every gooey bite.**
Ingredients You’ll Need
Gather ’round, buttercups! Here’s what you’ll need to make this magic happen:
- 1 ½ cups all-purpose flour: The basic building block of happiness (aka carbs).
- 1 cup granulated sugar: Because sweet. Duh.
- 2 teaspoons baking powder: Our little lift-off agent, making it fluffy, not flat.
- ½ teaspoon salt: Just a pinch, because even sweetness needs balance. It’s science!
- ¾ cup milk: Any kind! Full-fat is *chef’s kiss*, but do you.
- ¼ cup melted butter: The golden elixir of moistness and flavor. Don’t skimp!
- 1 teaspoon vanilla extract: Liquid gold for flavor. Don’t skip it!
- 1 cup packed light brown sugar: For that deep, molasses-y caramel hug. Essential!
- 1 ¾ cups boiling water: The secret sauce for the magic caramel layer. Make it *hot*!
Step-by-Step Instructions
- **Prep Time!** Preheat your oven to a cozy 350°F (175°C). Grab a 9×13 inch baking dish; no need to grease it, because we’re rebels like that (and the caramel will handle it).
- **Dry Mix Magic:** In a medium bowl, whisk together your flour, granulated sugar, baking powder, and salt. Make sure there are no lumpy surprises!
- **Wet Mix Wonders:** Now, pour in the milk, melted butter, and vanilla extract. Stir it all up until just combined. Don’t overmix, unless you like tough cake (and who likes tough cake?).
- **Spread the Love:** Pour this glorious batter into your ungreased baking dish and spread it evenly. It might seem a little thin, but trust the process.
- **Brown Sugar Blizzard:** In a separate small bowl, mix the brown sugar with the boiling water. Stir until the brown sugar is mostly dissolved. This is your magic potion!
- **The Grand Pour:** Carefully and evenly pour the hot brown sugar mixture over the batter in the pan. Do NOT stir it in. Just pour it over the top. It will look like a hot mess, but it’s part of the plan.
- **Bake It Up:** Pop that dish into your preheated oven. Bake for about 30-35 minutes, or until the top is golden brown and a toothpick inserted into the cake part (not the gooey caramel part!) comes out clean.
- **Cool Down:** Let it cool for a bit on a wire rack. It’s tempting, but a little patience makes it even better. Serve warm, perhaps with a scoop of ice cream if you’re feeling extra indulgent.
Common Mistakes to Avoid
Even though this recipe is basically idiot-proof, there are a few rookie blunders to steer clear of:
- **Overmixing the batter:** You want a tender cake, not a rubbery one. Mix until just combined; **lumps are okay!**
- **Stirring the brown sugar water into the batter:** Resist the urge! That separate layer is crucial for the caramel magic to happen. Just pour it gently over.
- **Not boiling the water for the brown sugar layer:** Lukewarm water just won’t cut it. It needs to be *hot* to dissolve properly and work its magic.
- **Patience, young grasshopper:** Don’t stab it repeatedly with a toothpick to “check if it’s done” every two minutes. Let it bake. Also, try to let it cool a *little* before devouring. IMO, it’s better warm, not straight-out-of-the-oven molten lava.
Alternatives & Substitutions
Feeling creative? Here are a few ways to tweak this winner:
- **Milk:** Any milk works, really. Almond, soy, oat – go wild! Full-fat dairy will give you that extra richness, though. Just saying.
- **Butter:** Margarine works in a pinch, but butter is where the flavor’s at, my friend. **Don’t sacrifice flavor if you don’t have to!** Coconut oil could also be an interesting swap for a subtle tropical note.
- **Add-ins:** Feeling fancy? A sprinkle of sea salt flakes on top before baking really elevates the caramel. Or some toasted pecans/walnuts for a nutty crunch! Chocolate chips? Heck yes, make it a chocolate-caramel dream.
FAQ (Frequently Asked Questions)
- Can I make this ahead of time? Absolutely! It actually gets even more moist and delicious the next day. Cover it up and store it at room temp for up to 2 days, or in the fridge for 3-4.
- My caramel didn’t form properly, what happened? Did you use boiling water for the brown sugar layer? Did you *not* stir it into the batter? Those are the two big culprits. **Hot water + no stirring = caramel success!**
- Is this technically a ‘pudding cake’? You could call it that! It’s got that delicious gooey bottom layer that makes it pudding-like, while the top is a tender cake. Best of both worlds, really.
- Can I use self-rising flour? You could, but then **omit the baking powder and reduce the salt slightly**. Just stick with all-purpose for simplicity, FYI.
- Help, my dessert is gone! How do I make more? Well, you know the drill! This recipe is infinitely repeatable. Just kidding (mostly). You’re welcome.
Final Thoughts
See? I told you it was easy! Now you’ve got a ridiculously moist, utterly delicious caramel dessert sitting pretty, practically begging to be eaten. Go ahead, pat yourself on the back. You just whipped up something amazing without breaking a sweat. Now go impress someone—or yourself—with your new culinary skills. You’ve earned it! Seriously, enjoy every single gooey, caramel-y bite. You earned this sugar rush!

