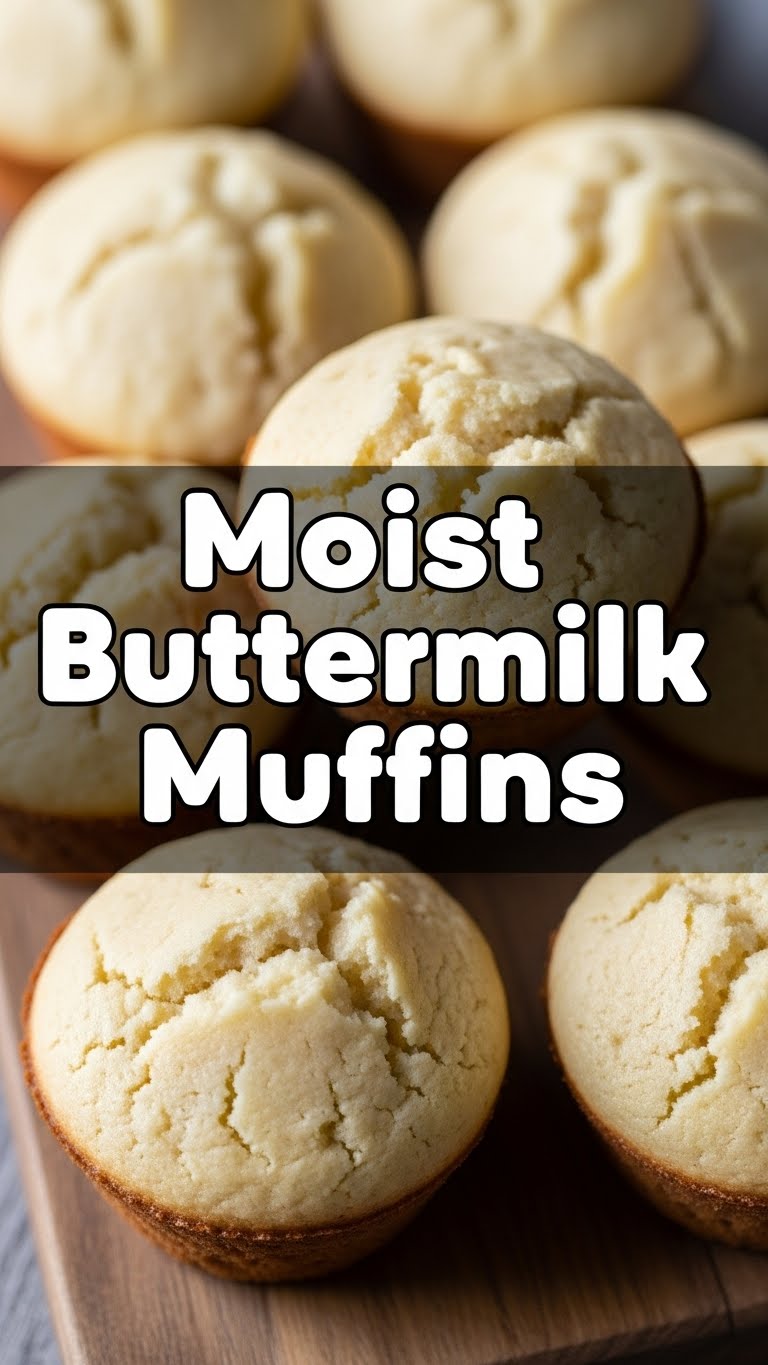
So you’re craving something tasty but too lazy to spend forever in the kitchen, huh? Same. And honestly, who isn’t? Life’s a marathon, not a sprint, and sometimes that marathon needs a delicious, fluffy, *moist* pit stop. That’s where these Buttermilk Muffins waltz in, smelling like a dream and tasting like a hug from your favorite bakery. Get ready to have your mind (and taste buds) blown without breaking a sweat, because we’re about to make some magic happen!
Why This Recipe is Awesome
Let’s be real, you’re not here for a lecture on the history of muffins. You’re here for the good stuff. And boy, is this recipe the good stuff! Why is it awesome, you ask? Well, for starters, it’s pretty much **idiot-proof**. Yes, even I, a person who once set off a smoke alarm making toast, can nail these. They’re quick, minimal fuss, and deliver maximum flavor. Think perfectly golden tops, soft pillowy insides, and a moisture level that will make you question every dry muffin you’ve ever encountered. Plus, they make your house smell like a warm, sugary cloud – totally worth it just for the aromatherapy, IMO.
Ingredients You’ll Need
Gather ’round, my budding baking superstar! Here’s your simple shopping list. Think of these as your basic building blocks for muffin greatness.
- 1 ½ cups All-Purpose Flour: The foundation of our dreams. Don’t worry, we’re not getting fancy with special flours here.
- ½ cup Granulated Sugar: Because life’s too short for unsweetened sadness.
- 1 tablespoon Baking Powder: Our little lift-off specialist.
- ½ teaspoon Baking Soda: The buttermilk’s best friend, working together for fluffiness.
- ¼ teaspoon Salt: Just a pinch to make everything else sing.
- 1 large Egg: Room temperature, please! It mixes better, trust me.
- 1 cup Buttermilk: This is the secret sauce for MOIST muffins. Don’t skip it! (Or at least, don’t skip the easy DIY version we’ll chat about later).
- ¼ cup Unsalted Butter: Melted and slightly cooled. This is where the rich flavor comes from.
- 1 teaspoon Vanilla Extract: A splash of liquid happiness.
Step-by-Step Instructions
Alright, apron on (or not, we don’t judge), let’s get baking! These steps are so simple, you could probably do them blindfolded. (Please don’t, safety first, folks.)
- Prep Your Stage: Preheat your oven to 400°F (200°C). Line a 12-cup muffin tin with paper liners. Or grease it well if you’re living life on the edge.
- Whisk the Dry Stuff: In a large bowl, whisk together the flour, sugar, baking powder, baking soda, and salt. Make sure there are no lumpy bits.
- Combine the Wet Crew: In a separate, medium bowl, whisk the egg until it’s slightly frothy. Then add the buttermilk, melted butter (make sure it’s not scorching hot, or you’ll scramble the egg – eww!), and vanilla extract. Mix it all up until combined.
- Gentle Merge: Pour the wet ingredients into the dry ingredients. Now, here’s the crucial part: **MIX JUST UNTIL COMBINED.** Seriously, stop when you see no more streaks of flour. A few lumps are totally fine, even desirable! Overmixing is the enemy of tender muffins.
- Fill ‘Em Up: Divide the batter evenly among the 12 prepared muffin cups. I like to use an ice cream scoop for this – makes it super neat and even.
- Bake Away: Pop that muffin tin into your preheated oven. Bake for 15-18 minutes, or until the tops are golden brown and a toothpick inserted into the center comes out clean.
- Cool Down: Let the muffins cool in the tin for 5 minutes before transferring them to a wire rack to cool completely. (Or, if you’re like me, eat one while it’s still warm and gooey. Shhh, I won’t tell.)
Common Mistakes to Avoid
Listen, we’ve all been there. Baking can feel like a minefield sometimes. But fear not, my friend, because I’ve made all the mistakes so you don’t have to. Here are a few traps to sidestep:
- Overmixing the Batter: This is the cardinal sin of muffin-making. Mixing too much develops the gluten, resulting in tough, chewy, sad muffins instead of light, fluffy ones. Remember: **Lumps are your friends!**
- Not Preheating Your Oven: Thinking you don’t need to preheat? Rookie mistake! A hot oven gives your muffins that initial “oven spring,” making them rise beautifully.
- Using Cold Ingredients: Room temperature eggs and buttermilk mix more evenly and create a smoother batter. Plan ahead, or give them a quick warm-up if you’re impatient.
- Ignoring the Cooling Time: Pulling them out of the tin too soon can cause them to fall apart. Give them that glorious 5 minutes to set up before unleashing them.
Alternatives & Substitutions
Life’s about options, right? And sometimes, your fridge is just… not cooperating. Here are a few swaps and jazz-ups to keep your muffin game strong:
- No Buttermilk? No Problem! Don’t panic! You can easily make your own. For 1 cup of buttermilk, simply pour 1 tablespoon of white vinegar or lemon juice into a liquid measuring cup, then fill the rest of the way to 1 cup with regular milk (any fat percentage works). Let it sit for 5-10 minutes until it looks slightly curdled. Voila!
- Butter Substitute: While butter gives the best flavor, you can use an equal amount of vegetable oil (like canola or sunflower oil) for a slightly different texture.
- Add-ins Galore: This is where you get to play! Stir in ½ to 1 cup of your favorite extras with the dry ingredients before combining with the wet. Think: chocolate chips (my personal fave), fresh or frozen berries (toss frozen berries in a little flour first to prevent sinking!), lemon zest, chopped nuts, or even a sprinkle of cinnamon sugar on top before baking. Get creative!
- Gluten-Free Flour: I haven’t personally tested this specific recipe with GF flour, but a 1:1 gluten-free baking blend (the kind with xanthan gum already in it) *should* work. Expect a slightly different texture, but still delicious!
FAQ (Frequently Asked Questions)
Got questions? I’ve got (casual and hopefully helpful) answers! Let’s clear up some common muffin mysteries.
- Can I use margarine instead of butter? Well, technically yes, but why hurt your soul like that? Butter offers superior flavor and texture. If you must, use margarine, but just know it won’t be quite the same level of blissful goodness.
- My muffins turned out dry. What went wrong? The biggest culprit is usually **overmixing**. Next time, be super gentle! Also, make sure your oven temperature is accurate – an oven that’s too hot or bakes too long can dry them out.
- Can I add fruit or chocolate chips to these? Absolutely, and please do! This recipe is a fantastic base. As mentioned earlier, add about ½ to 1 cup of your chosen mix-ins to the dry ingredients before combining with the wet.
- How do I store these muffins to keep them fresh? Once completely cooled, store them in an airtight container at room temperature for up to 3 days. If you want them to last longer, you can freeze them!
- Can I freeze these muffins? You bet! Once completely cool, place them in a freezer-safe bag or container. They’ll keep for up to 2-3 months. Just thaw them at room temperature or zap ’em in the microwave for a quick treat.
- What if I don’t have a muffin tin? You can use individual silicone muffin cups placed on a baking sheet, or even a loaf pan (though the baking time will change significantly for a quick bread). For true muffin shape, a tin is ideal, though!
Final Thoughts
See? That wasn’t so scary, was it? You just whipped up a batch of glorious, moist buttermilk muffins! Go ahead, pat yourself on the back. You’ve earned it. These aren’t just any muffins; these are *your* muffins, baked with love and minimal effort. Now go impress someone – or yourself – with your new culinary skills. They’re perfect for breakfast, a coffee break, or a sneaky midnight snack. Enjoy every single fluffy, moist bite!

