So you’re craving something tasty but too lazy to spend forever in the kitchen, huh? Same. We’ve all been there: that sudden, inexplicable urge for something warm, comforting, and utterly delicious, but the thought of a complicated recipe makes you want to curl up with a bag of chips instead. Fear not, my friend, because today we’re tackling the majestic, the legendary, the undeniably *moist* banana nut loaf. It’s basically a hug in bread form, and trust me, it’s easier than trying to explain cryptocurrency to your grandma.
Why This Recipe is Awesome
Let’s be real, who needs stress when baking? This isn’t a high-stakes pastry chef competition; it’s about making something yummy without wanting to throw your mixing bowl across the kitchen. This particular recipe for Moist Banana Nut Loaf is awesome because:
- It’s **idiot-proof**. Seriously, even I didn’t mess it up, and my kitchen skills are usually limited to not burning toast.
- It’s the perfect excuse to use those sad, spotty bananas sitting on your counter. Don’t throw them away! They’re just living their best, ripe life for *this* moment.
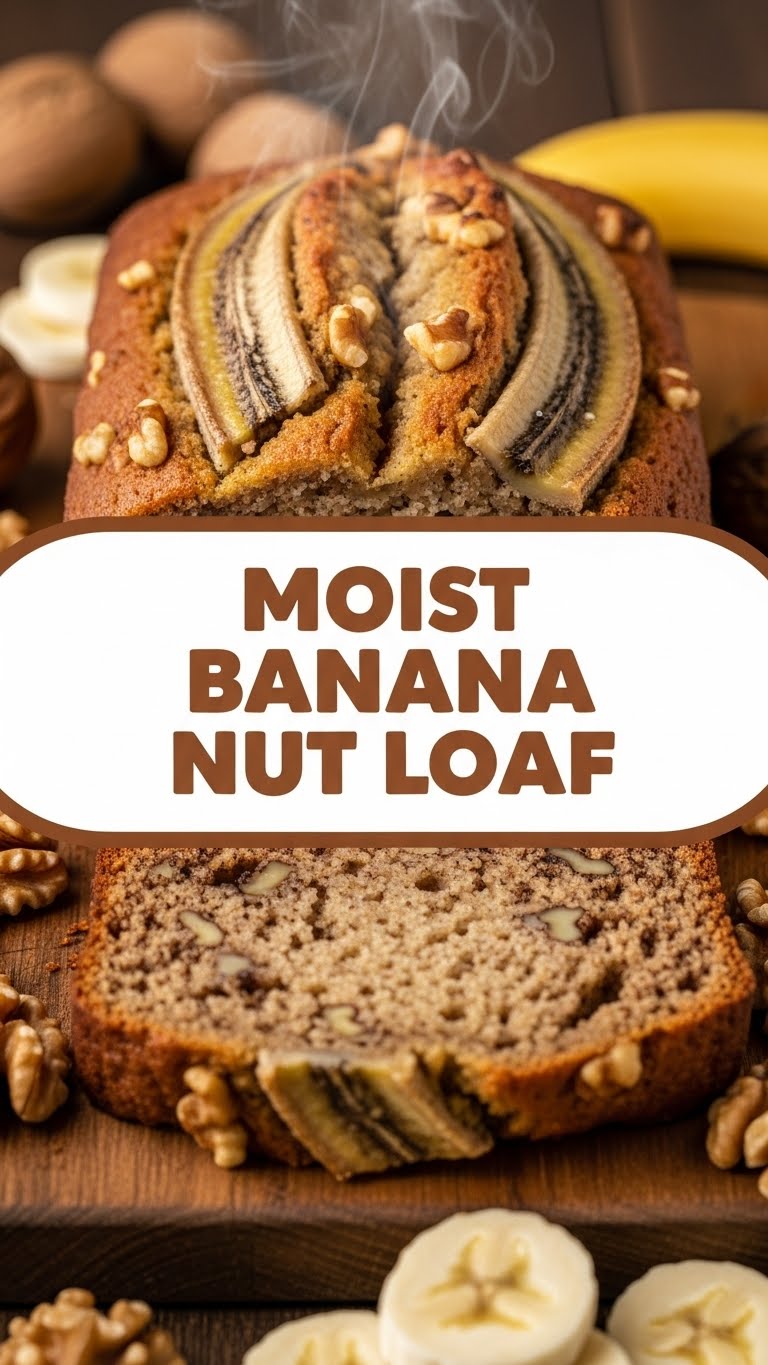
- The moistness factor is off the charts. We’re talking melt-in-your-mouth, ‘can I have another slice?’ moist. No dry, crumbly sadness here.
- It smells utterly divine while baking. Your house will smell so good, your neighbors might just “accidentally” drop by. You’ve been warned.
- And the nuts? They add that perfect crunch that makes every bite a little party in your mouth.
Ingredients You’ll Need
Gather your troops! Here’s what you’ll need to assemble your banana bread dream team. Don’t worry, no obscure ingredients that require a quest to find.
- **1 ½ cups all-purpose flour:** The basic building block. Don’t overthink it.
- **1 teaspoon baking soda:** Our leavening MVP. Helps everything rise beautifully.
- **½ teaspoon salt:** Just a pinch, to balance all that sweet goodness.
- **½ teaspoon ground cinnamon (optional, but highly recommended):** For that warm, cozy hug flavor. Seriously, add it.
- **3 very ripe medium bananas:** These are the stars of the show! The spottier, the better. Think leopard print, not green and firm. Mash ’em good!
- **½ cup unsalted butter, melted:** Because everything is better with butter. Make sure it’s melted, but not scorching hot.
- **¾ cup granulated sugar:** Sweetness! Adjust slightly if your bananas are super-duper sweet.
- **1 large egg:** The binder. Helps hold it all together.
- **1 teaspoon vanilla extract:** A flavor superstar that makes everything taste more “homemade.”
- **½ cup chopped walnuts or pecans:** For that delightful crunch! Or skip if you’re not a nut person (but then it’s just “banana loaf,” which is less cool, IMO).
Step-by-Step Instructions
Alright, apron on (or not, I don’t judge). Let’s get baking! These steps are super simple, promise.
- Prep Your Oven & Pan: First things first, preheat your oven to **350°F (175°C)**. Then, lightly grease and flour a 9×5 inch loaf pan. Or line it with parchment paper if you’re feeling fancy (and want easy cleanup!).
- Mix the Dry Stuff: In a medium bowl, whisk together the flour, baking soda, salt, and cinnamon (if using). Just a quick whisk to combine, don’t go crazy. Set it aside.
- Combine the Wet Magic: In a larger bowl, mash those ripe bananas until they’re mostly smooth but with a few small lumps—texture is good! Stir in the melted butter, sugar, egg, and vanilla extract until well combined.
- Bring Them Together: Now, add your dry ingredients to the wet ingredients. Mix until *just* combined. And I mean *just* combined. **Do NOT overmix!** A few streaks of flour are totally fine; overmixing leads to tough bread, and nobody wants that.
- Fold in the Nuts: Gently fold in your chopped walnuts or pecans. Distribute them evenly, like you’re tucking them into bed.
- Pour & Bake: Pour the batter into your prepared loaf pan. Pop it into the preheated oven and bake for **50-65 minutes**.
- Check for Doneness: How do you know it’s ready? Insert a toothpick into the center of the loaf. If it comes out clean or with a few moist crumbs, you’re golden! If it’s gooey, bake for a few more minutes.
- Cool Down: Once baked, let the loaf cool in the pan for about 10 minutes. This helps it firm up. Then, carefully remove it from the pan and let it cool completely on a wire rack. **Patience, young grasshopper!** Don’t slice it hot unless you like mushy bread.
Common Mistakes to Avoid
We’ve all been there, friend. Learning from others’ screw-ups (or my own) saves us all. Here are a few pitfalls to steer clear of:
- **Using under-ripe bananas:** This is probably the biggest rookie mistake. Green bananas taste different and won’t give you that glorious natural sweetness and moistness. Seriously, wait for the spots!
- **Overmixing the batter:** I’m not shouting, just emphasizing! Overmixing develops the gluten in the flour too much, resulting in a tough, chewy loaf instead of light and tender. Mix until *just* combined.
- **Opening the oven door constantly:** Resist the urge! Every time you open that door, you drop the oven temperature, which can mess with the rise and baking time. Peeking through the glass is fine, though.
- **Not preheating the oven:** Thinking you can just shove it in and hope for the best? Nope! A properly preheated oven ensures even baking from the start.
- **Slicing it too soon:** I know, the smell is intoxicating. But slicing a hot loaf leads to crumbling and a less-than-perfect texture. Let it cool!
Alternatives & Substitutions
Baking is an adventure, not a rigid set of rules! Feel free to mix things up:
- **No nuts? No problem!** If you or your buddies aren’t into nuts (or have allergies), simply omit them. The loaf will still be delicious, just… nut-less.
- **Chocolate chips instead of nuts?** Oh, you fancy, huh? Go for it! About ½ cup of semi-sweet chocolate chips is a fantastic addition. Or do a half-and-half mix for a banana chocolate chip *nut* loaf. Yum!
- **Different fats:** If you’re out of butter, you can use an equal amount of vegetable oil or melted coconut oil. The texture might be slightly different, but it’ll still be tasty.
- **Add-ins galore:** Want to spice things up even more? A pinch of nutmeg, a spoonful of shredded coconut, or even some dried cranberries would be amazing. Get creative!
- **Whole wheat flour:** You *could* substitute half of the all-purpose flour with whole wheat flour for a slightly healthier twist. Don’t go 100% whole wheat unless you want a denser loaf.
FAQ (Frequently Asked Questions)
Got questions? I’ve got (casual) answers!
Q: Can I use margarine instead of butter?
A: Well, technically yes, but why hurt your soul like that? Butter just tastes better, period. Margarine might work in a pinch, but for optimal flavor and texture, stick to butter, **IMO**.
Q: My bananas aren’t ripe enough! What do I do?
A: Patience, young grasshopper! But if you *really* can’t wait, you can try baking them in their peels at 300°F (150°C) for 15-30 minutes until they turn black and soft. Let them cool before mashing. It’s a hack, not a perfect solution, but it works!
Q: How should I store leftover banana bread?
A: Store it at room temperature in an airtight container for up to 3-4 days. For longer storage, you can wrap it tightly in plastic wrap and foil and freeze it for up to 3 months. Just thaw it on the counter when you’re ready to devour it. **FYI**, it tastes great lightly toasted too!
Q: Can I make this gluten-free?
A: Absolutely! Just swap out the all-purpose flour for a 1:1 gluten-free baking flour blend. Make sure it contains xanthan gum for the best results.
Q: What if I don’t have a loaf pan?
A: You can make muffins instead! Fill lined muffin tins about two-thirds full and bake for 20-25 minutes. Or use an 8×8 inch square pan and reduce baking time slightly. Just keep an eye on it!
Final Thoughts
And there you have it! Your very own, incredibly moist, absolutely delicious banana nut loaf. It’s perfect for breakfast, a snack, dessert, or just a little something to brighten your day. Go on, pat yourself on the back – you totally nailed it. Now go impress someone—or yourself—with your new culinary skills. You’ve earned it! Maybe make an extra loaf, because this one won’t last long. Trust me.


