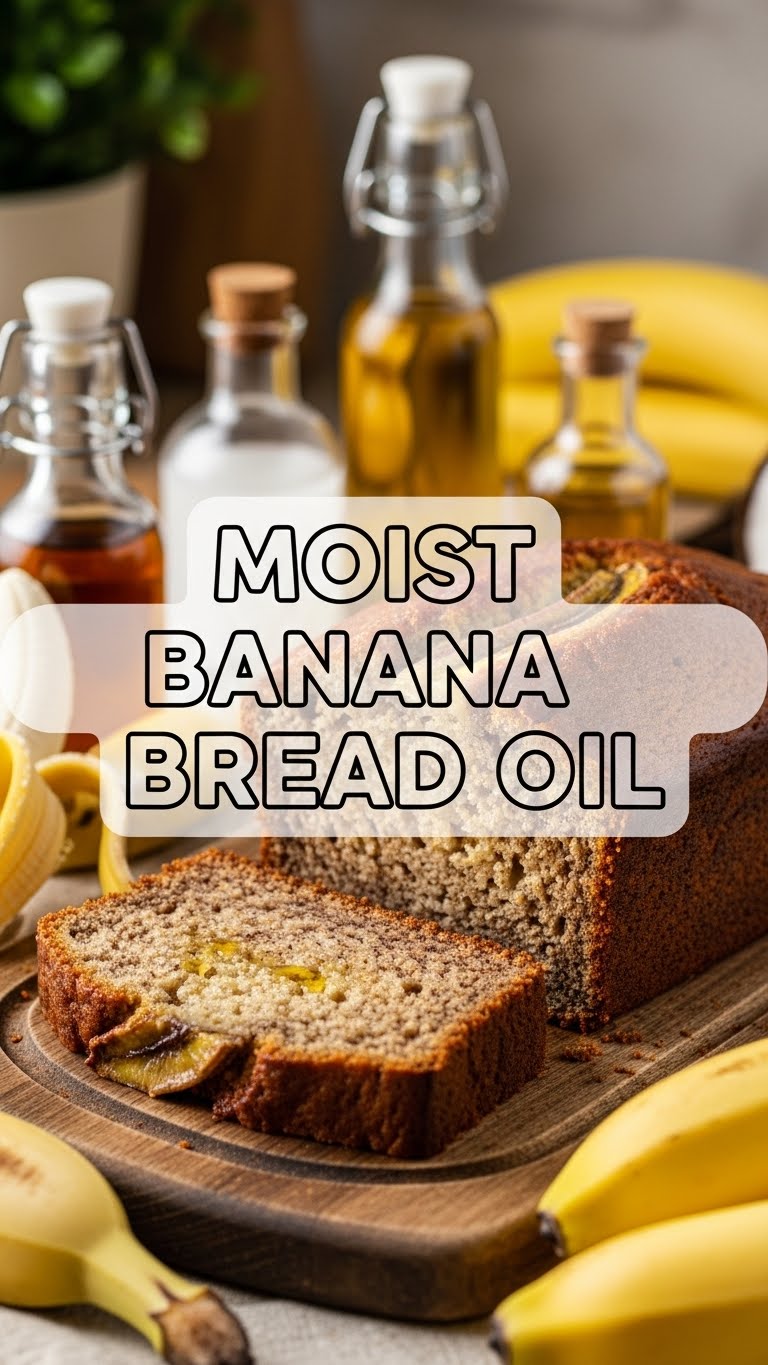
So you’re craving something tasty but too lazy to spend forever in the kitchen, huh? Same. We’ve all been there: staring at those suspiciously speckled bananas on the counter, knowing their destiny involves *something* delicious, but the thought of a complicated recipe makes you wanna just order takeout. Fear not, my friend! Today, we’re diving into the glorious world of **Moist Banana Bread (Oil Version)**. It’s so easy, you’ll wonder why you ever bothered with anything else. Think of it as a hug in bread form, but way less effort than, you know, an actual hug sometimes.
Why This Recipe is Awesome
Okay, let’s be real. This isn’t just *another* banana bread recipe. This is THE banana bread recipe for anyone who values flavor, moistness, and the ability to not utterly destroy their kitchen in the process. Why is it awesome? First off, we’re using oil, which is a secret weapon for keeping things ridiculously moist and tender – seriously, butter who? Plus, it means no waiting for butter to soften, which, let’s be honest, is a major time-sink when you’re in a banana bread emergency.
It’s also **idiot-proof**. I’m talking “even I didn’t mess it up” level of simple. No fancy equipment, no crazy techniques. Just mix, bake, and bask in the glory of your own genius. It comes out perfect every single time, making you look like a culinary wizard even if your last cooking adventure involved burning toast. Trust me on this, your future self (and your taste buds) will thank you.
Ingredients You’ll Need
Gather ’round, my aspiring bakers! Here’s what you’ll need for this magical journey. No need for a scavenger hunt, most of these are probably chilling in your pantry already.
- **3-4 Very Ripe Bananas:** The spottier, the better! Think leopard print, not green-apple chic. These are the stars, bringing all the natural sweetness and moisture.
- **1/2 Cup Vegetable Oil:** Or canola oil. This is our secret to ultimate moistness. Don’t skimp, don’t swap for olive oil (unless you like savory banana bread, which… to each their own).
- **1/2 Cup Granulated Sugar:** Just enough to sweeten the deal without making it a total sugar bomb.
- **1/4 Cup Packed Brown Sugar:** Adds that lovely caramel-y depth. Because why have one sugar when you can have two?
- **1 Large Egg:** Room temperature if you’re feeling fancy, straight from the fridge if you’re like me and forget that rule 90% of the time.
- **1 Teaspoon Vanilla Extract:** Vanilla makes everything better. It’s like the Beyoncé of baking ingredients.
- **1 1/2 Cups All-Purpose Flour:** The foundation of our delicious bread.
- **1 Teaspoon Baking Soda:** Our leavening friend, making sure our bread rises beautifully.
- **1/2 Teaspoon Salt:** Balances all that sweetness and brings out the flavors. Don’t skip it!
- **Optional Add-ins:** 1/2 cup chocolate chips, chopped walnuts, or pecans (because sometimes you just need that extra somethin’ somethin’).
Step-by-Step Instructions
Alright, apron on (or not, I won’t judge), let’s get baking! These steps are so easy, you could probably do them blindfolded… though I wouldn’t recommend it. Safety first, right?
- **Preheat & Prep:** First things first, get that oven warming up to **350°F (175°C)**. While it’s heating, grease and flour a 9×5 inch loaf pan. Or, if you’re lazy efficient like me, line it with parchment paper with a bit of overhang – makes removal a breeze!
- **Mash Those Bananas:** In a large bowl, mash your super-ripe bananas with a fork until they’re mostly smooth but still have a few lumps. Lumps are good, they add character!
- **Wet Ingredients Unite!** To the mashed bananas, add the vegetable oil, both sugars, the egg, and vanilla extract. Whisk ’em all together until just combined. Don’t go crazy, we’re not making meringue here.
- **Dry Mix:** In a separate medium bowl, whisk together the flour, baking soda, and salt. Make sure there are no clumpy bits.
- **Combine Gently:** Add the dry ingredients to the wet ingredients. **Mix until *just* combined.** Seriously, stop mixing the second you don’t see any dry streaks. Overmixing is the enemy of moist banana bread! If you’re using any optional add-ins, gently fold them in now.
- **Into the Pan:** Pour the glorious batter into your prepared loaf pan and spread it evenly. Give the pan a gentle tap on the counter to settle the batter and release any air bubbles.
- **Bake It Up:** Pop that bad boy into your preheated oven and bake for **50-65 minutes**. You’ll know it’s ready when a wooden skewer or toothpick inserted into the center comes out clean or with just a few moist crumbs attached.
- **Cool Down:** Once baked, let the loaf cool in the pan for about 10-15 minutes. This helps it firm up and prevents it from crumbling. Then, carefully remove it from the pan and let it cool completely on a wire rack. **Patience is a virtue here, folks!** Slicing it hot is tempting, but it will fall apart.
Common Mistakes to Avoid
Nobody’s perfect, and neither is banana bread (if you mess it up!). Here are a few rookie errors to steer clear of:
- **Under-ripe Bananas:** Using firm, yellow bananas? That’s a hard no, buddy. You need those spotty, almost-ready-for-the-bin bananas for maximum flavor and sweetness. **Black is best!**
- **Overmixing the Batter:** This is probably the number one banana bread killer. Mixing too much develops the gluten in the flour, leading to tough, dry bread. Remember step 5? *Just combined.* No more, no less.
- **Not Greasing Your Pan Properly:** Thinking you don’t need to grease and flour (or parchment) your pan? **Rookie mistake.** You’ll end up with half your delicious loaf stuck to the pan, and nobody wants that kind of heartbreak.
- **Impatience with Cooling:** Slicing into a hot loaf might seem like a good idea in the moment of pure banana bread desire, but it usually results in a gummy, crumbly mess. Let it chill out, literally.
Alternatives & Substitutions
Feeling adventurous? Or maybe you’re just out of an ingredient? No worries, we’ve got options!
- **Flour Power:** While all-purpose is classic, you can swap out up to half of it for whole wheat flour for a slightly nuttier, healthier vibe. Just know it might be a tad denser.
- **Sweetener Swaps:** You can play with the sugar ratios. Use all brown sugar for a deeper, molasses-y flavor. Or, if you’re feeling wild, some maple syrup could work for a portion of the liquid.
- **Oil vs. Butter (again!):** While this is an “oil” recipe for ultimate moistness, you *can* use melted butter if you insist. Just be aware the texture might be slightly different – less tender, more crumbly.
- **Add-in Extravaganza:** My personal faves are dark chocolate chips (because, chocolate) or toasted walnuts. But feel free to throw in pecans, shredded coconut, a sprinkle of cinnamon or nutmeg, or even dried cranberries! Get creative!
FAQ (Frequently Asked Questions)
Got questions? I’ve got answers! (Mostly.)
**Q: Can I use margarine instead of oil?**
A: Well, technically yes, but why hurt your soul like that? Margarine isn’t going to give you that same deep moistness and tenderness that good old vegetable oil does. Stick to the oil for the best results, IMO.
**Q: How do I store banana bread?**
A: You mean you’ll have leftovers?! Wrap it tightly in plastic wrap or aluminum foil, or pop it in an airtight container at room temperature for up to 3-4 days. It also freezes beautifully for up to 3 months. Just thaw it on the counter overnight.
**Q: My bananas aren’t ripe enough! Help!**
A: Panic not! You can ripen them faster. Place them on a baking sheet and bake them at 300°F (150°C) for 15-30 minutes, or until the peels are black and shiny. Let them cool before mashing. Mind blown, right?
**Q: Can I make this into muffins?**
A: Heck yes! Just divide the batter into a greased muffin tin (filling about two-thirds full) and bake for 20-25 minutes, or until a toothpick comes out clean. You’ll get about 12-18 muffins.
**Q: Why is my banana bread dry?**
A: Two main culprits: **overmixing** the batter (developing too much gluten) or **overbaking** it. Keep an eye on that baking time and remember to mix gently. Dry banana bread is a sad banana bread.
**Q: Can I reduce the sugar?**
A: You can, but be mindful! The sugar contributes to both sweetness and moisture, so cutting too much might affect the texture and overall deliciousness. Maybe try reducing by only a quarter first to see if you like it.
Final Thoughts
And there you have it, folks! Your new go-to recipe for the most wonderfully moist banana bread that ever graced your kitchen. It’s simple, it’s scrumptious, and it’s basically guaranteed to make you feel like a domestic god/goddess. So next time those bananas start looking a little too familiar with their spots, you know exactly what to do.
Now go impress someone—or yourself—with your new culinary skills. You’ve earned it! Seriously, go make some. Then come back and tell me how amazing it was. Happy baking, my friend!

